•
tread depth—if tread is less than 4/32 inch
(3 mm) on any front tire, or less than 2/32
inch (1.5 mm) on any rear tire, replace the
tire
•
debris lodged between duel tire sets
2.
Check tire inflation.
For inflation pressures and maximum loads, see
the tire manufacturer’s guidelines. Inflate the tires
to the applicable pressures if needed.
If a tire has been run flat or under-inflated, check
the wheel and tire for damage before adding air.
Keep compressed air reservoirs and lines dry
during tire inflation. Use well-maintained inline
moisture traps and service them regularly.
WARNING
Do not operate the vehicle with underinflated or
overinflated tires. Incorrect inflation can stress
the tires and make the tires and rims more sus-
ceptible to damage, possibly leading to rim or
tire failure and loss of vehicle control, resulting
in serious personal injury or death.
NOTICE
A weekly pressure loss of 4 psi (28 kPa) or more
in a tire may indicate damage. The tire should be
inspected and, if necessary, repaired or replaced
by a qualified tire service facility.
IMPORTANT: The load and cold inflation pres-
sure must not exceed the rim or wheel manu-
facturer’s recommendations, even though the
tire may be approved for a higher load inflation.
Consult the rim or wheel manufacturer for the
10/11/2005 f421397
1
2
3
4
5
6
7
8
9
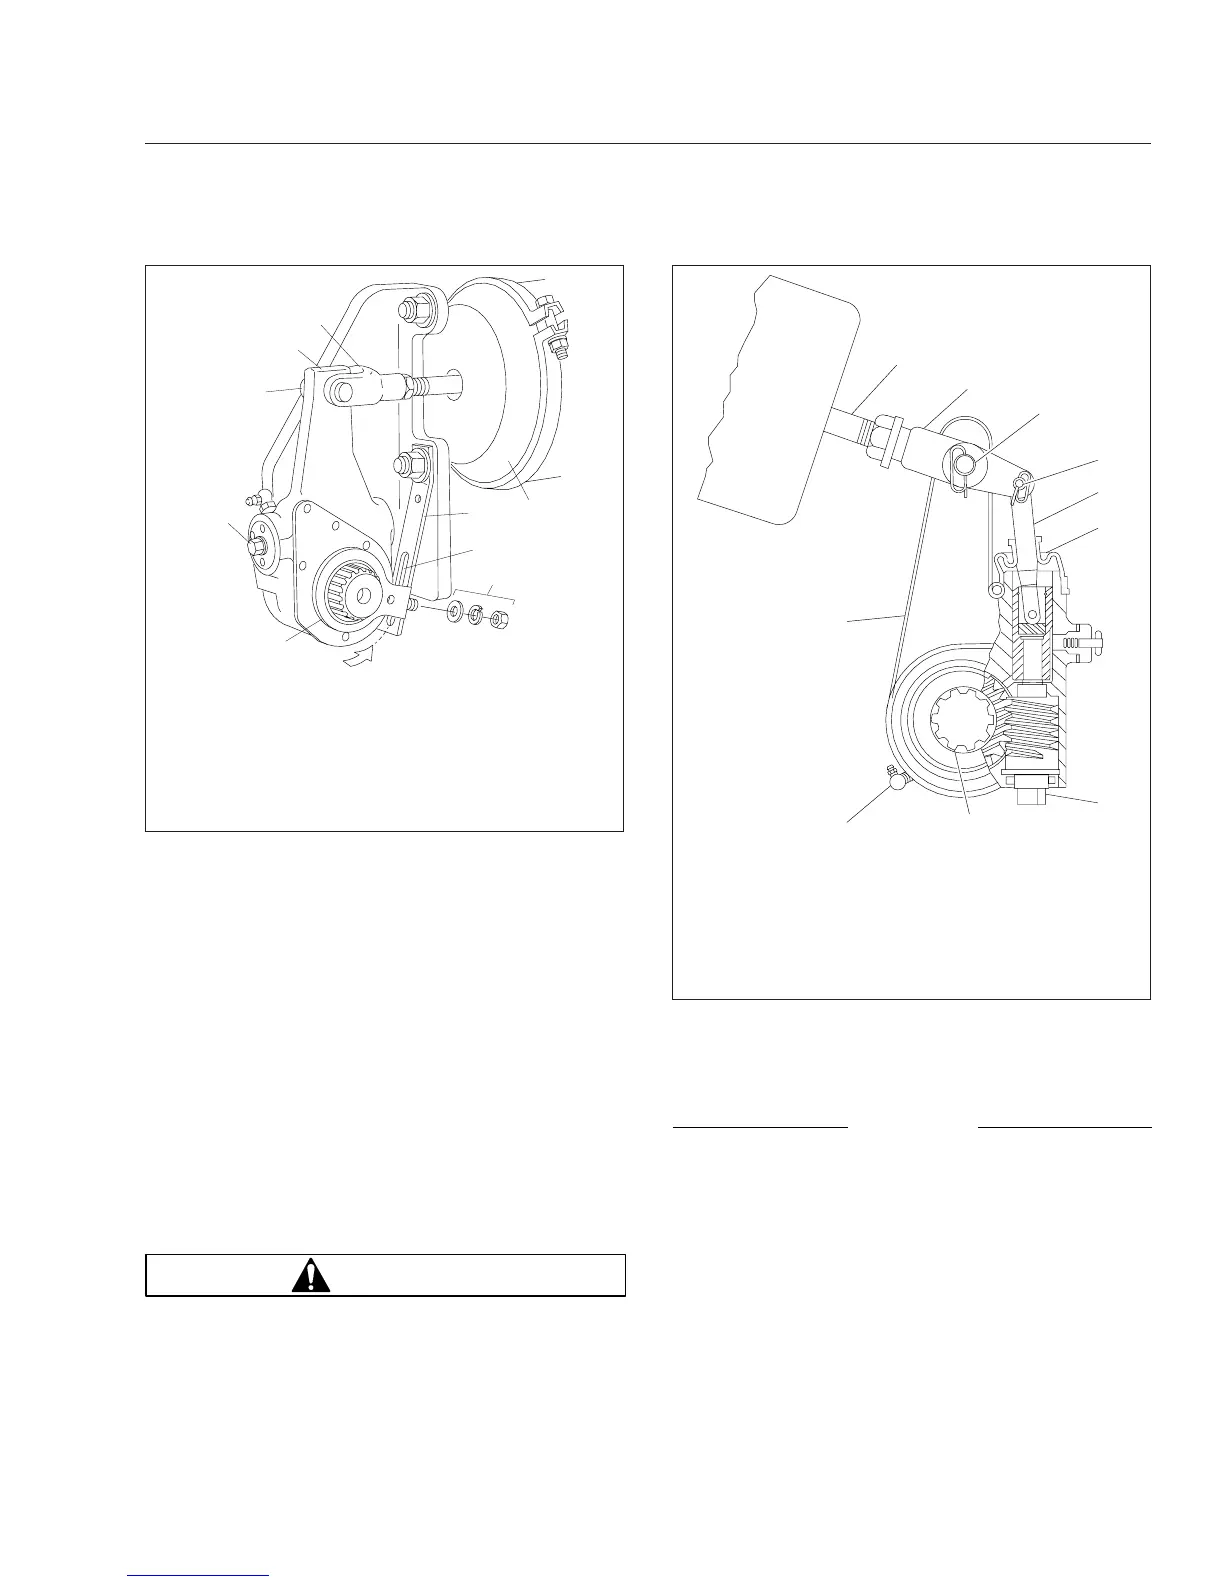
A
A. Rotate the control arm toward the brake chamber
until it can be felt contacting the internal stop.
1. Clevis
2. Slack Adjuster
3. Clevis Pin
4. Manual Adjusting Nut
5. Control Arm
6. Control-Arm Washers
and Nut
7. Anchor Strap Slot
8. Anchor Strap
9. Brake Chamber
Fig. 11.2, Haldex Automatic Slack Adjuster
01/31/2011 f422530
1
2
3
4
5
6
7
8
9
10
1. Grease Fitting (if
equipped)
2. Slack Adjuster
Housing
3. Brake Chamber
Pushrod
4. Clevis
5. Clevis Pin (large)
6. Clevis Pin (small)
7. Actuator Rod
8. Boot
9. Manual Adjusting Nut
10. Camshaft Splines
Fig. 11.3, Meritor Automatic Slack Adjuster
Pretrip and Post-Trip Inspections and Maintenance
11.4