Daily Pretrip Inspection and
Maintenance
Complete the following inspection and maintenance
procedures to ensure that vehicle components are in
good working condition before each trip. A driver who
is familiar with the vehicle and drives it regularly can
perform the daily inspections, then add the weekly
and monthly post-trip inspections as scheduled.
If the driver does not operate the vehicle on a con-
sistent basis, all daily, weekly, and monthly inspec-
tion and maintenance procedures should be per-
formed before the trip.
IMPORTANT: The pre- and post-trip checklists,
inspections, and maintenance procedures de-
tailed in this chapter are not all-inclusive.
Refer to other component and body manufactur-
ers’ instructions for specific inspection and
maintenance instructions, as well as local, state,
and federal guidelines.
NOTE: If any system or component does not
pass this inspection, it must be corrected before
operating the vehicle. Whenever equipment re-
quires adjustment, replacement, and/or repair,
see the
Century Class Trucks Workshop Manual
for procedures and specifications.
Suspension and Slack Adjuster
Inspection
Walk around the vehicle and visually inspect suspen-
sion and slack adjuster components.
1.
Inspect the following suspension components for
signs of structural damage, cracks, or wear.
•
springs
•
spring hangers
•
shocks
•
suspension arms
•
suspension brackets
•
axle seats
•
bushings
2.
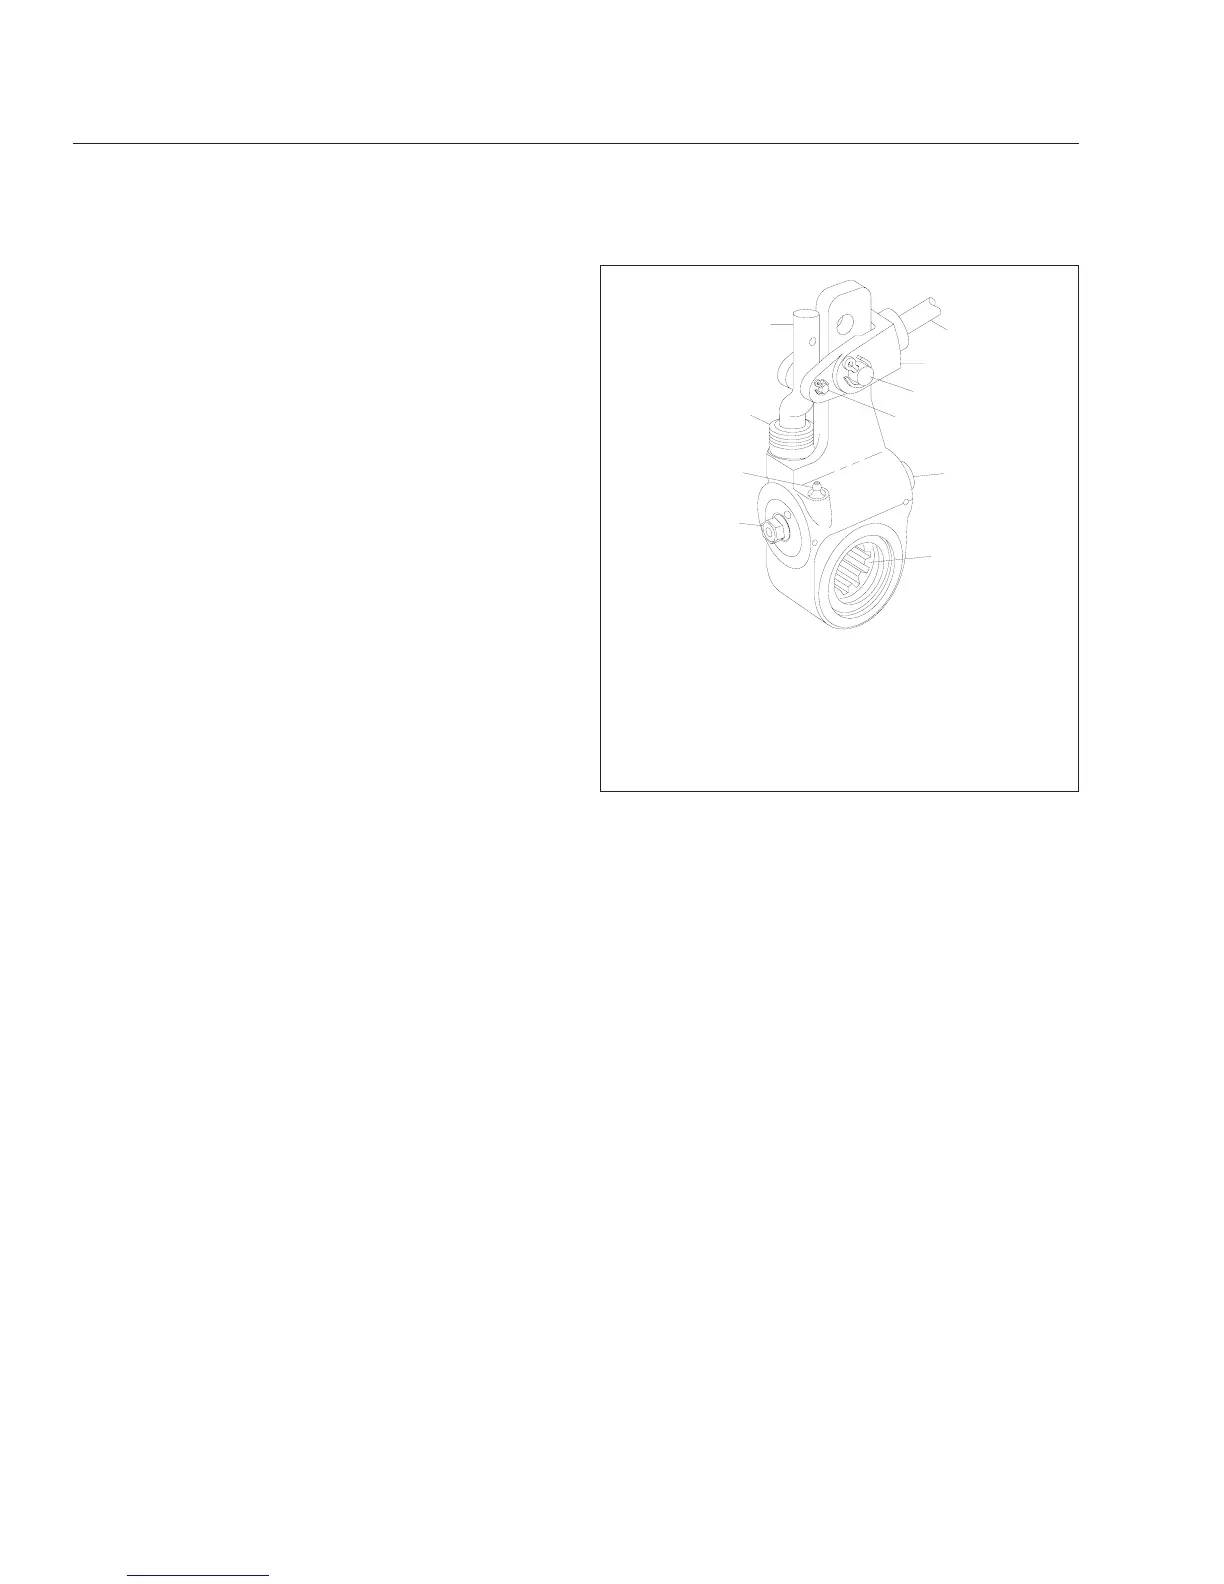
Inspect slack adjusters for signs of damage. See
Fig. 11.1, Fig. 11.2,orFig. 11.3.
•
Inspect slack adjuster boots, if equipped,
for cuts or tears.
•
Inspect anchor straps, if equipped, for
damage.
•
Look for worn clevis pins on brake cham-
ber pushrods.
•
Look for missing or damaged cotter pins
on the clevis pins.
•
Ensure chamber piston rods are in line
with the slack adjusters.
Wheel and Tire Inspection
Walk around the vehicle and visually inspect each
wheel and tire assembly.
1.
Inspect tire condition for the following:
•
valve stem caps on every tire, screwed on
finger-tight
•
bulges, cracks, cuts, and penetrations
•
oil contamination (petroleum derivatives will
soften the rubber and destroy the tire)
f421398
06/17/2003
1
2
3
4
5
6
7
8
10
9
1. 7/16-inch Adjusting
Nut
2. Grease Fitting
3. Boot
4. Link
5. Brake Chamber Piston
Rod
6. Clevis
7. 1/2-inch Clevis Pin
8. 1/4-inch Clevis Pin
9. Grease Relief
Opening
10. Slack Adjuster Spline
Fig. 11.1, Gunite Automatic Slack Adjuster
Pretrip and Post-Trip Inspections and Maintenance
11.3