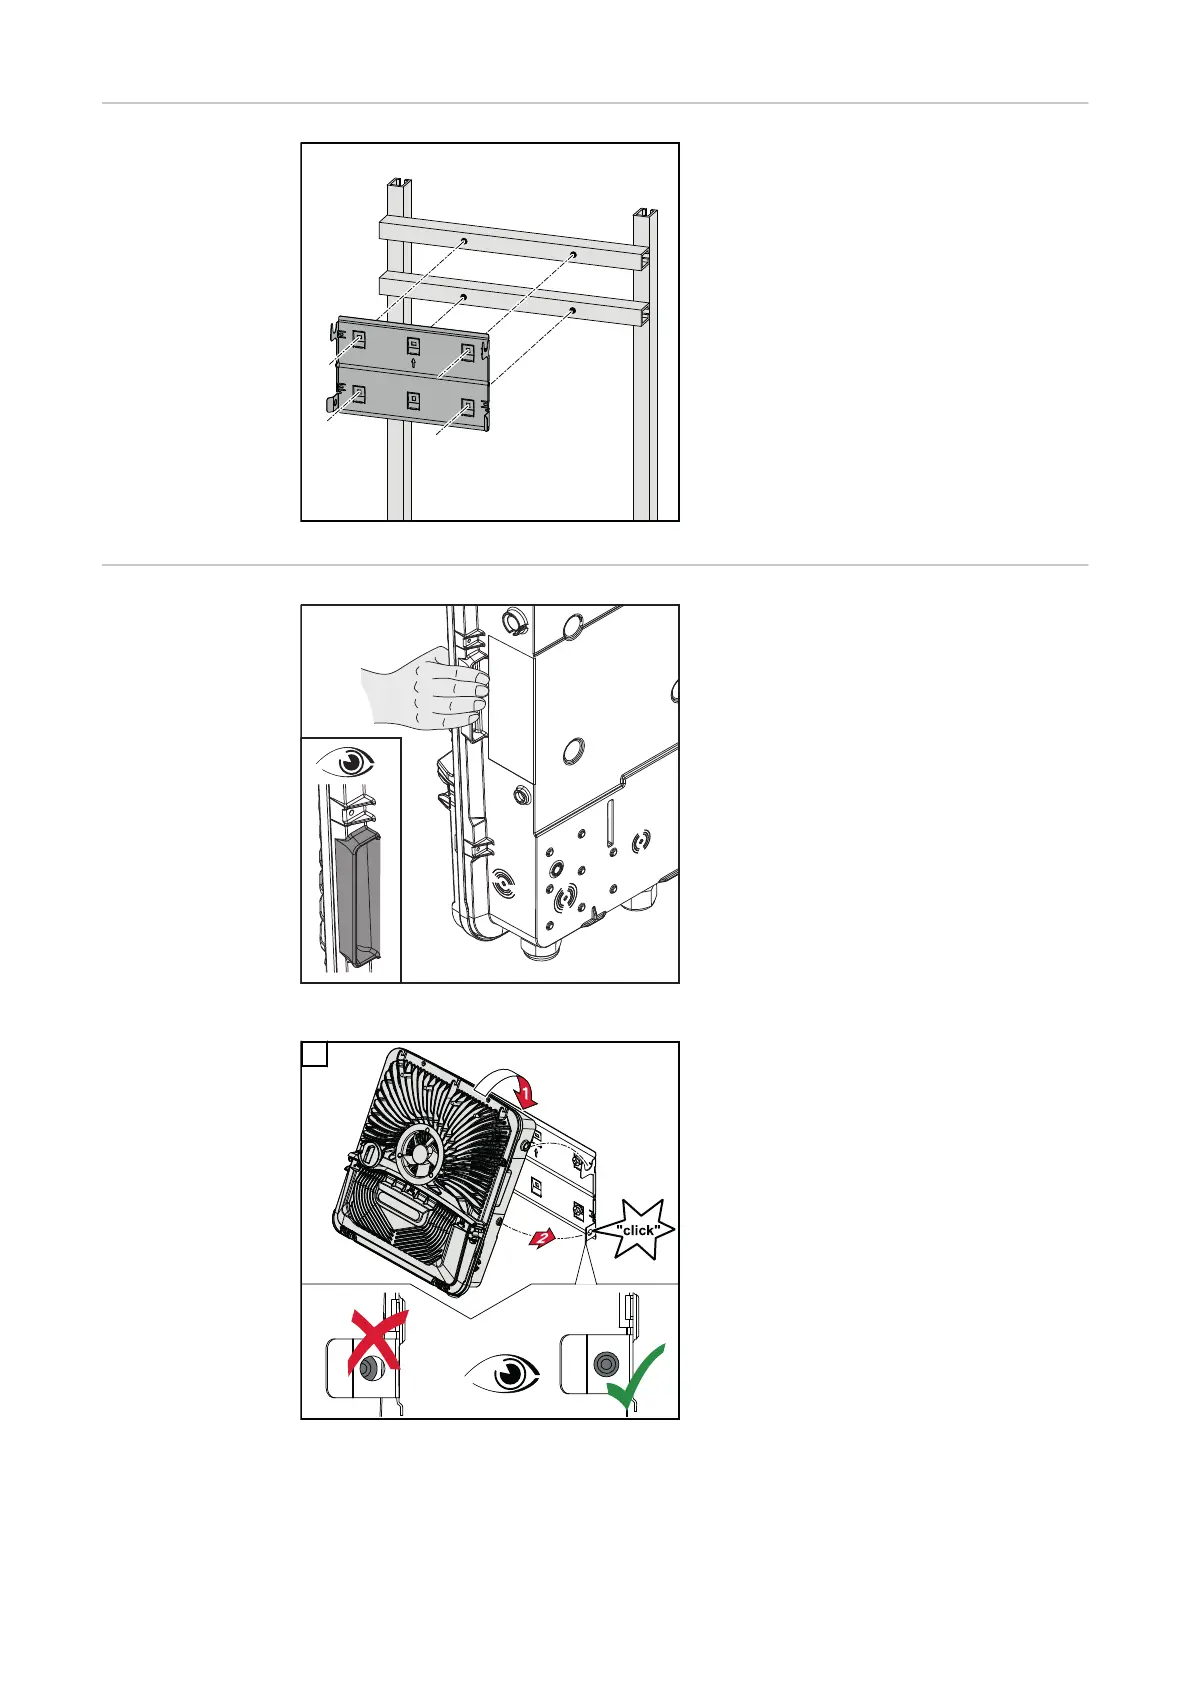
EasyManuals Logo

Fronius Primo GEN24 4.0 User Manual

Fronius Primo GEN24 4.0
232 pages
To Next Page IconTo Next Page
To Previous Page IconTo Previous Page
Page #66 background imageLoading...
Page #66 background image
Attaching the
mounting brack-
et to mounting
rails
IMPORTANT!
The mounting bracket must be affixed
at a minimum of four points.
Attaching the in-
verter to the
mounting brack-
et
There are integrated grips on the side
of the inverter which facilitate lifting/
attaching.
1
Clip the inverter into the mounting
bracket from above. The connections
must point downwards.
Push the lower part of the inverter into
the snap-in tabs until the inverter aud-
ibly clicks into place on both sides.
Check that the inverter is correctly po-
sitioned on both sides.
66

Table of Contents

Questions and Answers:

Question and Answer IconNeed help?

Do you have a question about the Fronius Primo GEN24 4.0 and is the answer not in the manual?

Fronius Primo GEN24 4.0 Specifications

General IconGeneral
ModelFronius Primo GEN24 4.0
TypeHybrid Inverter
Rated Power4.0 kW
Dimensions530 x 474 x 165 mm
IP RatingIP66
Grid frequency50 / 60 Hz
THD< 3%
Number of MPP trackers2
Max. input current per MPP tracker12 A
Maximum Input Voltage600 V
Operating Temperature Range-25°C to +60°C
Communication InterfacesEthernet
Max. apparent AC power4.6 kVA
Max. DC power6 kW
CoolingActive cooling
Warranty5 years

Related product manuals