Innovation · Expertise · Agility
7
1.3.1 Mounting the Switch in a Cabinet or Rack
Mounting the Switch in a Rack
The S5860 series switches are designed to meet the EIA standard size and can be installed in a 19-inch rack.
During installation, the front panel of the switch should be placed forward on the brackets. It is recommended
to use a tray for mounting the S5860 series switch and then secure it to the rack brackets. Alternatively, the
provided rear brackets can be used for fixation. The S5860 series switches have a smaller depth and do not
come with rear brackets as standard equipment.
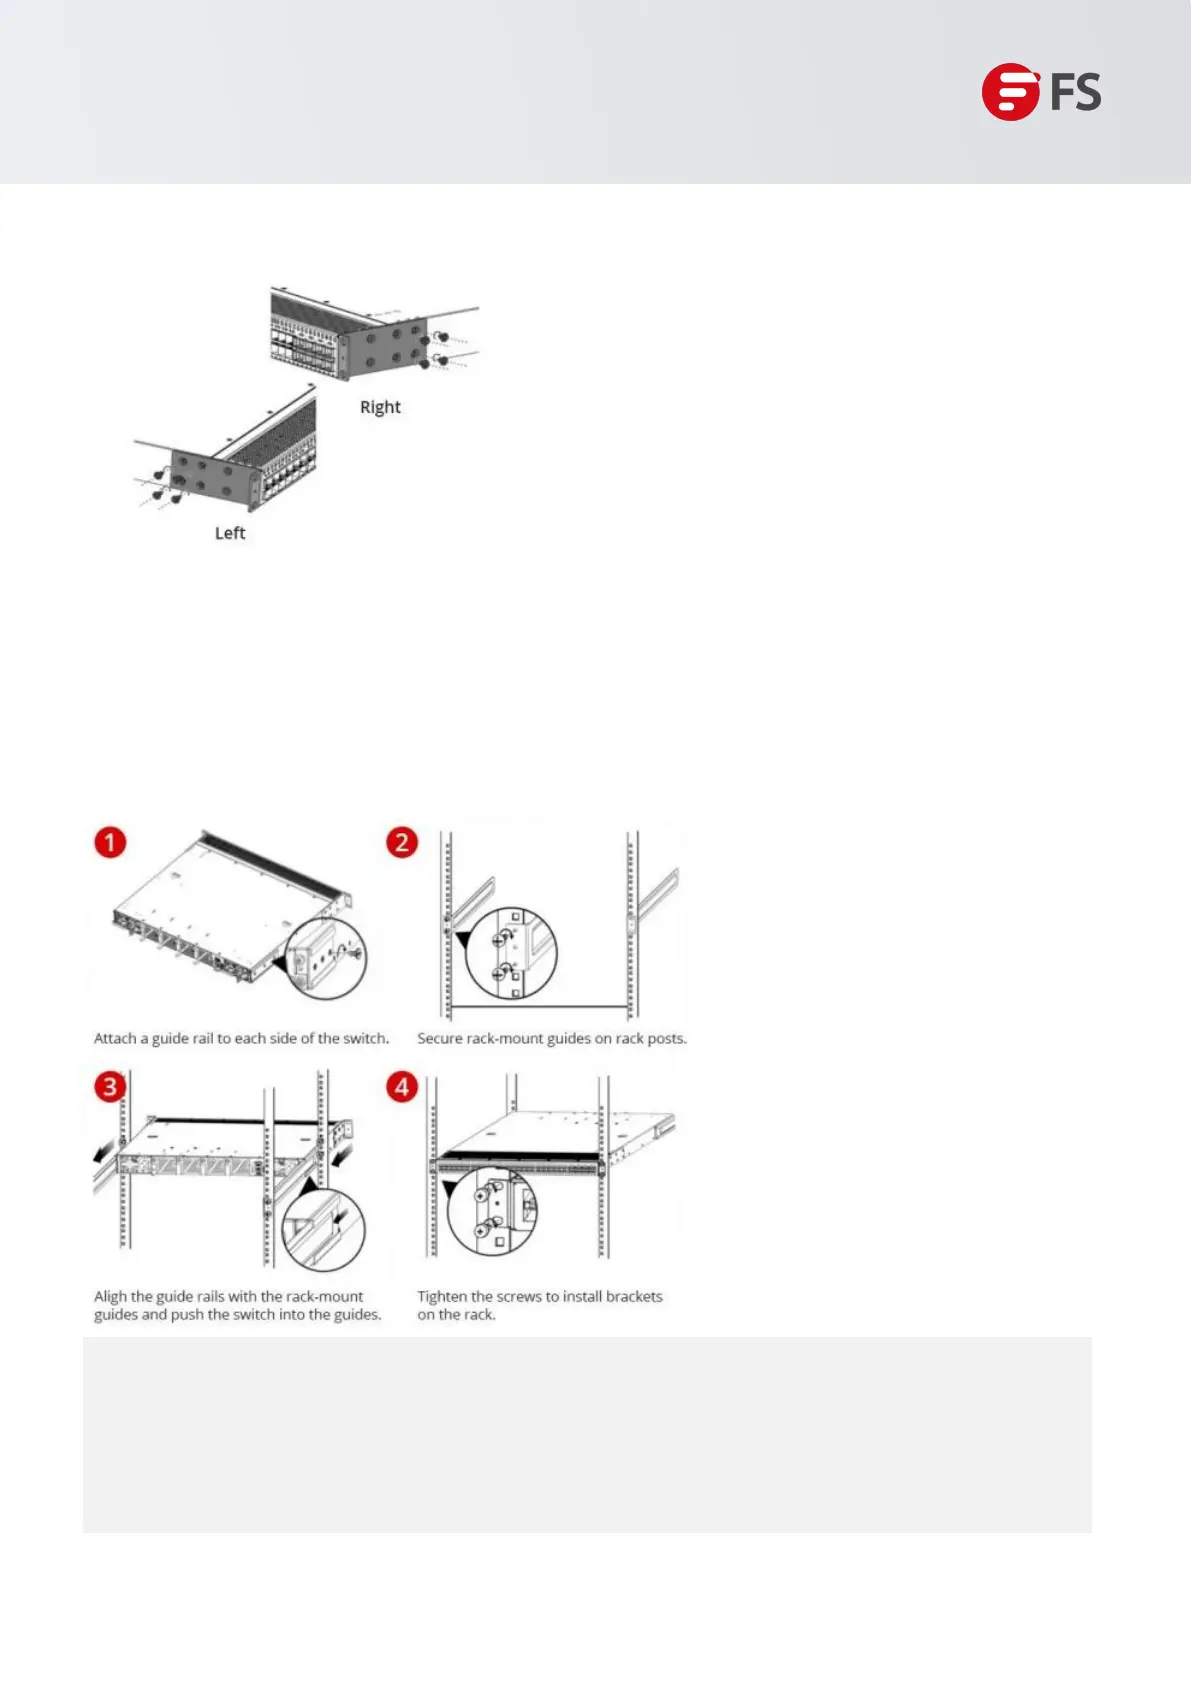
Figure 2: Mounting the Switch in a Rack
• The mounting position for wall-mount installation is the four screw holes on the left and right sides of the
rear panel of the main unit.
• Differentiate the left and right rear brackets based on the direction indicated on the brackets.
• The provided rear brackets are only suitable for cabinets with a depth of 800 mm-1200 mm.
Hardware Installation and Parts Replacement
Switch Hardware Installation and Maintenance Guide
 Loading...