– 17 –
4
Chapter
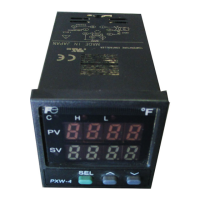
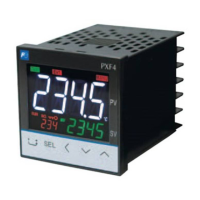
Parameter Setting Procedure
The following steps explain how to change the settings to station number "3", parity setting "9600bps/none", and communication
permissions "read and writable" as an example.
(Note) If your micro controller does not have a communication function, "CC
CC
oo
oo
MM
MM
CC
CC
hh
hh
99
99
" will not be displayed. Please check with your
model.
1
Press and hold the key to display "MM
MM
vv
vv
11
11
".
The MV1 of the monitoring screen is displayed.
2
Press and hold the key to display the setup mode operation
menu
("oo
oo
PP
PP
EE
EE
CC
CC
hh
hh
11
11
"), then use the keys to display "CC
CC
oo
oo
MM
MM
CC
CC
hh
hh
99
99
".
The communication menu is displayed.
3
Press and hold the key, the use the keys to display
"SS
SS
TT
TT
nn
nn
oo
oo
."
The station number is displayed.
4
Press the key, then use the keys to set station
number to "3" when the bottom part of the display begins to blink.
This sets the parameter to "3".
5
Press the key to confirm the setting.
6
Use the keys to select the parity setting ("CC
CC
oo
oo
MM
MM
").
7
Press the key, then use the keys to set the parity
setting to "96no" when the bottom part of the display begins to
blink.
The parity setting is set to "9600 bps/none".
8
Press the key to confirm the setting.
9
Use the keys to select the communication permissions
("SS
SS
CC
CC
CC
CC
").
10
Press the key, then use the keys to set the protocol to
"rW" when the bottom part of the display begins to blink.
"read/write" is selected.
11
Press the key to confirm the setting.

 Loading...