6 - 11
6.3 Alarm setting
6.3.1 Setting of alarm values
7KH+LJK/RZOLPLWDODUPRXWSXWVHWWLQJIRUWKHPHDVXUHGFRQFHQWUDWLRQDQGSRZHURIIDODUPDODUP
6 only) setting can be made during measurement. Arbitrary 6 alarm contact outputs can be used.
Before changing the alarm setting, set the alarm ON/OFF setting to OFF.
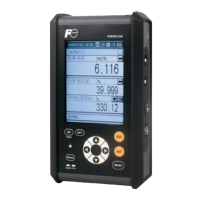
'XULQJPHDVXUHPHQWSUHVVWKH
MODE
key
WRGLVSOD\WKH8VHUPRGH
3RLQWWKHFXUVRUWR³$ODUP6HWWLQJ´E\
pressing the
or key. Press the
ENT
key.
( )
ENT
MODE
( )
ENT
Note
Set the values so that H-limit value > L-limit
value and that (H-limit value
-
L-limit value)
> hysteresis.
$IWHUWKHDODUP1RVHOHFWLRQVFUHHQKDV
appeared, point the cursor to the Alarm
No. you want to set by pressing or
key .
Press the
ENT
key.
(4) After the alarm item selection screen has
appeared, operate the
or key until
the cursor is aligned with a desired item
and press the
ENT
key.
( )
ENT
Measurement Mode
0
User
Mode
Se1ect
an
item
with
UP/DOWN
and
ENT
Back
with
ESC
0 0
0
Switch
Ranges
Calibration
Para
meters
~
Alarm
Setting
Setting
of
Auto
Calibration
Setting
of
Auto
Zero
Calibration
Setting
of
Peak
Alarm
Para
meter
Setting
A1arm
Setting
Sel
e
ct
Alarm
No.
or
Hysteresis
setting
0 0
0
~
Alarm-1
Alarm-2
Alarm-3
Alarm-4
Alarm-5
Alarm-6
Hysteresis
00
%FS
0 0
Alarm
Setting
Se1ect
an
item
Alarm-1
with
UP/DOWN
and
ENT
Back
with
ESC
0
~
Channel
Ch
1
[~_]
H-Li
mit
Range
1
1000
ppm
Range
2
2000
ppm
L-Li
mit
Range
1 0000
ppm
Range
2
0000
ppm
Kind
of
Alarm
High
O~J
I
OFF OFF
 Loading...