Manual Alignment Adjustment
685
Appendix
16
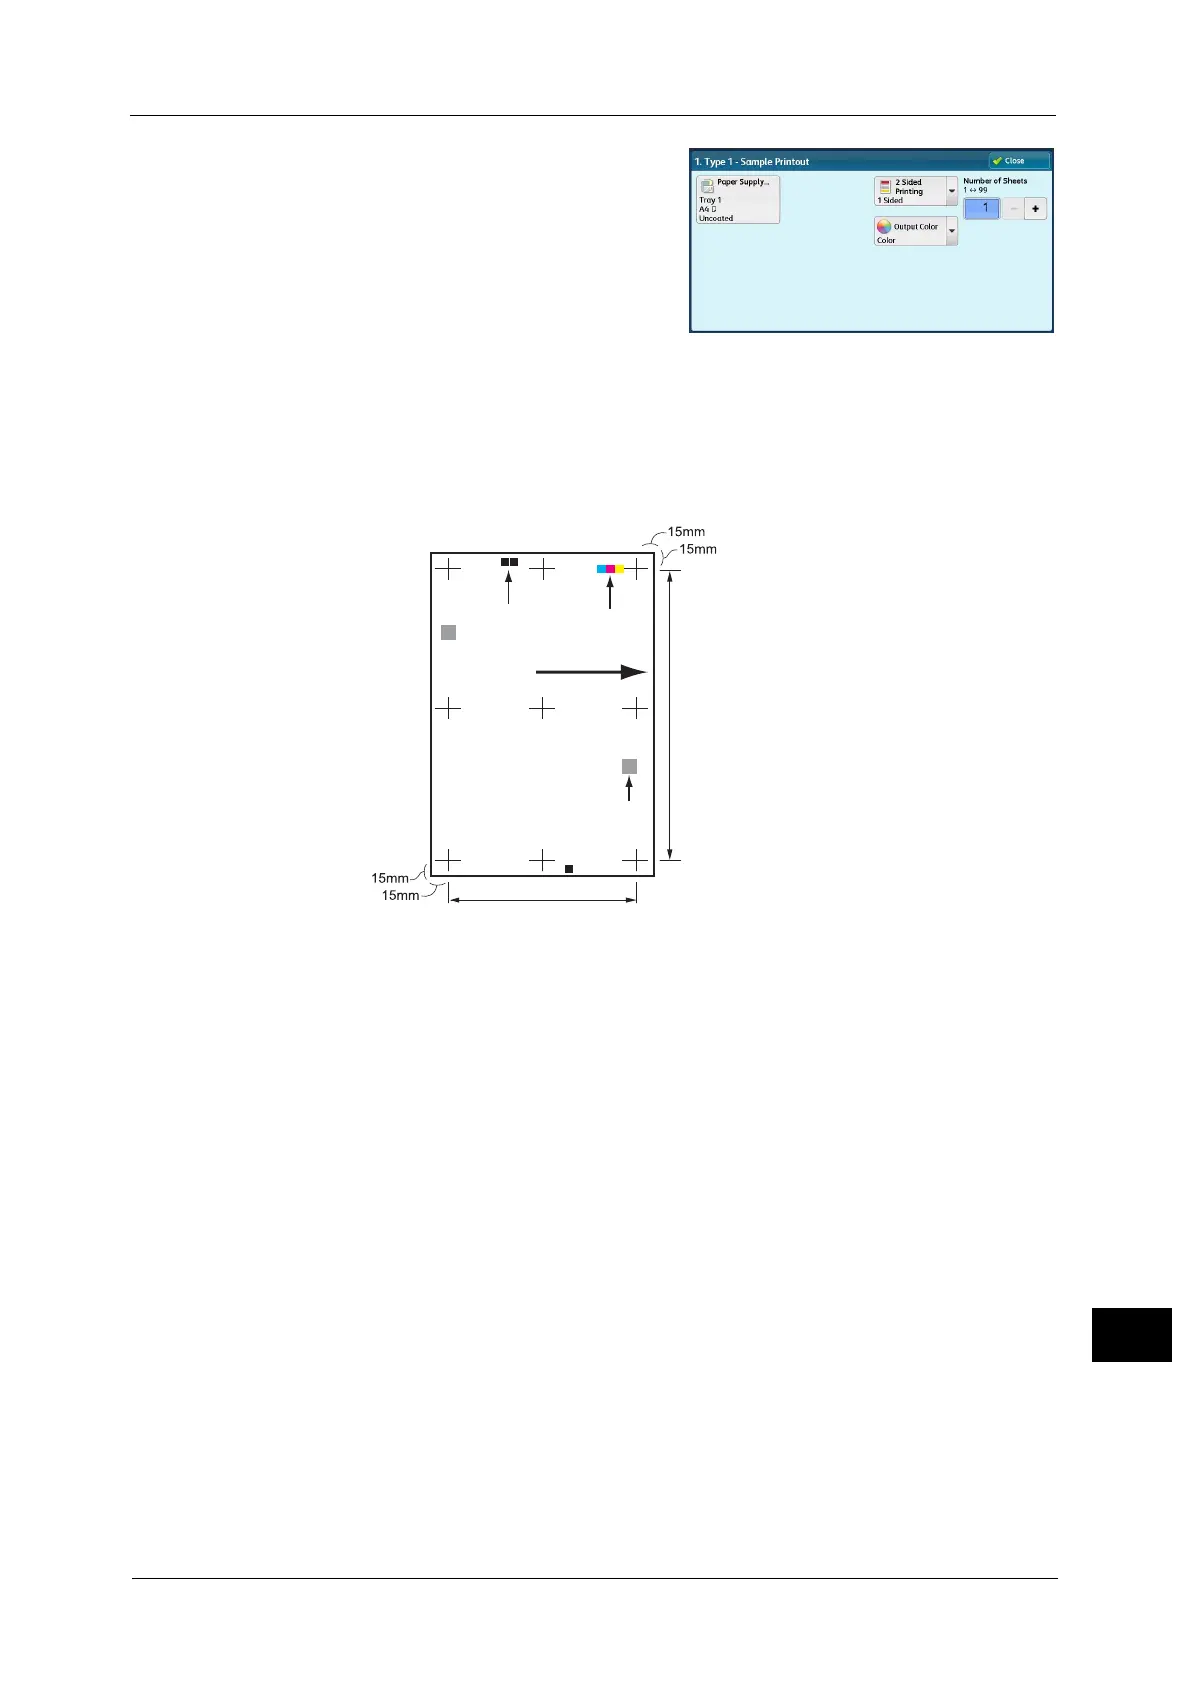
11 Select the tray in which you loaded paper in
step 1, and then select [2 Sided] or [1 Sided],
output color, and the number of sheets.
Note • We recommend that you print about 10
sheets to calculate the average value of the
variations.
12 Press the <Start> button.
The current sample printout is printed.
If the position of the sample printout is correct, a line is printed at a position 15 mm from
the edge of the paper. If the position of the line on the sample printout is misaligned, adjust
the alignment.
Note • A dark black patch is printed on the image of side 1 and a light black patch is printed on the image
of side 2 of the sample printed with [Sample Printout]. A color patch is printed to show the paper
feed direction.
13 Select [Confirm].
14 Select [Close].
15 Check the sample printout, and adjust the position if it is misaligned.
Important • When adjusting multiple types of misalignments, adjust them in the following order:
Perpendicularity Adjustment > Skew Adjustment > Scale Adjustment > Print Position Adjustment.
For more information on each type of adjustment, refer to the following sections:
- For perpendicularity adjustment, refer to "Perpendicularity Adjustment" (P.686).
- For skew adjustment, refer to "Skew Adjustment" (P.687).
- For scale position adjustment, refer to "Scale Adjustment" (P.689).
- For print position adjustment, refer to "Print Position Adjustment" (P.690).
16 After you complete adjustment, print another sample printout with [Sample Printout] and
check the adjustment results.
17 Adjust the alignment again if necessary.
18 Select [Save].
19 Select [Close].
Paper feed direction
Color patch
Black patch
Y direction
X direction
QR code
 Loading...

