3. INSTALLATION
20
7. Confirm that [FUJIFILM PICTRO TCP Port] appears in the
[Available Port types;] field, and then click the [New Port]
button. After a file copy operation is performed, the following
dialog box appears:
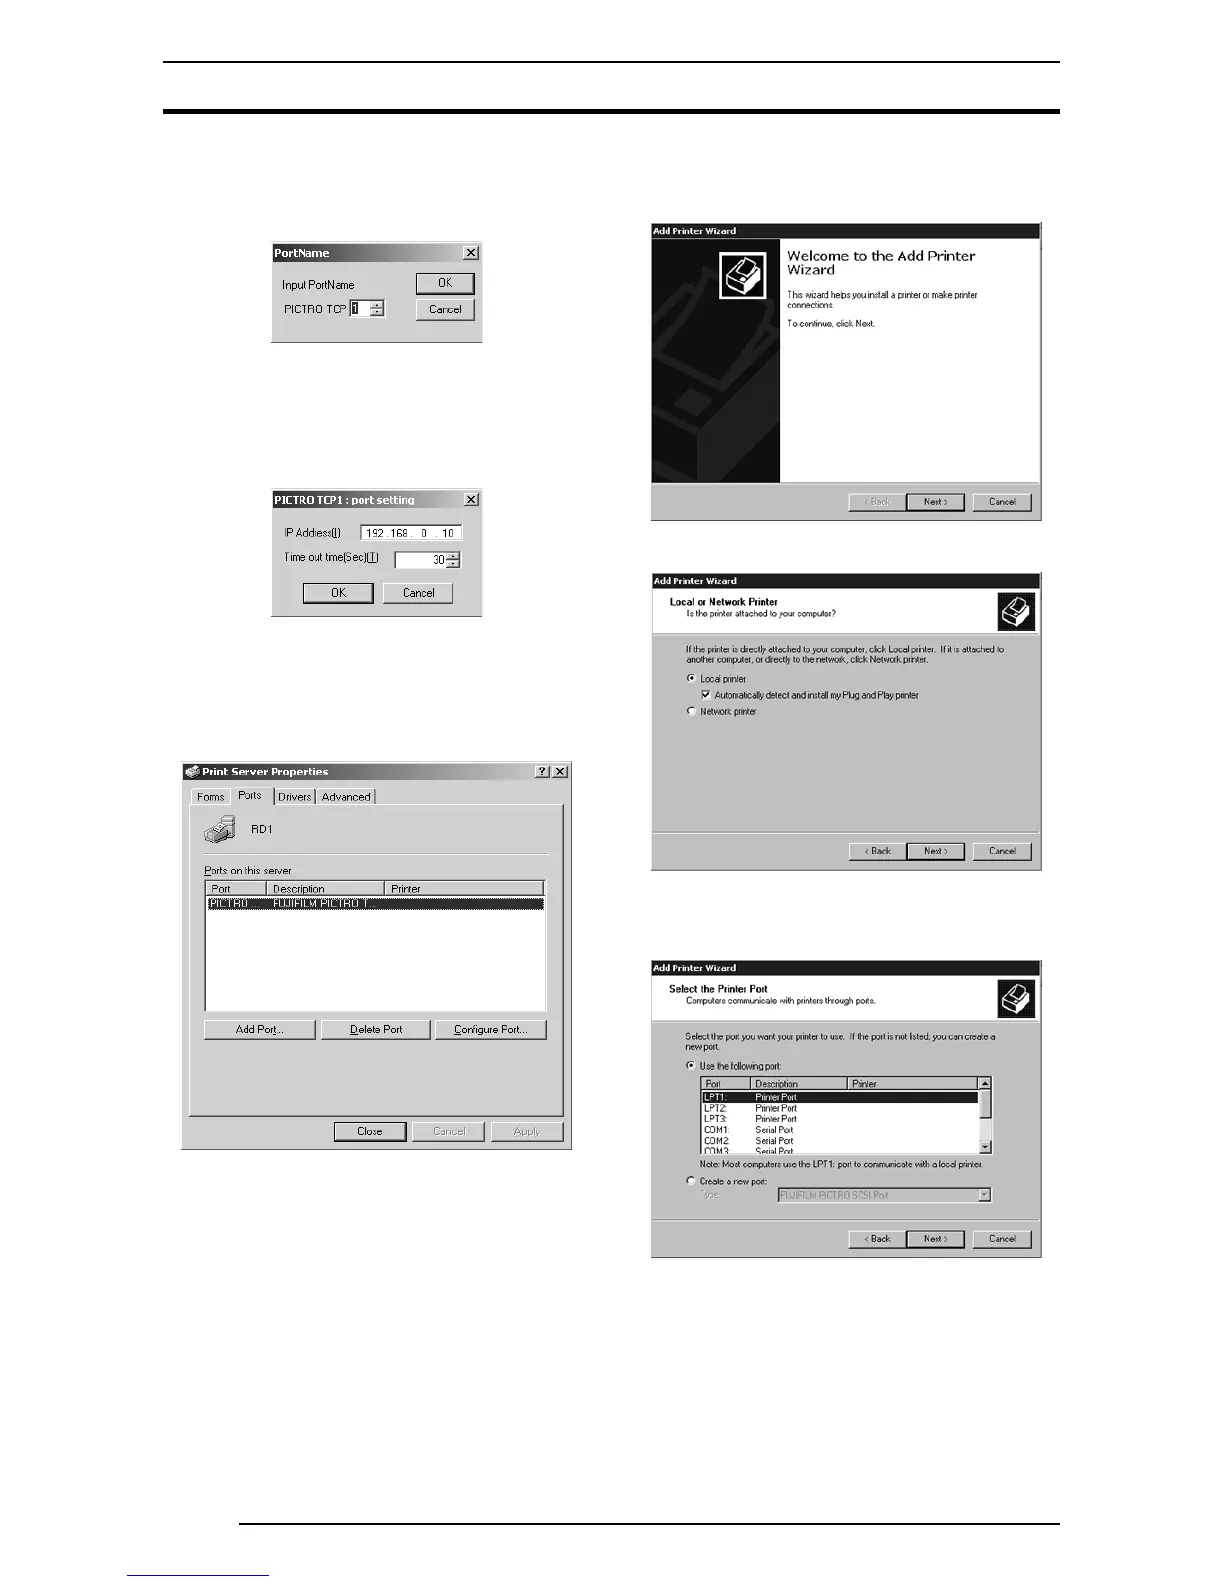
8. Specify the port name as directed below:
Enter a numerical value between 1 and 99 to specify the port
name. Although the default port name (numerical value) is
displayed, you can change it by entering a new port name
(numerical value).
When the port name is determined, click the [OK] button.
The following dialog box appears:
9. Specify the output destination IP address as directed below:
Enter the IP address of the PICTROGRAPHY network adapter
to specify the output destination, and then click the [OK] button.
When you are returned to the dialog box shown in Step 6., click
the [Close] button.
10. The following is displayed when the file is copied.
11. Confirm that [PICTRO TCPx:] (x: numerical value entered as
the port name) appears in [Ports on This Server], and then
click the [Close] button.
This completes the installation of [PICTRO TCP Port].
12. Now install the printer.
Click the [Add Printer] icon in the [Printers] folder window.
The [Add Printer Wizard] dialog box is displayed.
13. Click the [Next] button.
The following appears.
14. Select [Local Printer] and uncheck [Automatically detect and
install my Plug and Play printer].
Click the [Next] button.
The following appears.




 To Next Page