4. USAGE OF PRINTER DRIVER
36
4.1.5 Printer folder
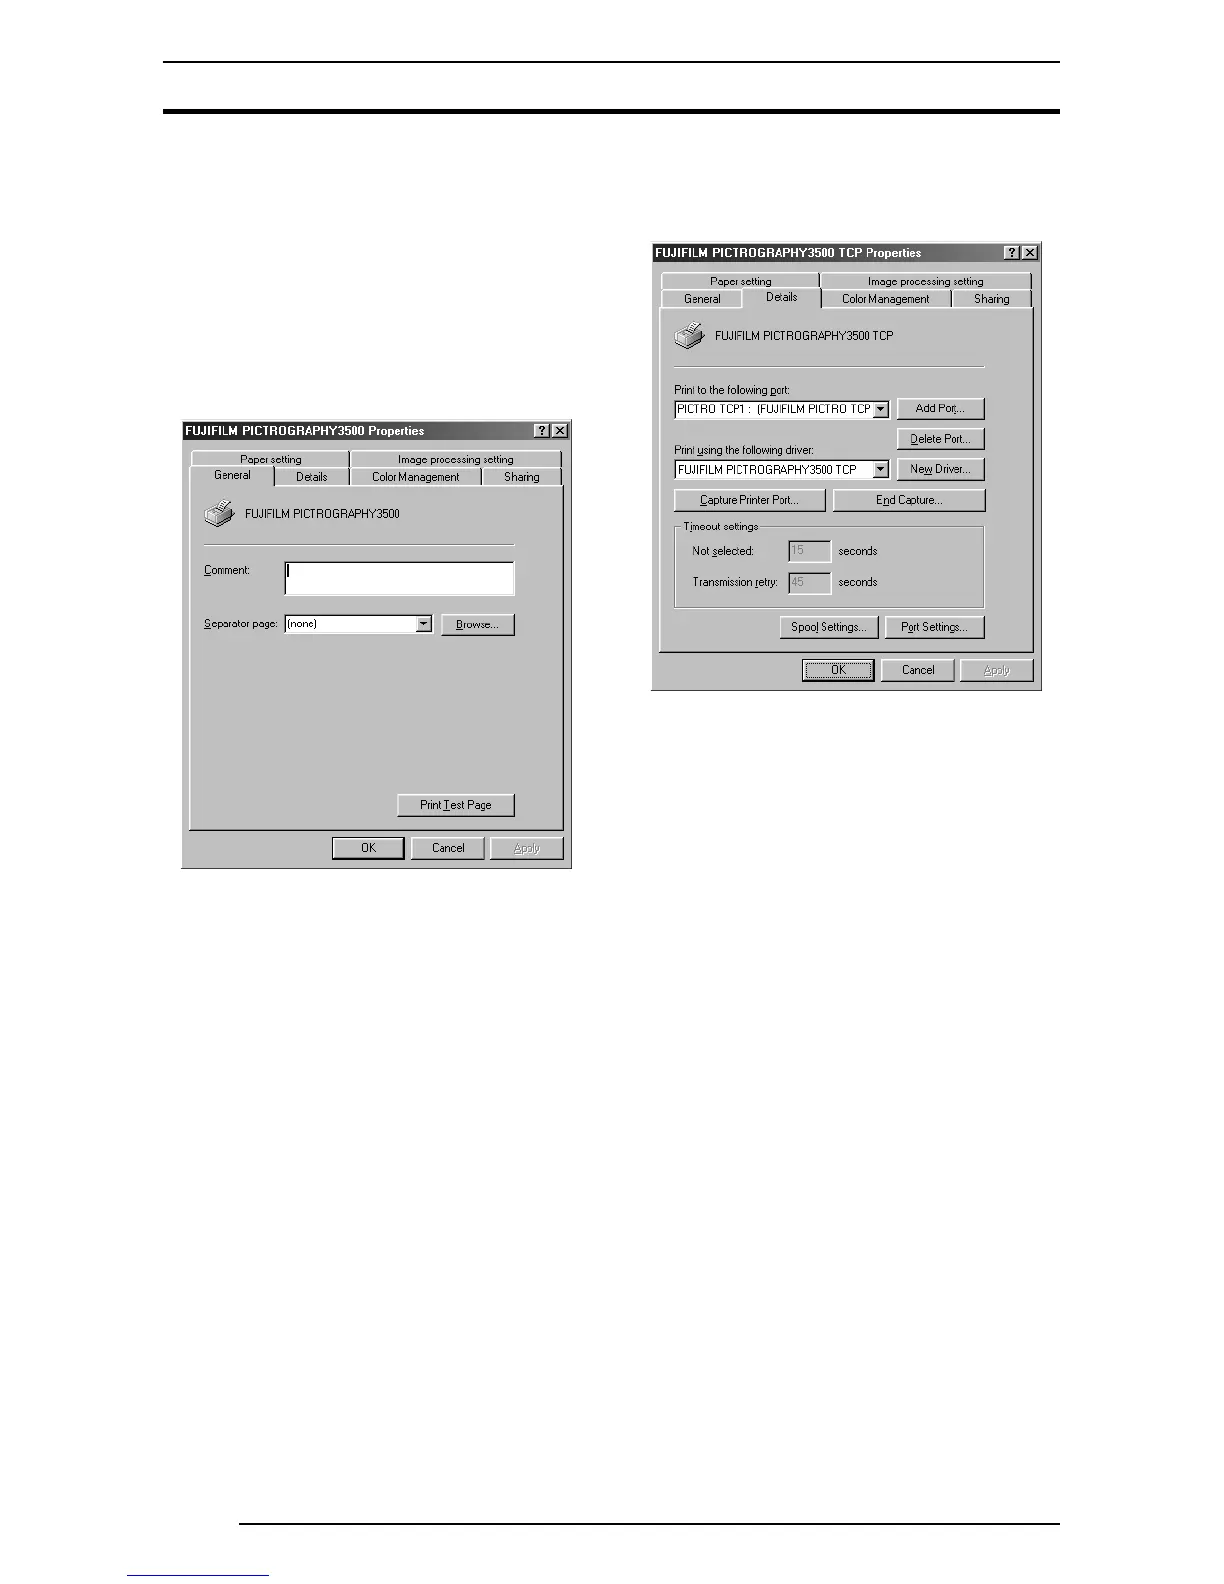
Click [File] > [Properties] of the [Printers] folder to view the Printer
Properties dialog box. Various printer driver parameters are set here.
4.1.5.1 Windows 95/98
Select [Setting] > [Printer] from the [Start] menu. This opens the
[Printers] folder window. Click the [FUJIFILM PICTRO-
GRAPHY3500 (4000
22
22
2 or 4500) TCP] icon, then select
[Properties] on the [File] menu.
The [FUJIFILM PICTROGRAPHY3500 (4000
22
22
2 or 4500) TCP
Properties] dialog box is displayed.
1. Paper setting
Click the [Paper setting] tab on the [FUJIFILM PICTRO-
GRAPHY3500 (4000
22
22
2 or 4500) TCP Properties] dialog box.
For information on setup items, see “4.1.2 Print setup and
printing”.
The settings entered here are assumed as default values for the
application software [Print] command.
2. Image processing setting
Click the [Image processing setting] tab on the [FUJIFILM
PICTROGRAPHY3500 (4000
22
22
2 or 4500) TCP Properties]
dialog box. For information on setup items, see “4.1.2 Print setup
and printing”.
The settings entered here are assumed as default values for the
application software [Print] command.
3. Details
Click the [Details] tab on the [FUJIFILM PICTROGRAPHY3500
(4000
22
22
2 or 4500) TCP Properties] dialog box to display the
following:
• Print to the following port
The port to which the printer is connected or the network printer
path is indicated.
• [Add Port...] button
Click this button to add a new port or to specify a new network
printer path.
• [Delete Port...] button
Click this button to delete a port from the listing of ports.
• Print using the following driver
Various types of printer drivers are displayed here. Do not
change these settings unless absolutely necessary.
• [New Driver...] button
Click this button to add a printer driver.
• [Capture Printer Port...] button
This button is enabled when the computer is connected to a
network printer.
Click the button to assign a port to the network drive.
• [End Capture...] button
This button is enabled when the computer is connected to a
network printer.
Click this button to clear the port assigned to a network drive.
•Timeout settings
You cannot change this setting when the print output port is
[PICTRO TCP:(FUJIFILM PICTRO TCP Port)].




 To Next Page