En-8
•RoomTemp.
Setto“Visible”todisplaytheroomtemperaturedetectedbythisuniton
themonitorscreen.
3.
Touchthe[RoomTemp.]onthe“DisplayItemSetting”screen.The
“RoomTemp.”screenisdisplayed.
4.
Touch[OK]aftertouching[Visible]or[Invisible]toreturntothe
“DisplayItemSetting”screen.
5.
Touchthe[OK]onthe“DisplayItemSetting”.Itreturnstothe“Initial
Setting”screen.
3. 4. 5.
Filter Sign [Visible]
Display Item Setting
Cancel OK
Room Temp. [Invisible]
Room Temp.
Cancel OK
Visible
Invisible
Filter Sign [Visible]
Display Item Setting
Cancel OK
Room Temp. [Visible]
6.3.9. RCMaster/SlaveSetting
Ifmultipleremotecontrollersaresetforaremote-controlgrouporfor
asingleindoorunit,itisnecessarytosettheremote-controllermaster.
Thissettingwillberequiredatthetimeofinitialstart-upduringinstalla-
tion.However,thissettingcanbechangedafterwards.Nomasterremote
controllerswillbeautomaticallysettobeslaves.Thefollowingfunctions
canbeusedwithslaveremotecontrollers.
Forthemethodofconguration,referto6.2.3.RCMasterSlaveSetting.
Setting.Touch[OK]onthe“RCMaster/SlaveSetting”screenaftersetting
thetemperatureunitstoreturntothe“Initialsetting”screen.
Donotperform“RCMaster/SlaveSetting”duringsettingoroperating
fromtheMasterunit.
6.3.10. DeadbandSetting
1.
Touchthe[DeadbandSetting]onthe“Initial
Setting”screen.The“DeadbandSetting”
screenisdisplayed.
“DeadbandSetting”screenisdisplayed.
Adjustthedeadbandwiththe[
]or[ ].
5
°F
Deadband Setting
Cancel OK
Whenthe[OK]istouched,thedisplayreturnstothe“InitialSetting”
screen.
Whenthe"Automodetype"(No.68)ofthefunctionsettingonthein-
doorunitissetto"Dualsetpoint",deadbandcannotbesetonthisunit.
(TheDeadbandSettingisnotdisplayed.)Pleasesetinthe"Deadband
value"(No.69)ofthefunctionsettingontheindoorunit.
6.3.11.OptimumStartSetting
1.
Touchthe[OptimumStartSetting]onthe
“InitialSetting”screen.“OptimumStart
Setting”screenisdisplayed.Selectthe
[On]or[Off].
Whenthe[OK]istouched,thedisplay
returnstothe“InitialSetting”screen.
Optimum Start Setting
Cancel OK
On
Off
6.3.12. I.U.DisplayNumberSetting
Atinitialstarting,thedisplaynumbers(UnitX)oftheindoorunitsdisplayed
atthe“IndividualVTHold”settingofthisremotecontrollerareautomati-
callyallocatedinascendingorderofaddressvalue.(Fortheindoorunit
displaynumber(UnitX),referto“3-2-3IndividualVTHold”oftheoperat-
ingmanualontheaccessoryCD-ROM)
Theindoorunits(correspondingaddresses)canberearrangedinarbitrary
orderinwhichyouwanttocorrespondtothedisplaynumber(UnitX)at
thissetting.Decidetheindoorunit(address)correspondingtothedisplay
number(UnitX)byconsultingtheuser.
1.
Touchthe[I.U.DisplayNumberSetting]onthe“InitialSetting”
screen.
2.
“I.U.DisplayNumberSetting”screenisdisplayed.Whenthescreen
hasmultiplepages,theycanbeswitchedbytouchingthe[Next
Page]or[PreviousPage].Theaddress(System-Unit)allocatedto
thecurrentdisplaynumber(UnitX)isdisplayed.Therefrigeration
systemaddress(Ref.-in.)isdisplayedonlywhenthisremotecon-
trollerisconnectedtoaVRFsystem.Touchthedisplaynumbers
(UnitX)whoseaddressyouwanttointerchange.
3.
Theaddressselectionscreenisdisplayed.Selecttheaddressof
theindoorunityouwanttomatchtothedisplaynumberselectedat
step2with[
]or[ ].
When[OK]istouched,thedisplayreturnstothescreenof2and
theaddressisinterchangedwiththeselecteddisplaynumber(Unit
X).Repeatsteps2and3uptothedesiredorder.
When[Back]ofthescreenof2istouched,thedisplayreturnstothe
“InitialSetting”screen.
2. 3.
/
/
002–01
002–02
002–03
/
01–01
01–02
01–03
Unit 1
Unit 2
Unit 3
Back
Next
Page
Page 1/ 6
I.U. Display Number Setting
Disp No. System–Unit
/
Ref.–In.
/
002–02
/
002–03
/
002–04
/
002–01
01–02
01–03
01–04
01–01
I.U. Display Number Setting
Cancel OK
Page 1/ 4
Disp No. System–Unit
/
Ref.–In.
Unit 1
Unit 2
Unit 3
Unit 4
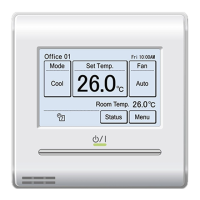
6.4. Maintenance(OtherSettings)
Carryoutthefollowingsettingandconrmation,asrequired.
1.
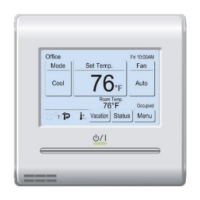
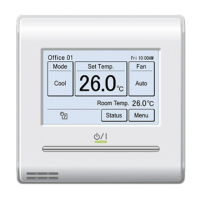
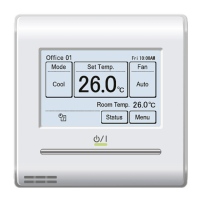
Touchthe[Menu]onthe“Monitormodescreen”.The“MainMenu”
screenisdisplayed.
2.
The“MainMenu”screenhastwopages.Touch[NextPage]or[Pre-
viousPage]toswitchbetweenscreens.Thentouchthe[Mainte-
nance].
(Itemsthatindoorunitdoesnotsupportarenotdisplayed.)
1. 2.
Set Temp.
Mode
MenuStatus
Fan
Fri 10:00AM
Unoccupied
Monitor
Next
Page
Page 1/ 2
Main Manu
Air Flow Direction
Setting
Weekly Timer
Setting
Auto Off Timer
Setting
Special Setting
Monitor
Previous
Page
Page 2/ 2
Main Menu
Summer Time
Setting
Initial Setting Maintenance
Preference
3.
The“Maintenance”screenisdisplayed.The“Maintenance”screen
has3pages.Touch[NextPage]or[PreviousPage]toswitchbe-
tweenscreens.
(Itemsthatindoorunitdoesnotsupportarenotdisplayed.)
Back
Next
Page
Page 1/ 3
Maintenance
Error History
Setting
Status List
Version
Filter Sign
Reset
Previous
Page
Back
Next
Page
Page 2/ 3
Maintenance
Test Run
R.C. Address
Setting
Function Setting
I.U. Address
Verification
Back
Previous
Page
Page 3/ 3
Maintenance
Initialization
Installer Password
Change
6.4.1. ErrorHistory
1.
Touchthe[ErrorHistory]onthe“Maintenance”screen.The“Error
History”screenisdisplayed.
Ifthereare7ormoreerrors,youcanswitchbetweenpagesby
touching[NextPage]or[PreviousPage]Uptoamaximumof32er-
rorscanbesaved.Oncetherearemorethan32errors,theoldest
onewillbedeleted.
Touch[Back]toreturntothe“Maintenance”screen.
2.
Todeletetheerrorhistory,touch[EraseAll]andthen[Yes]onthe
conrmationscreen.
1. 2.
11:00
2:53
8:53
11:00
11:00
11:00
1
2015/ 8/ 1 002-01 141
2
2015/ 7/30 002-02 143
3
2015/ 7/25 002-02 143
4
2015/ 7/22 002-01 141
5
2015/ 7/22 002-01 141
6
2015/ 7/21 002-01 141
Page 1/ 2
Error History
No. Date Time Address Code
Back
Next
Page
Erase
All
AM
AM
AM
AM
AM
AM
Delete entire error history?
Error History
No Yes
6.4.2. SettingStatusList
1.
Touchthe[SettingStatusList]onthe
“Maintenance”screen.The“SettingStatus
List”screenisdisplayed.
Touch[NextPage]or[PreviousPage]to
switchbetweenscreens.
Touch[Back]toreturntothe“Maintenance”
screen.
Auto Off Timer
– Operation Stop Time
– Time Range
Weekly Timer
Set Temp. Auto Return
– Cool/Dry
– Heat
[Disable]
[30min.]
[ – ]
[Disable]
[Disable]
[60min. / 84°
F
]
[60min. / 74°
F
]
Back
Next
Page
Page 1/ 4
Setting Status List
6.4.3. FilterSignReset
1.
Touchthe[FilterSignReset]onthe“Main-
tenance”screen.The“FilterSignReset”
screenisdisplayed.
Touch[OK]toresettheltersign,and
returntothe“Maintenance”screen.
Cancel OK
Filter Sign Reset
The filter sign will be reset. OK?
9373328407-01_IM.indb 8 2/22/2017 11:06:24 AM

 Loading...