Apply the setting.
(8) After setting is complete,
touch the [OK] on the “Back-
light Setting” screen.
After the setting change is
displayed, the display returns
to the “Preference” screen.
Enable/Disable [Enable]
[30s]
[2]
Automatic Off Time
Brightness
Backlight Setting
Cancel OK
3-7-3 Contrast Setting
(1) Touch the [Contrast Setting] on the “Preference” screen.
(2) “Contrast Setting” screen is displayed. Adjust the con-
trast with [
] or [ ].
(1) (2)
Back
Preference
Panel
Calibration
Backlight
Setting
Contrast
2
3
4
5
1
Contrast
Cancel OK
When the [OK] is touched, after the setting change
screen is displayed, the display returns to the “Prefer-
ence” screen.
3-8 Initial Setting (for administrator)
Perform this setting at installation. The setting can also be
changed after installation.
(1) Touch the [Initial Setting] on the “Main Menu” screen.
(2) When “Password Verication” screen is displayed, enter
the Password (or Installer Password) and touch [OK].
(1) (2)
Monitor
Previous
Page
Page 2/ 2
Main Menu
Summer Time
Setting
Initial Setting Maintenance
Preference
0
CL
5
1
6
2
7
3
8
4
9
Cancel OK
Password Verification
Enter Current Password
(3) If the password is entered correctly, the “Initial Setting”
screen is displayed. The screen has 3 pages which
are switched by touching the [Next Page] or [Previous
Page].
Back
Next
Page
Page 1/ 3
Initial Setting
Language Setting Date Setting
R.C.Group
Name Setting
Temp. Unit
Setting
Back
Previous
Page
Page 2/ 3
Initial Setting
R.C. Sensor
Setting
Password Setting
Display Item
Setting
Master Indoor
Unit Setting
Next
Page
Back
Previous
Page
Page 3/ 3
Initial Setting
RC Master/
Slave Setting
I.U. Display
Number Setting
Deadband Setting
Optimum Start
Setting
The following contents are set. (♦: for installer)
(*: Items that indoor unit does not support are not dis-
played.)
• Language Setting:
The displayed language is switched. The displayable
languages are English (factory setting), Chinese,
French, German, Spanish, Polish, Russian, Italian,
Greek, Portuguese, Turkish and Dutch.
• Date Setting:
The date and time display format are set. When the
power is turned off, the date and time data hold time
by built-in battery is approximately 7 days. When the
power is turned off for longer than this, the date and
time must be reset.
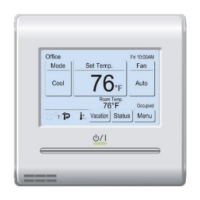
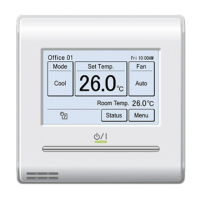
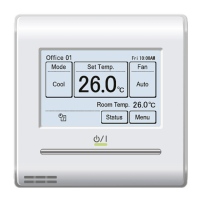
• Temp. Unit Setting:
The temperature display unit is switched to “°C” or “°F”.
Factory settings is “°C”.
• R.C.Group Name Setting:
The remote controller group name can be set or
changed.
• RC Sensor Setting*:
This setting uses the sensor of this unit to sense the
room temperature. The room temperature can be
sensed at a position, closer to the person than the
indoor unit sensor. Factory settings is “Not Used”.
• Master Indoor Unit Setting: ♦
• Password Setting:
The password setting and changes can be performed.
In addition, password request to the following setting
items can be set.
• Auto Off Timer (3-3)
• Weekly Timer (3-4)
• Set Temp. Auto Return (3-5-2)
• Set Temp. Range Setting (3-5-3)
• Anti Freeze* (3-5-4)
• Away Setting (3-5-5)
• Human Sensor Setting* (3-5-6)
• Fan Control for Energy Saving* (3-5-7)
• Initial Setting (3-8)
• Maintenance (3-9)
• Display Item Setting:
Display of the Filter sign and Room temp. can be
switched between Visible and Invisible.
• RC Master/Slave Setting ♦
• Deadband Setting:
Set the deadband value. The deadband can be set
within the 2ºF to 9ºF (1ºC to 4.5ºC) range. Set the
deadband value only to the Master Indoor Unit. (Set-
tings are not reected even if the deadband value is
set to other indoor units .)
Depending on a model of the indoor unit, the dead-
band is set on the indoor unit side. In this case, the
Deadband Setting is not displayed on this unit. If you
want to change the setting, consult an authorized ser-
vice personnel.
• Optimum Start Setting:
When this function is set to On, the indoor unit per-
forms advance operation so that the set temperature
is reached when occupied begins by schedule. To
use this function, schedule must be set. Refer to [3-4
Weekly Timer Setting].
• I.U. Display Number Setting* ♦
When the item to be set is touched, the display switches
to each setting screen. When each setting is complete
or canceled, the display returns to this screen. When
[Back] is touched, the display returns to the “Main Menu”
screen.
En-17
En-18

 Loading...