(1) (2)
Back
Previous
Page
Page 3/ 3
Initial Setting
RC Master/
Slave Setting
I.U. Display
Number Setting
Deadband Setting
Optimum Start
Setting
Optimum Start Setting
Cancel OK
On
Off
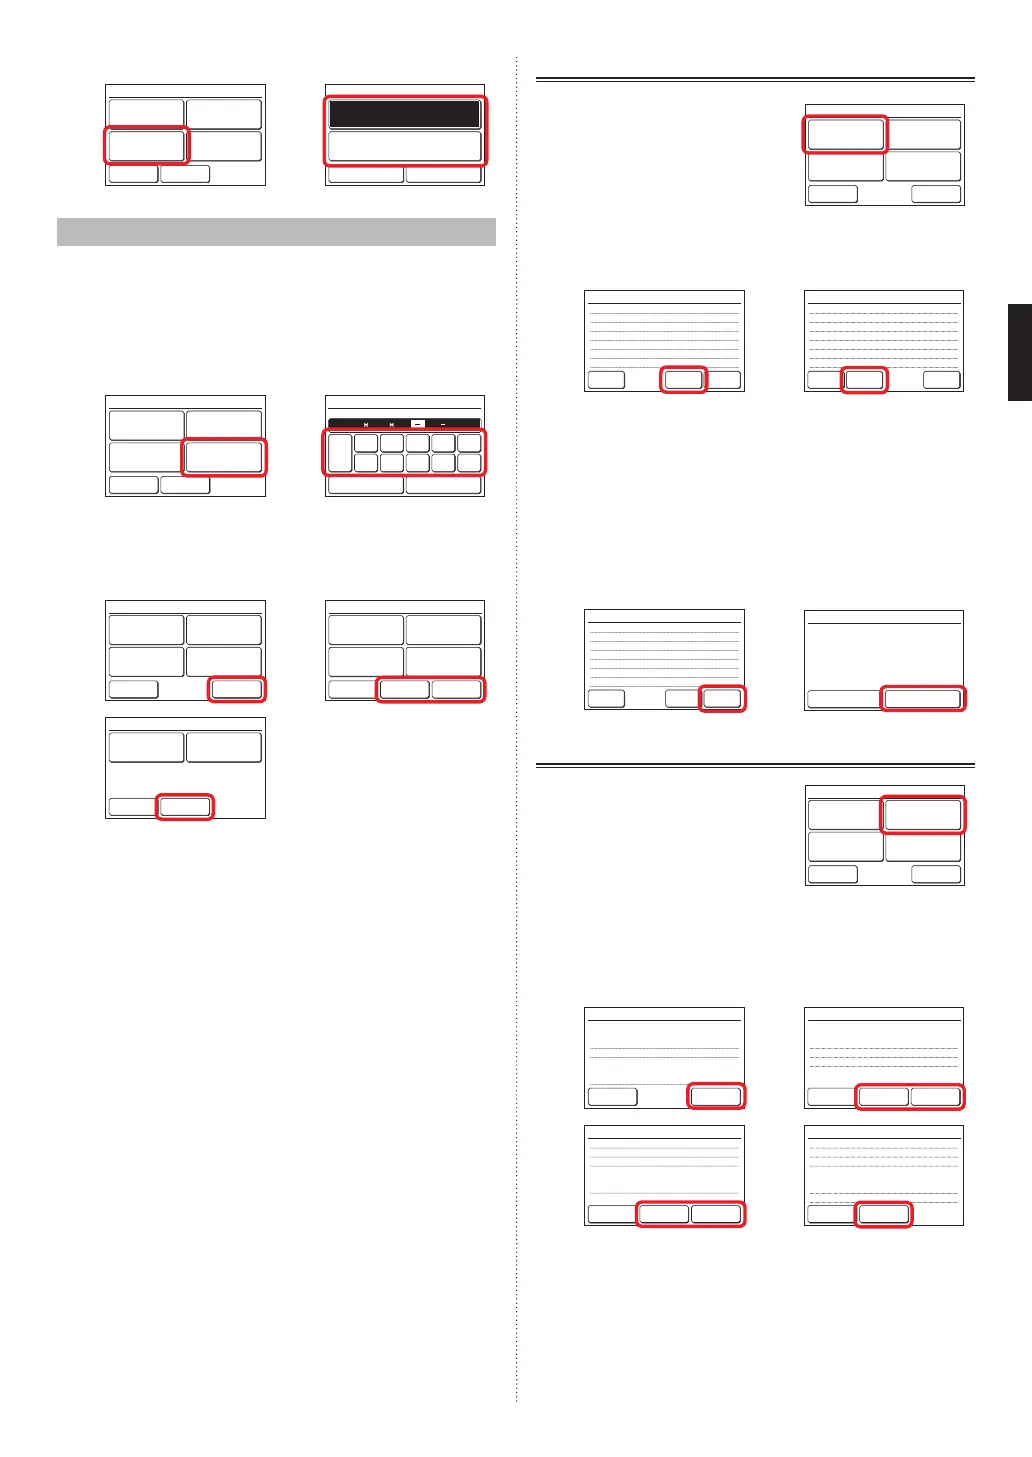
3-9 Maintenance (for administrator)
Verication, operation, and setting for administrator informa-
tion are performed.
(1) Touch the [Maintenance] on the “Main Menu” screen.
(2) When “Password Verication” screen is displayed, enter
the Password (or Installer Password) and touch [OK].
(1) (2)
Monitor
Previous
Page
Page 2/ 2
Main Menu
Summer Time
Setting
Initial Setting Maintenance
Preference
0
CL
5
1
6
2
7
3
8
4
9
Cancel OK
Password Verification
Enter Current Password
(3) If the password is entered correctly, the “Maintenance”
screen is displayed. The screen has 3 pages which
are switched by touching the [Next Page] or [Previous
Page].
Back
Next
Page
Page 1/ 3
Maintenance
Error History
Setting
Status List
Version
Filter Sign
Reset
Previous
Page
Back
Next
Page
Page 2/ 3
Maintenance
Test Run
R.C. Address
Setting
Function Setting
I.U. Address
Verification
Back
Previous
Page
Page 3/ 3
Maintenance
Initialization
Installer Password
Change
Verication, operation, and setting of the following con-
tents are performed. (♦: for installer)
(*: Items that indoor unit does not support are not dis-
played.)
• Error History:
The error history can be veried/cleared.
• Setting Status List:
The status of each setting can be veried as a list.
• Filter Sign Reset*:
After the indoor unit lter is cleaned, the lter sign can
be reset.
• Version:
The software version No. of this unit can be veried.
• Test Run ♦
• R.C. Address Setting ♦
• Indoor Unit Address Verication ♦
• Function Setting ♦
• Installer Password Change ♦
• Initialization ♦
When the [Back] is touched at settings other than initial-
ization, the display returns to the “Main Menu” screen.
When initialization is performed, the setting screen at
initial starting is displayed.
3-9-1 Error History
(1) Touch the [Error History] on
the “Maintenance” screen.
Back
Next
Page
Page 1/ 3
Maintenance
Error History
Setting
Status List
Version
Filter Sign
Reset
(2) “Error History” screen is displayed. When the screen
has multiple pages, they can be switched by touching
the [Next Page] or [Previous Page].
11:00
2:53
8:53
11:00
11:00
11:00
1
2015/ 8/ 1 002-01 141
2
2015/ 7/30 002-02 143
3
2015/ 7/25 002-02 143
4
2015/ 7/22 002-01 141
5
2015/ 7/22 002-01 141
6
2015/ 7/21 002-01 141
Page 1/ 2
Error History
No. Date Time Address Code
Back
Next
Page
Erase
All
AM
AM
AM
AM
AM
AM
11:00
2:53
8:53
11:00
11:00
7
2015/ 7/ 1 002-01 141
8
2015/ 7/10 002-02 143
9
2015/ 7/ 5 002-02 143
10
2015/ 7/ 2 002-01 141
11
2015/ 7/ 2 002-01 141
Page 2/ 2
Error History
No. Date Time Address Code
Back
Previous
Page
Erase
All
AM
AM
AM
AM
AM
(3) When the [Back] is touched after verication, the display
returns to the “Maintenance” screen.
Erase the Error History
(1) Touch the [Erase All] on the “Error History” screen.
(2) A verication screen is displayed. When the [Yes] is
touched after the history is cleared, the display returns
to the “Error History” screen.
(1) (2)
11:00
2:53
8:53
11:00
11:00
11:00
1
2015/ 8/ 1 002-01 141
2
2015/ 7/30 002-02 143
3
2015/ 7/25 002-02 143
4
2015/ 7/22 002-01 141
5
2015/ 7/22 002-01 141
6
2015/ 7/21 002-01 141
Page 1/ 2
Error History
No. Date Time Address Code
Back
Next
Page
Erase
All
AM
AM
AM
AM
AM
AM
Delete entire error history?
Error History
No Yes
3-9-2 Setting Status List
(1) Touch the [Setting Status List]
on the “Maintenance” screen.
Back
Next
Page
Page 1/ 3
Maintenance
Error History
Setting
Status List
Version
Filter Sign
Reset
(2) “Setting Status List” screen is displayed. The screen
has 4 pages which are switched by touching the [Next
Page] or [Previous Page].
(Items that indoor unit does not support are not dis-
played.)
Auto Off Timer
– Operation Stop Time
– Time Range
Weekly Timer
Set Temp. Auto Return
– Cool/Dry
– Heat
[Disable]
[30min.]
[ – ]
[Disable]
[Disable]
[60min. / 84°
F
]
[60min. / 74°
F
]
Back
Next
Page
Page 1/ 4
Setting Status List
Set Temp. Range Setting
– Cool/Dry
– Heat
Date Format
Time Format
[Disable]
[64°
F
– 88°
F
]
[64°
F
– 88°
F
]
[Day/Month/Year]
[12:00–11:59
AM/PM
]
Previous
Page
Back
Next
Page
Page 2/ 4
Setting Status List
Summer Time Setting
Temp. Unit Setting
R.C. Sensor Setting
Display Item Setting
– Filter Sign
– Room Temp.
[Disable]
[°F]
[Not Used]
[Visible]
[Invisible]
Previous
Page
Back
Next
Page
Page 3/ 4
Setting Status List
R.C. Master/Slave Setting
Deadband Setting
Optimum Start Setting
Backlight Setting
– Automatic Off Time
– Brightness
Contrast
[Master]
[5°F]
[Off]
[Enable]
[30s]
[2]
[3]
Previous
Page
Back
Page 4/ 4
Setting Status List
When the [Back] is touched, the display returns to the
“Maintenance” screen.
En-21
En-22

 Loading...