1-7-2 E3B40DC
Reference Notes
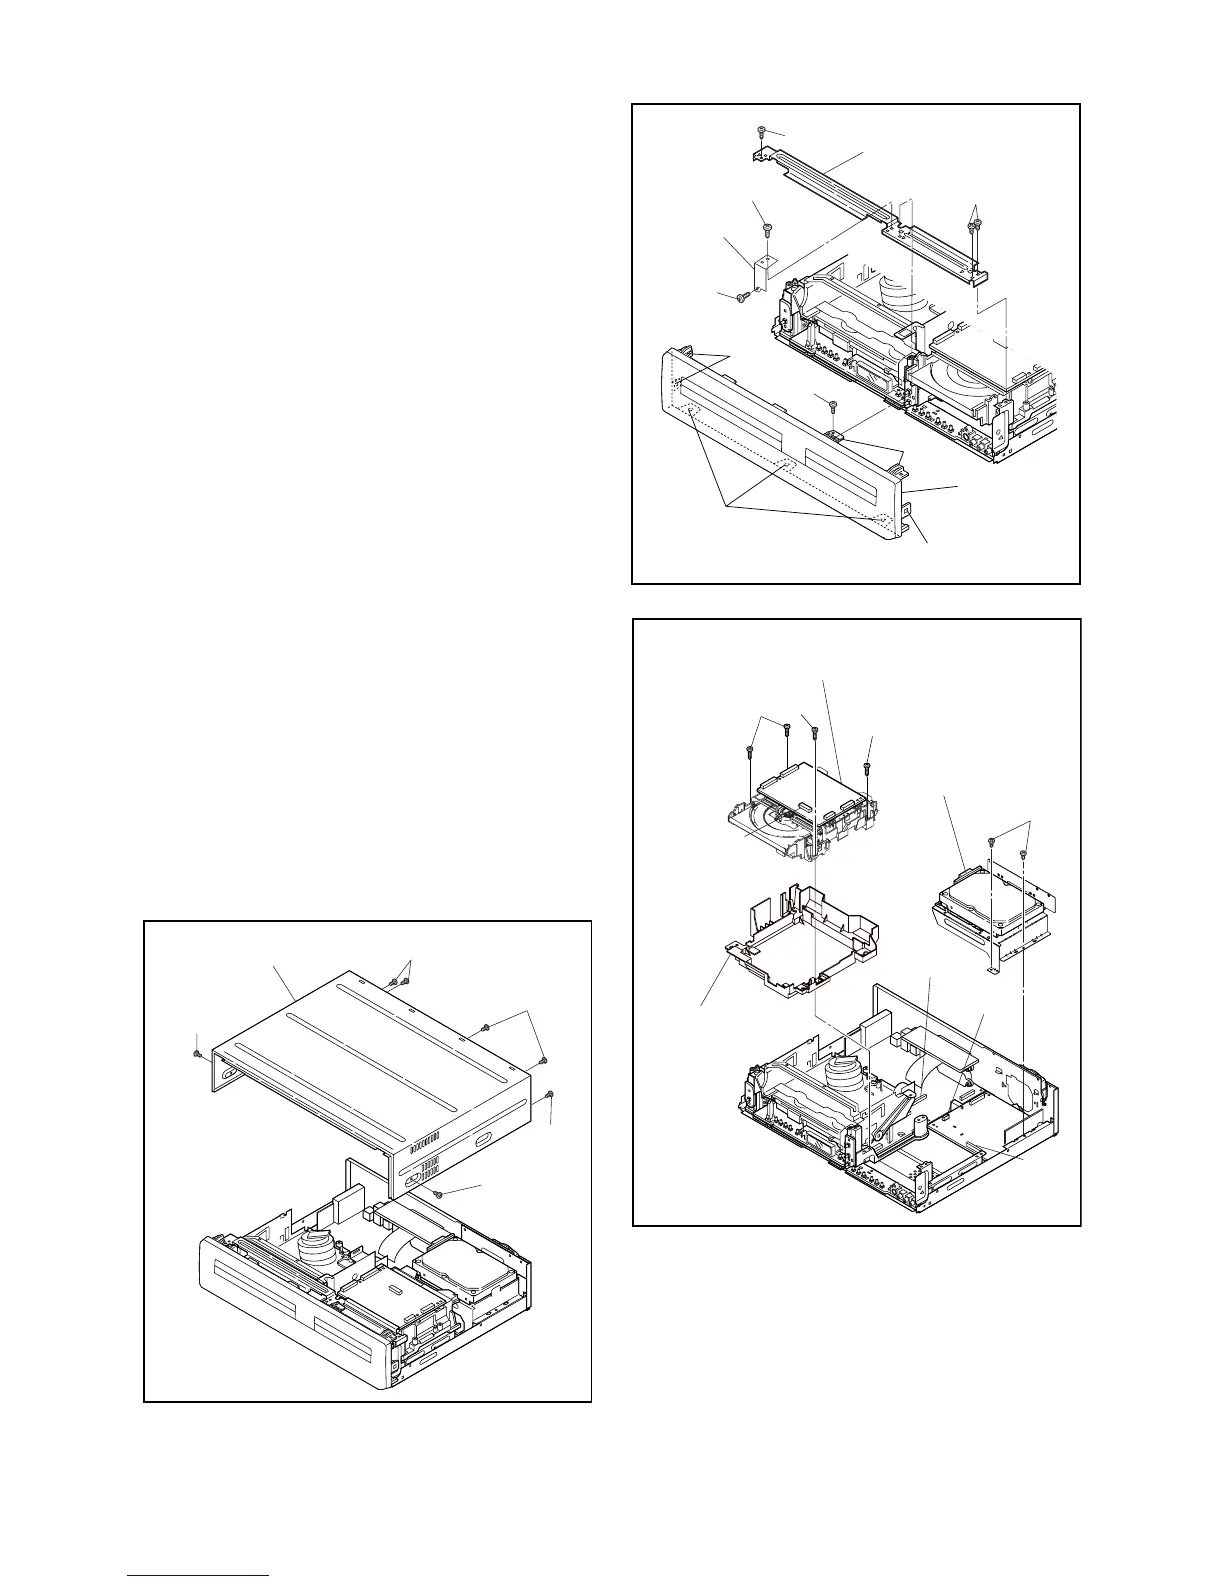
1. Locking Tabs (L-1) and (L-2) are fragile. Be careful
not to break them.
1-1. Remove Screw (S-2).
1-2. Release five Locking Tabs (L-1).
1-3. Release three Locking Tabs (L-2) and
remove the Front Assembly.
2. Do not replace the DVD Mechanism or the DVD/
HDD Main CBA Assembly separately, when
replacing the DVD Mechanism & DVD/HDD Main
CBA Assembly. Order the new DVD Mechanism &
DVD/HDD Main CBA Assembly.
2-1. Whenever you have replaced the HDD unit,
initialize the HDD unit. To initialize the HDD
unit, perform the following.To put the DVD/
VCR with HDD recorder into the HDD mode,
press the [HDD] button on the remote control
unit.
2-2. To put the DVD/VCR with HDD recorder into
the self-check mode, after pressing
[VARIABLE SKIP] button, press the [3], [6],
and [9] buttons on the remote control in that
order within three seconds.
2-3. Press [ENTER] button. The DVD/VCR with
HDD recorder is initialized and the power is
turned off automatically after two seconds.
3. When reassembling, solder wire jumpers as
shown in Fig. D8.
4. Before installing the Deck Assembly, be sure to
place the pin of LD-SW on the AV CBA as shown
in Fig. D8. Then, install the Deck Assembly while
aligning the hole of Cam Gear with the pin of LD-
SW, the shaft of Cam Gear with the hole of LD-SW
as shown in Fig. D8.
(S-1)
(S-1)
(S-1)
(S-1)
(S-1)
[1] Top Cover
Fig. D1
(S-3B)
(S-3B)
(L-1)
(L-2)
(L-1)
(S-3A)
(S-3B)
(S-2)
(L-1)
Fig. D2
Front
Support
[2] Front
Assembly
[3] Front Bracket
(S-4)
(S-5)
(S-5)
(S-6)
CN901
Dust Cover
CN1003
CN1502
CN1001
Fig. D3
[4] HDD Assembly
[5] DVD Mechanism &
DVD/HDD Main CBA
Assembly