1-9-1 E3B40INT
HOW TO SELF-CHECK AND INITIALIZE THE DVD/VCR WITH HDD
1. Turn on the DVD/VCR with HDD recorder.
2. To put the DVD/VCR with HDD recorder into the HDD mode, press [HDD] on the remote control unit.
3. To put the DVD/VCR with HDD recorder into the self-check mode, after pressing [VARIABLE SKIP] button,
press the [3], [6], and [9] buttons on the remote control in that order within three seconds.
Fig. a appears on the screen and all LEDs light.
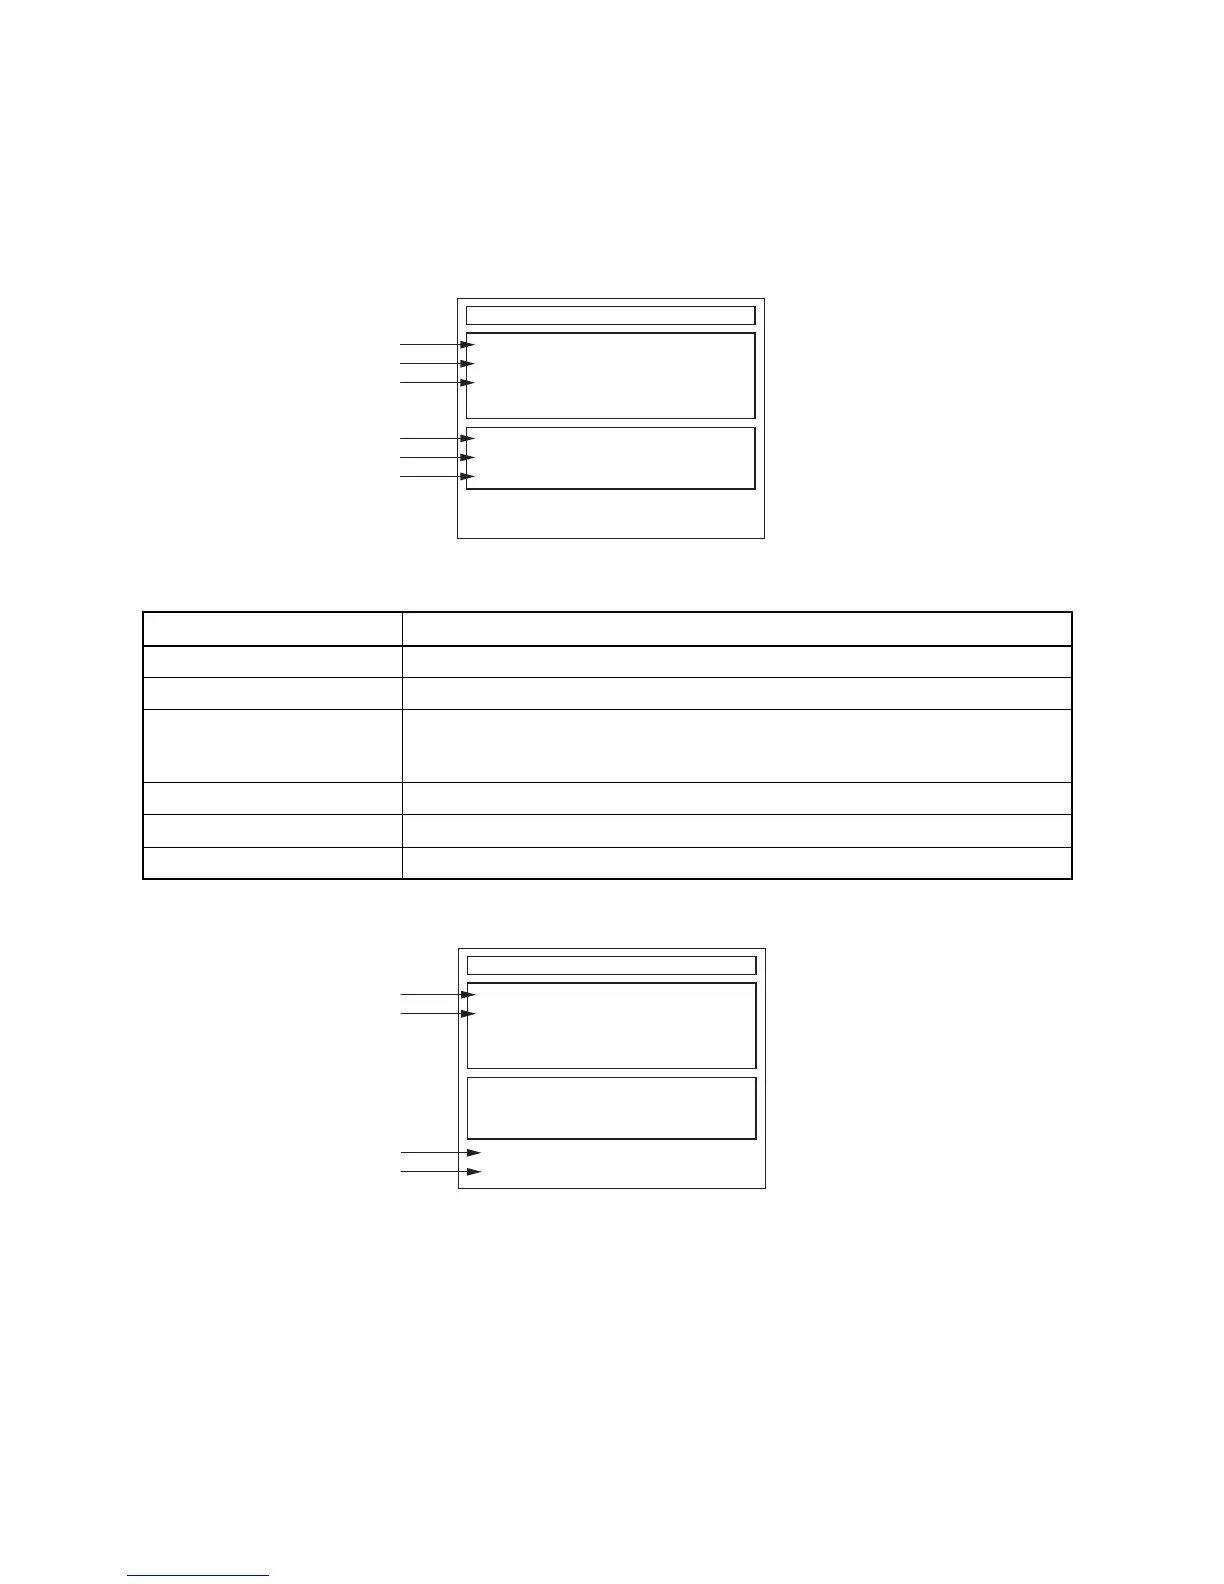
Fig. a: Self-Check Mode Screen
4. Upon the self-check completion, Fig. b appears on the screen.
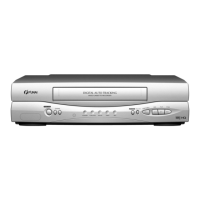
Fig. b: Screen of Finishing Self-Check Mode
Table 1: Description of Fig. a
INDICATION DESCRIPTION
DVD CONNECT STATUS (*1) Connecting Condition of DVD(F/E)
HDD CONNECT STATUS (*2) Connecting Condition of HDD
HDD POWER ON HOURS (*3)
Value of HDD power on hours obtained from S.M.A.R.T. command. (If not obtainable,
value of HDD power on hours is “0”.)
Value in parentheses is the factory setting value. (If no setting, the value is “0”.)
BE Ver. (*4) B/E version
FE Ver. (*5) F/E version
Sub Micon Ver. (*6) Sub micro controller version
Self-Analysys and Report
DVD CONNECT STATUS :
HDD CONNECT STATUS :
HDD POWER ON HOURS :
BE Ver. :
FE Ver. :
Sub Micon Ver. :
T3*****B2S-****
R35_028_000
T3***TTP
*1
*2
*3
*4
*5
*6
"
*******
" differs depending on the models.
Self-Analysys and Report
DVD CONNECT STATUS : OK
HDD CONNECT STATUS : OK
HDD POWER ON HOURS : 100(40)
*7
*8
*9
*10
FACTORY DEFAULT :
POWER OFF :
ENTER
POWER
"
*******
" differs depending on the models.
BE Ver. :
FE Ver. :
Sub Micon Ver. :
T3*****B2S-****
R35_028_000
T3***TTP