2. INSTALLATION OF TRANSDUCERS
2-4
Installation procedure
A suitable mounting location is at least 50 cm away from the engine and where the
water flow is smooth.
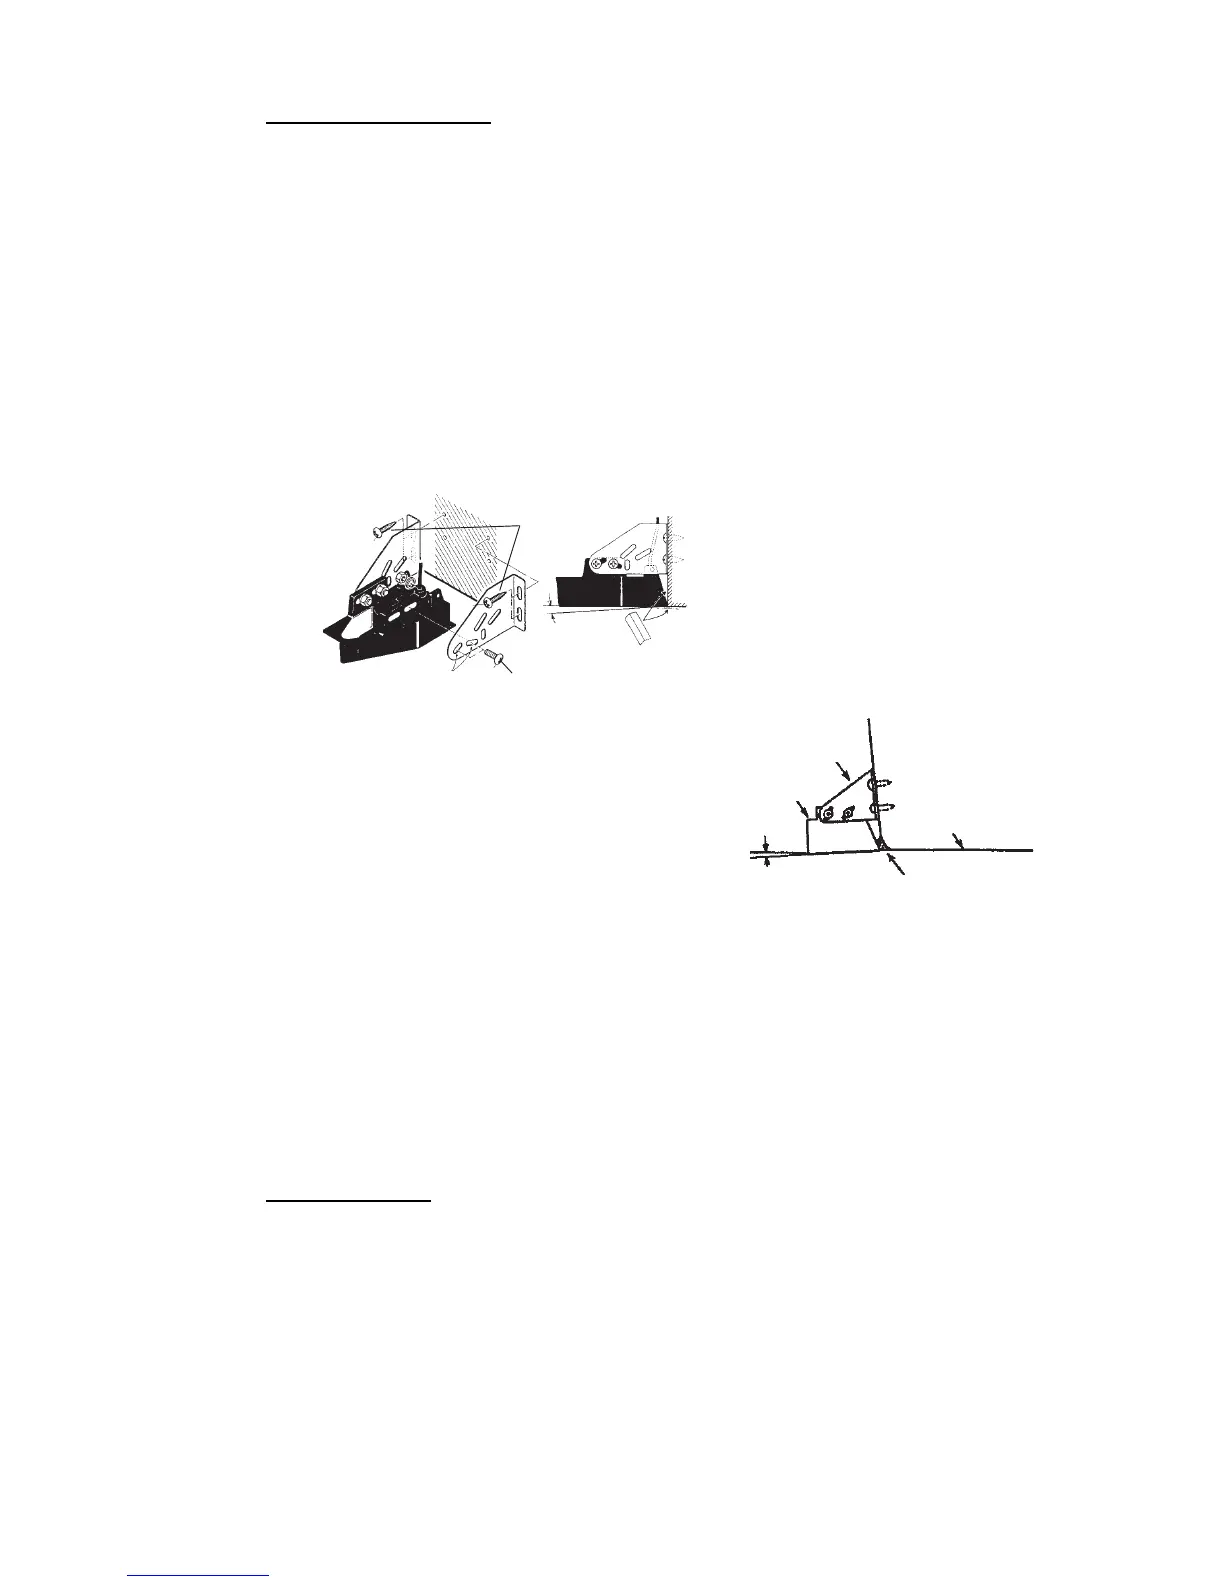
1. Drill four pilot holes for self-tapping screw (5x20) in the mounting location.
2. Coat the threads of the self-tapping screws (5x14) for the transducer with silicone
sealant for waterproofing. Attach the transducer to the mounting location with the
self-tapping screws.
3. Adjust the transducer position so the transducer faces right to the bottom. If nec-
essary, to improve water flow and minimize air bubbles staying on the transducer
face, incline the transducer about 5° at the rear. This may require a certain amount
of experimentation for fine tuning at high cruising speeds.
4. Tape the location shown in the figure below.
5. Fill the gap between the wedge front of
the transducer and transom with epoxy
material to eliminate any air spaces.
6. After the epoxy hardens, remove the
tape.
2.3 How to Mount a Trans-
ducer inside the Hull
The transducer may also be installed inside the hull on FRP boats. However, this in-
stallation method affects the ability to detect the bottom, fish and other objects be-
cause the ultrasound pulse is weakened when it passes through the hull.
Note: This mounting method should not be used to mount the transducer that sup-
ports the ACCU-FISH
TM
and/or bottom discrimination display feature, since perfor-
mance is greatly degraded.
Necessary tools
You will need the following tools:
• Sandpaper (#100)
• Silicone sealant
• Silicone grease
 Loading...