GAT ECO.Side Lock 7010 (NW) F/ISO
Installation
28
HB_GAT-ECOSide-Lock7010-FISO--EN_11
www.gantner.com
3.11.3 Installation Instructions for the GAT ECO.Side Lock 7010 F/ISO and Metallic Doors
Complete the following steps to install the GAT ECO.Side Lock 7010 F/ISO into lockers with metallic doors.
► Drill 3 holes (3 in Figure 3.11) for the GAT ECO.Side Lock 7010 F/ISO into the locker wall.
NOTE! Position the 3 holes according to the information in section "3.11.2 Installation Requirements for the
GAT ECO.Side Lock 7010 F/ISO and Bolt Set" and the measurements in Figure 3.11.
► Insert the batteries into the GAT ECO.Side Lock 7010 F/ISO (see section “4.2.2. Inserting the Battery”).
► Mount the GAT ECO.Side Lock 7010 F/ISO with 3 screws (3) on the inside locker wall.
NOTE! Use the correct screws according to the type of locker material, max. Ø 4 mm (0.16´´). The
maximum allowed tightening torque of the screws is 2 Nm (1.47 lb-ft).
► Cut out a section, 63.4 mm x 68.2 mm (2.5´´ x 2.69´´), in the inner wall of the locker door for the GAT NET.Lock
Bolt Set 7200 (8 in Figure 3.12).
► Drill 4 holes (6 in Figure 3.12) in the inner wall of the locker door for mounting the GAT NET.Lock Bolt Set
7200.
► Cut out a section, 67.6 mm x 94 mm (2.66´´ x 3.7´´), in the outer wall of the locker door for the label carrier (9 in
Figure 3.12).
► Mount the bolt set onto the inside wall of the locker door using 4 screws.
NOTE! Use pan-head metal screws, Ø 3.5 mm (0.14´´), screw length depends on locker door thickness. The
maximum tightening torque of the screws is 2 Nm (1.47 lb-ft).
► Push the label carrier onto the outside wall of the locker door. The label carrier will remain in place with the
lashes on the label carrier. To protect against manipulation, a screw can be used to fix the bolt set to the label
carrier.
NOTE! Use a countersunk screw, Ø 2.9 mm (0.11´´). Screw length depends on locker door thickness, e.g., a
15 mm (0.59´´) thick door requires a 19 mm (0.75´´) long screw.
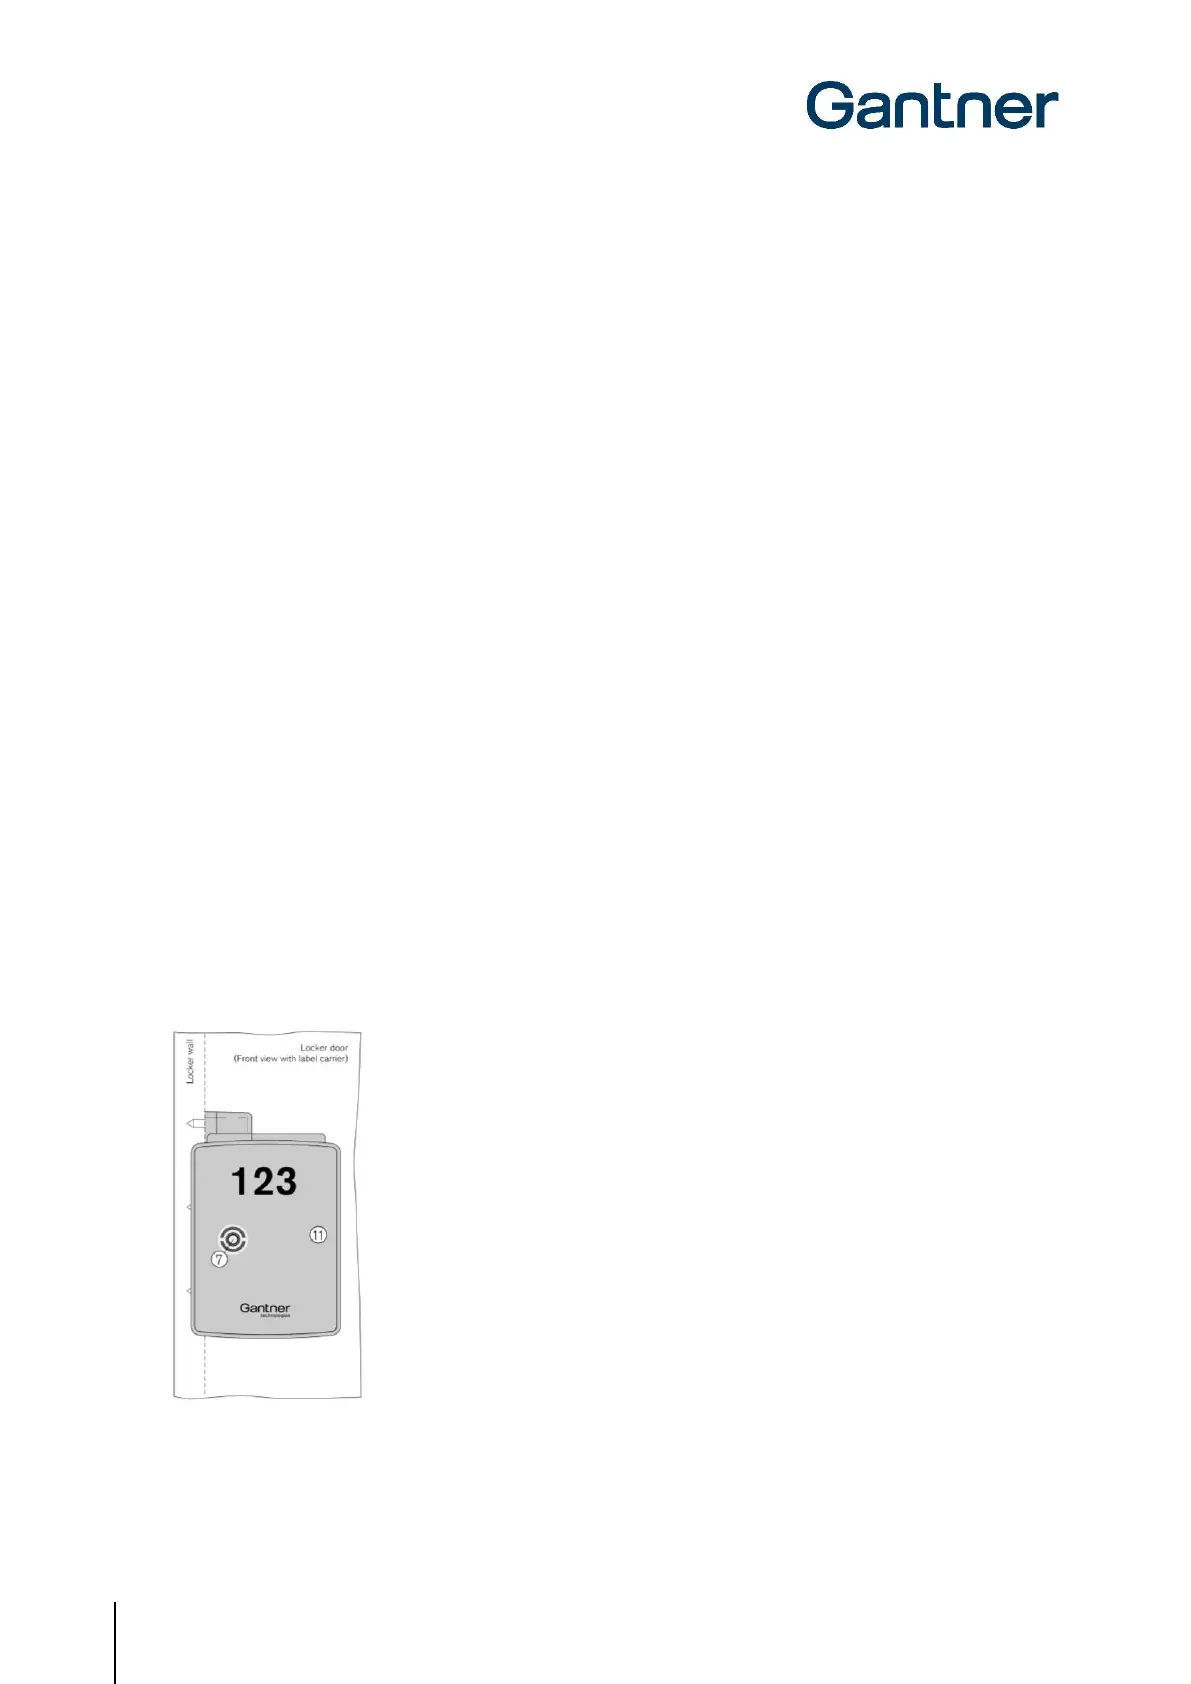
► A label can be attached to the label carrier on the front of the locker door. The label has a transparent (matt)
viewing window for the LED to shine through and can be ordered with a GANTNER design or customer-specific
design.
NOTE! For customer-specific labels, ensure that a transparent field for the status
LED is incorporated in the design and that no metal foil or metal color are used.
Figure 3.14 - Label carrier with front label
► Test the locker door to confirm that it closes easily and that the door shackle inserts correctly into the GAT
ECO.Side Lock 7010 F/ISO. The locker door must spring open without assistance after it is unlocked.
 Loading...