File Types
The handheld device supports these file types:
• Files from BaseCamp or HomePort
™
. Go to www.garmin.com/trip_planning.
• GPX route, track, and waypoint files.
• GPX geocache files (Downloading Geocaches Using a Computer, page 12).
• JPEG photo files.
• GPI custom POI files from the Garmin POI Loader. Go to www.garmin.com/products/poiloader.
• FIT files for exporting to Garmin Connect.
Installing a Memory Card
You can install a microSD memory card, up to 32 GB, for additional storage or pre-loaded maps.
1 Turn the D-ring counter-clockwise, and pull up to remove the cover.
2 Remove the batteries.
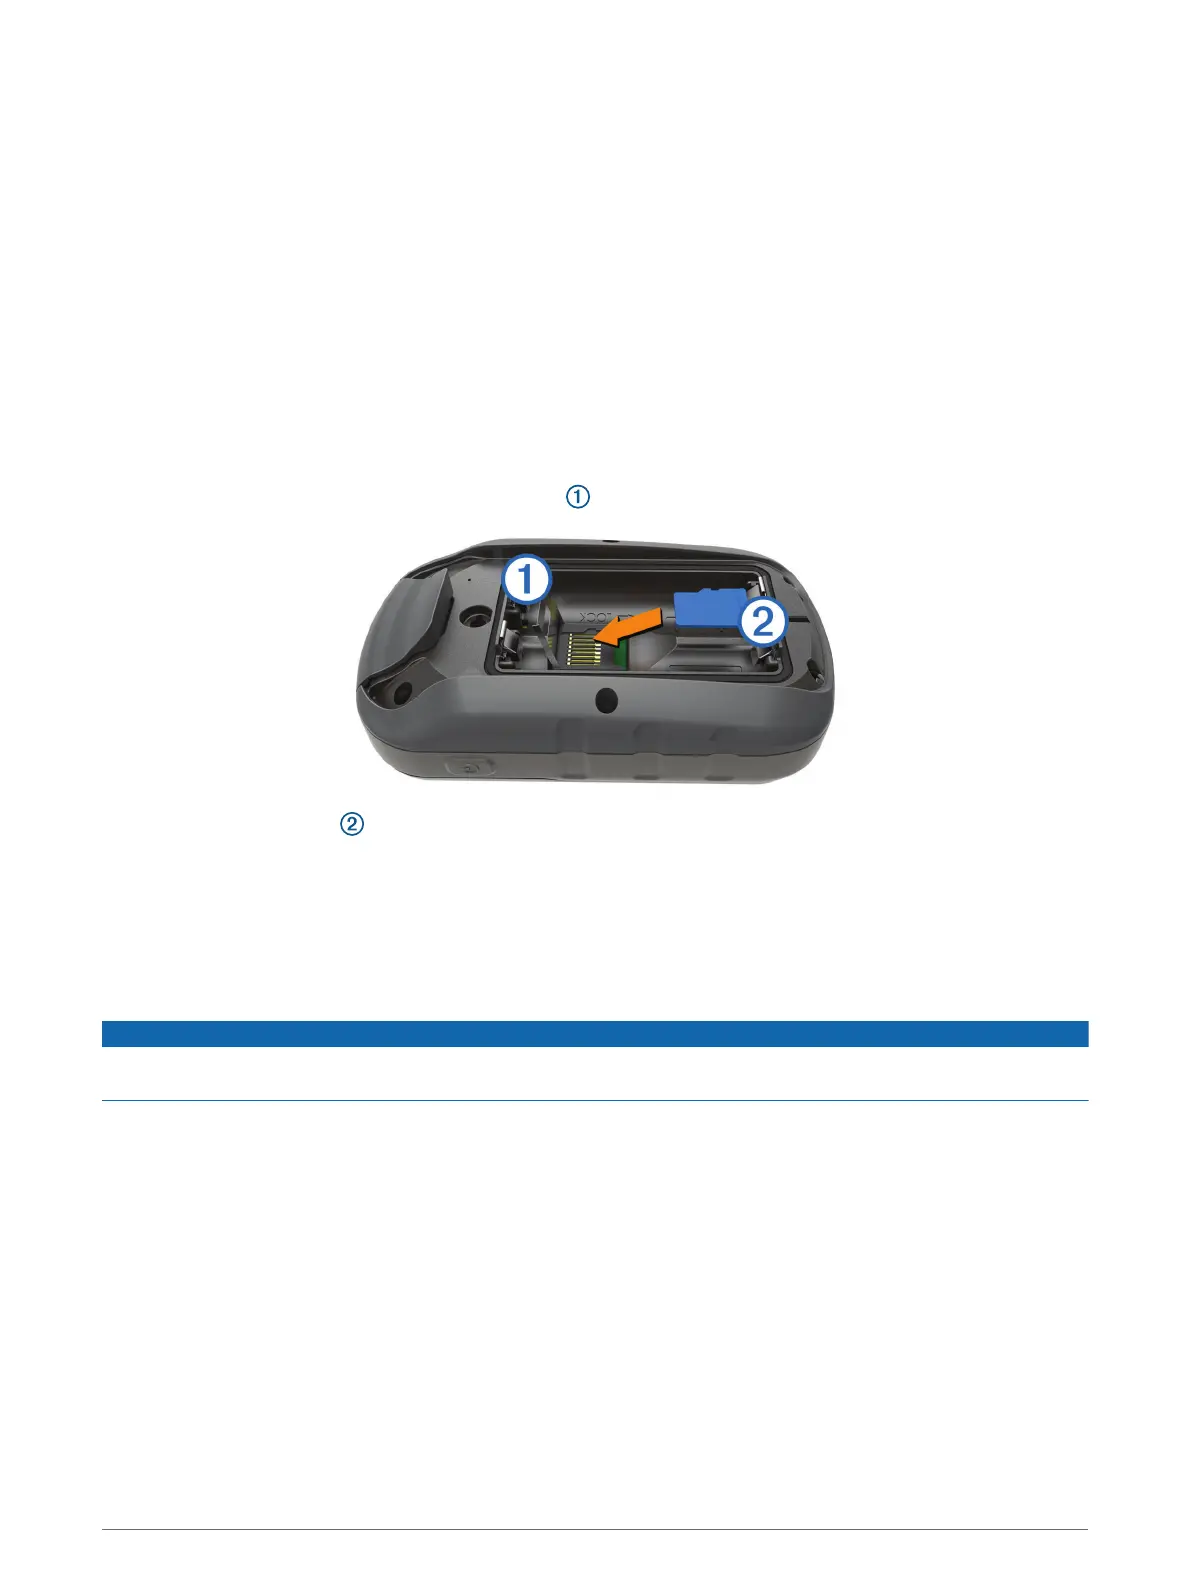
3 In the battery compartment, slide the card holder to the left and lift up.
4 Place the memory card with the gold contacts facing down.
5 Close the card holder.
6 Slide the card holder to the right to lock it.
7 Replace the batteries.
8 Replace the battery cover, and turn the D-ring clockwise.
Connecting the Device to Your Computer
NOTICE
To prevent corrosion, thoroughly dry the USB port, the weather cap, and the surrounding area before charging or
connecting to a computer.
1 Pull up the weather cap from the USB port.
2 Plug the small end of the USB cable into the USB port on the device.
3 Plug the large end of the USB cable into a computer USB port.
Your device and memory card (optional) appear as removable drives in My Computer on Windows
computers and as mounted volumes on Mac computers.
28 Device Information


 To Next Page