USER GUIDE - MC3001
12
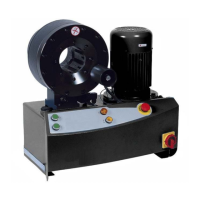
3.3 - OPERATING INSTRUCTIONS:
Ref - fig 4.a
1. Turn the main switch (8) to position 1 and press the ON button (6).
2. Press the disengage die button (5) in order to fully open the die carriers.
3. Set gauge at "150" +/- 10.
5. Press emergency stop button (7).
6. Remove set of dies required from die rack using quick change tool.
7. Insert die set into die carriers.
8. Pull trigger on quick change tool and remove, leaving dies in place and ready to use.
9. Unlock the emergency stop button (7) and press the ON button (6).
11. Set the gauge setting mechanism (2) to the correct setting as indicated on the crimp CD for the particular
hose and connector being crimped.
12
. Position the hose and the connector between the dies in the crimp head.
13. Place the ferrule in the position as specified on the crimp CD.
14. Press the engage die button (4) to carry out the crimping operation until the finished crimp indicator
light (3) lights up.
15
. Press the disengage button (5) to release the crimped assembly.
16. Check the crimp diameter of the ferrule with a vernier or micrometer*. The measured crimp diameter must be
4. Press engage die button (4) until machine automatically stops.
within the tolerance published on the crimp CD. If not, the hose assembly cannot be used and adjustment
will be required. Correct the gauge setting if required. In order to decrease the crimp diameter reduce the
value of the gauge setting mechanism (2); reverse procedure to increase crimp diameter.
*Always use verniers or micrometers that are graduated to 0.001"/0.02mm or smaller.
N.B. To change die set, perform steps 1-5. If dies do not have a small gap between each other they will
not release from the intermediate dies, therefore it will be necessary to increase the gauge setting by
10 and perform steps 1-5 until a working gap appears, thus allowing the die set to be removed from the
A rotation of 7 units on the gauge setting mechanism is equal to a change of 0.10mm on the crimp diameter.
Gauge settings must be considered a guide to achieving the correct crimp diameter.
Actual crimp diameters must be within the specified crimp tolerance.
10. Press disengage button (5).