38 Replacing and Adding System Components
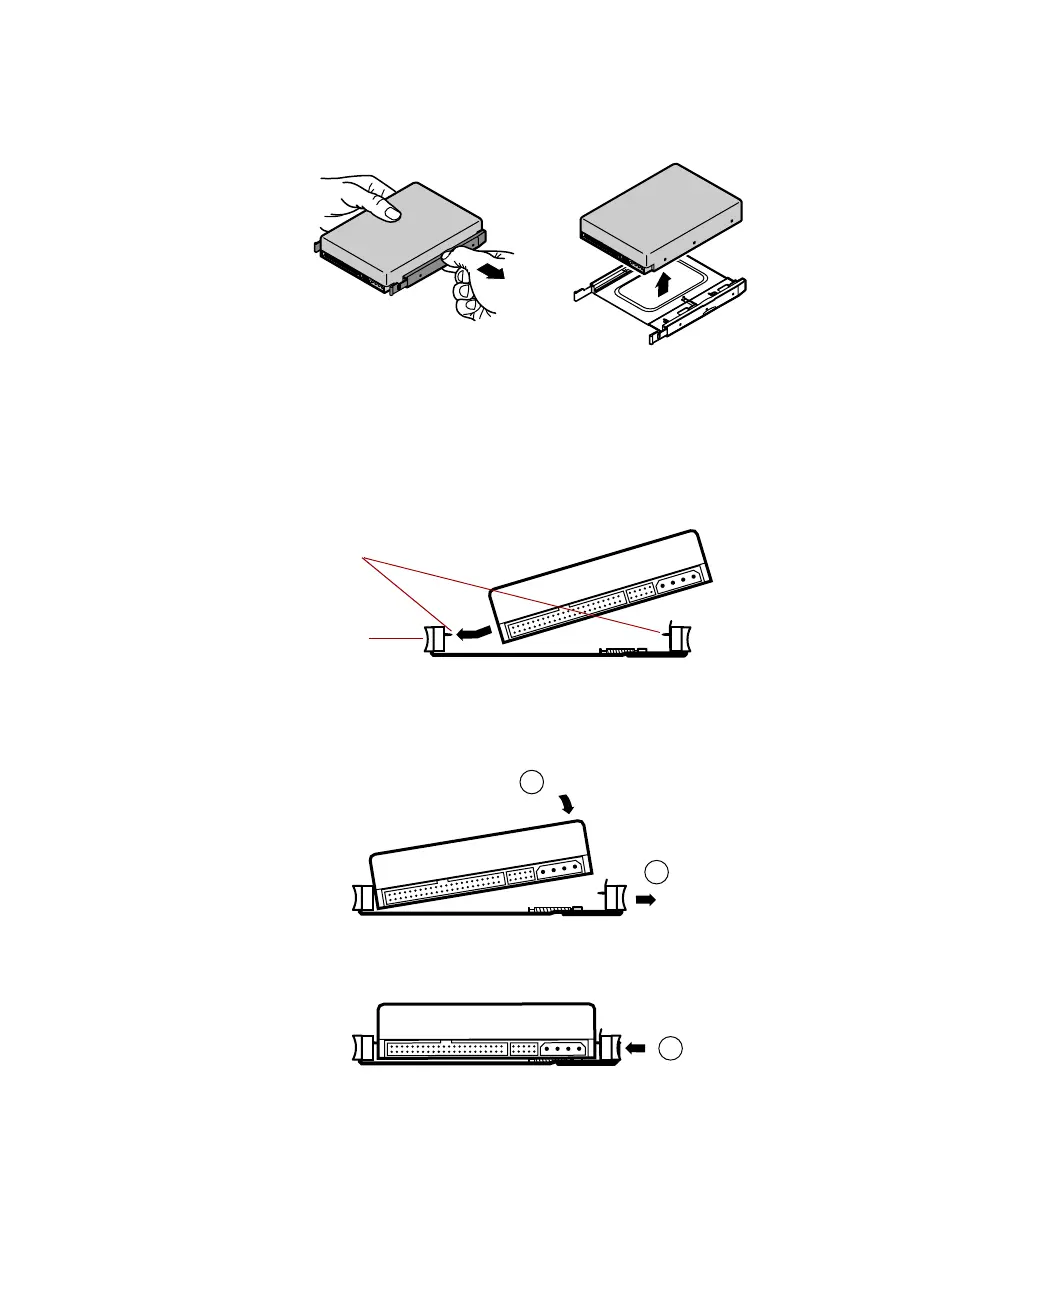
5 Pull on the rail to expand the tray, then remove the drive from the tray.
6 Set any jumpers on the new drive. (See the drive documentation for more
information.)
7 Align the threaded holes on the side of the hard drive with the metal
points on the tray, then press the drive against the side rail.
8 Expand the tray until it fits the size of your drive, then lower the drive
into the tray. Release the tray so it can contract to secure the drive.
Metal points
Side rail
1
2
3
05957.book Page 38 Monday, May 8, 2000 10:09 AM