4
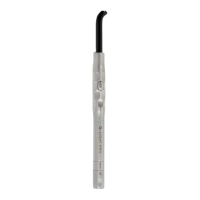
Handpiece
• First, insert the electronic module into the handpiece
(Figure 10).
• Next, insert the battery into the rear end of the
handpiece/electronic module assembly (Figure 11).
Light-guide
• Before each use, autoclave the light guide and
handpiece.
CAUTION! Be certain to remove the electronic module
and battery pack from the handpiece.
• Disinfect the eye-protection shield.
• Insert the light guide into the handpiece (Figure 12).
Make sure that the light guide snaps into position.
Mount either the hard or soft eye-protection shield on
the light guide.
• NOTE: For the Detection mode (DT), the use of the hard
eye-protection shield is recommended for improved
visibility.
6. OPERATION
Activating the unit
• Gently insert one battery pack into the rear-end of the
D-Light Pro handpiece after the electronic module is
inserted. You will feel the connector guide the battery
automatically into the “Off position”.
• When resistance is felt, gently push the battery all the
way into the handle. A click will be heard when the
battery pack is completely inserted and correctly
seated in the D-Light Pro handpiece (Figure 11).
• Rotate the cap of battery pack by quarter turns in either
direction, to select the required curing program (Figure
13).
• Adjust the angle of the light if necessary by “rolling”
your pen-like grip.
• Press the start button (Figure 14). Keep the tip of the
light guide as close as possible to the surface of the
material to be cured. Prevent direct contact with the
material. In case of contact, carefully remove remaining
material from the light guide using a plastic spatula.
• The D-Light Pro handpiece may feel slightly warm
during prolonged operation. This is normal.
Curing programs
PROGRAM FEATURES
HP
High Power
Standard curing with dual wavelength featuring a 20 second cycle with high output power (approx.
1400 mW/cm
2
) for maximum effi ciency.
LP
Low Power
Low power curing with dual wavelength featuring a 20 second cycle with approx. 700 mW/cm
2
output, optimal for instance when curing close to the pulp.
DT
Detection
Violet light only featuring a 60 second cycle, for the visualization of fl uorescent restorative materials
and/or identifi cation of bacteria in plaque, fi ssures, infected dentin, etc. (see Indications).
Tone signals
TONE SIGNAL EXPLANATION
1x A curing cycle has started or ended.
1 Quick Tone and
a Flash
10 seconds of curing have been completed.
2x A curing cycle has been interrupted prematurely.
3x
The internal temperature of the handpiece is too high. After 3 minutes pause, the curing light can be
used again.
4x
Too many consecutive curing cycles have been performed (>10), and a short pause is required
(maximum 3 minutes)
5x Battery charge is low. The battery needs recharging.
Quick Tone(s)
Selection of a new program (Battery cap rotation)
HP=1 quick tone; LP= 2 quick tones; DT= 3 quick tones
 Loading...