5
D-Light
®
Pro
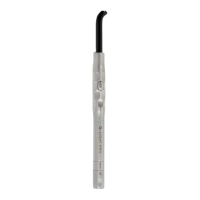
Radiometer Usage
• Select the High Power (HP) curing program
• To confi rm proper light output, cover the window of
the built-in radiometer in the charging station with
the light-guide and press the start button (Figure 15).
• The green LED response means the light output is
suffi cient for usage.
• The red LED response means that the light output is
not suffi cient for curing. Check troubleshooting
section before contacting technical support.
7. AUTOCLAVING AND CARE OF THE UNIT
• The light guide and handpiece sleeve can be steam-
autoclaved at 134°C (275°F) maximum (Figure 16).
CAUTION! Prior to autoclaving, remove the electronic
module and battery pack from the handpiece by pulling
on the “Mode” ring.
• Clean and sterilize the light guide and handpiece in a
sterilization bag before each patient application.
• Use a validated sterilization process at a maximum
temperature of 134°C and for a time of up to 20 min.
Perform sterilization according to EN 17665-1:2006 and EN
556-1:2001 at 134 °C for at least 3 minutes and use steam
sterilizers that comply with the requirements of EN
13060:2004+A2:2010, class B or S.
• The eye-protection shields (soft and hard versions) cannot
be autoclaved, but should be disinfected using an alcohol-
based disinfectant.
• Remove the battery pack prior to routine cleaning,
disinfection and maintenance of the unit.
• The docking ports of the charging station can be cleaned
with a dry clean brush.
• The charging station, battery, and eye-protection shield
should be cleaned with a soft cloth moistened with
alcohol. Organic detergents such as thinners or petroleum
benzine should not be used. Take care not to get water
inside the charging station or on the contact points of the
battery.
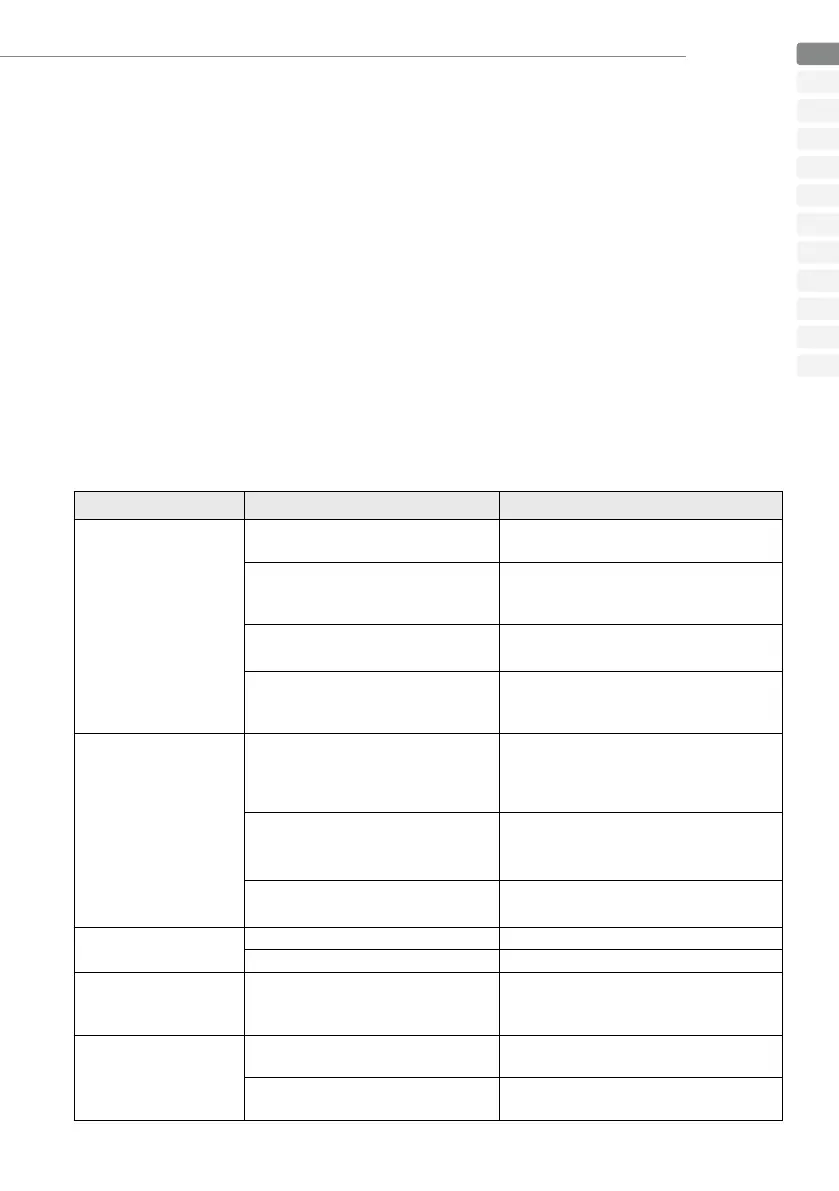
8. TROUBLESHOOTING
If any diffi culty is experienced while operating the unit,
please check below for possible causes of the problem
and suggested corrective actions before seeking further
advice or repair from your point of purchase.
Problem Check Corrective Action
When the start button is
pressed, the light will not
come on.
Is the battery discharged or the charging
status extremely low?
Charge the battery.
Is the battery set correctly in the
handpiece/electronic module assembly?
If not, reset the battery in the right position
(refer to section “activating the unit”).
Is the electronic module correctly inserted
into the handpiece?
Remove the electronic module and insert it
again into the handpiece
Has an extended period of continuous
irradiation been carried out?
The unit is cooling down. After a minimum a
3 minutes where the device is not in use, it can
be started again.
The battery cannot be
charged.
Is the charging station correctly
connected?
Check to ensure the charging station is
correctly connected to the power supply.
Check if the power supply is correctly
connected to the mains.
Is the battery fi rmly set in the charging
station?
Remove any dust present in the docking ports
of the charging station and insert the battery
fi rmly in the docking port.
Is the battery already completely charged?
Insert the battery into the handpiece and activate
to confi rm the battery has a charge.
The unit is working normally,
but the material will not
cure.
Is the shelf life of the material expired? Use fresh material.
Has the light guide been damaged? Clean or replace the light guide.
The light guide or electronic
module is diffi cult to insert
Is the groove of the light guide or
electronic module clean and free from
damage?
Apply a small amount of lubricant on the groove
of the light guide or electronic module
The radiometer indicates a
red light response
Has the light guide been damaged? Clean or replace the light guide.
Is the window of the radiometer free of any
material?
Clean the radiometer window.
EN
DE
FR
IT
ES
NL
DA
SV
NO
PT
FI
EL
 Loading...