– 31 –
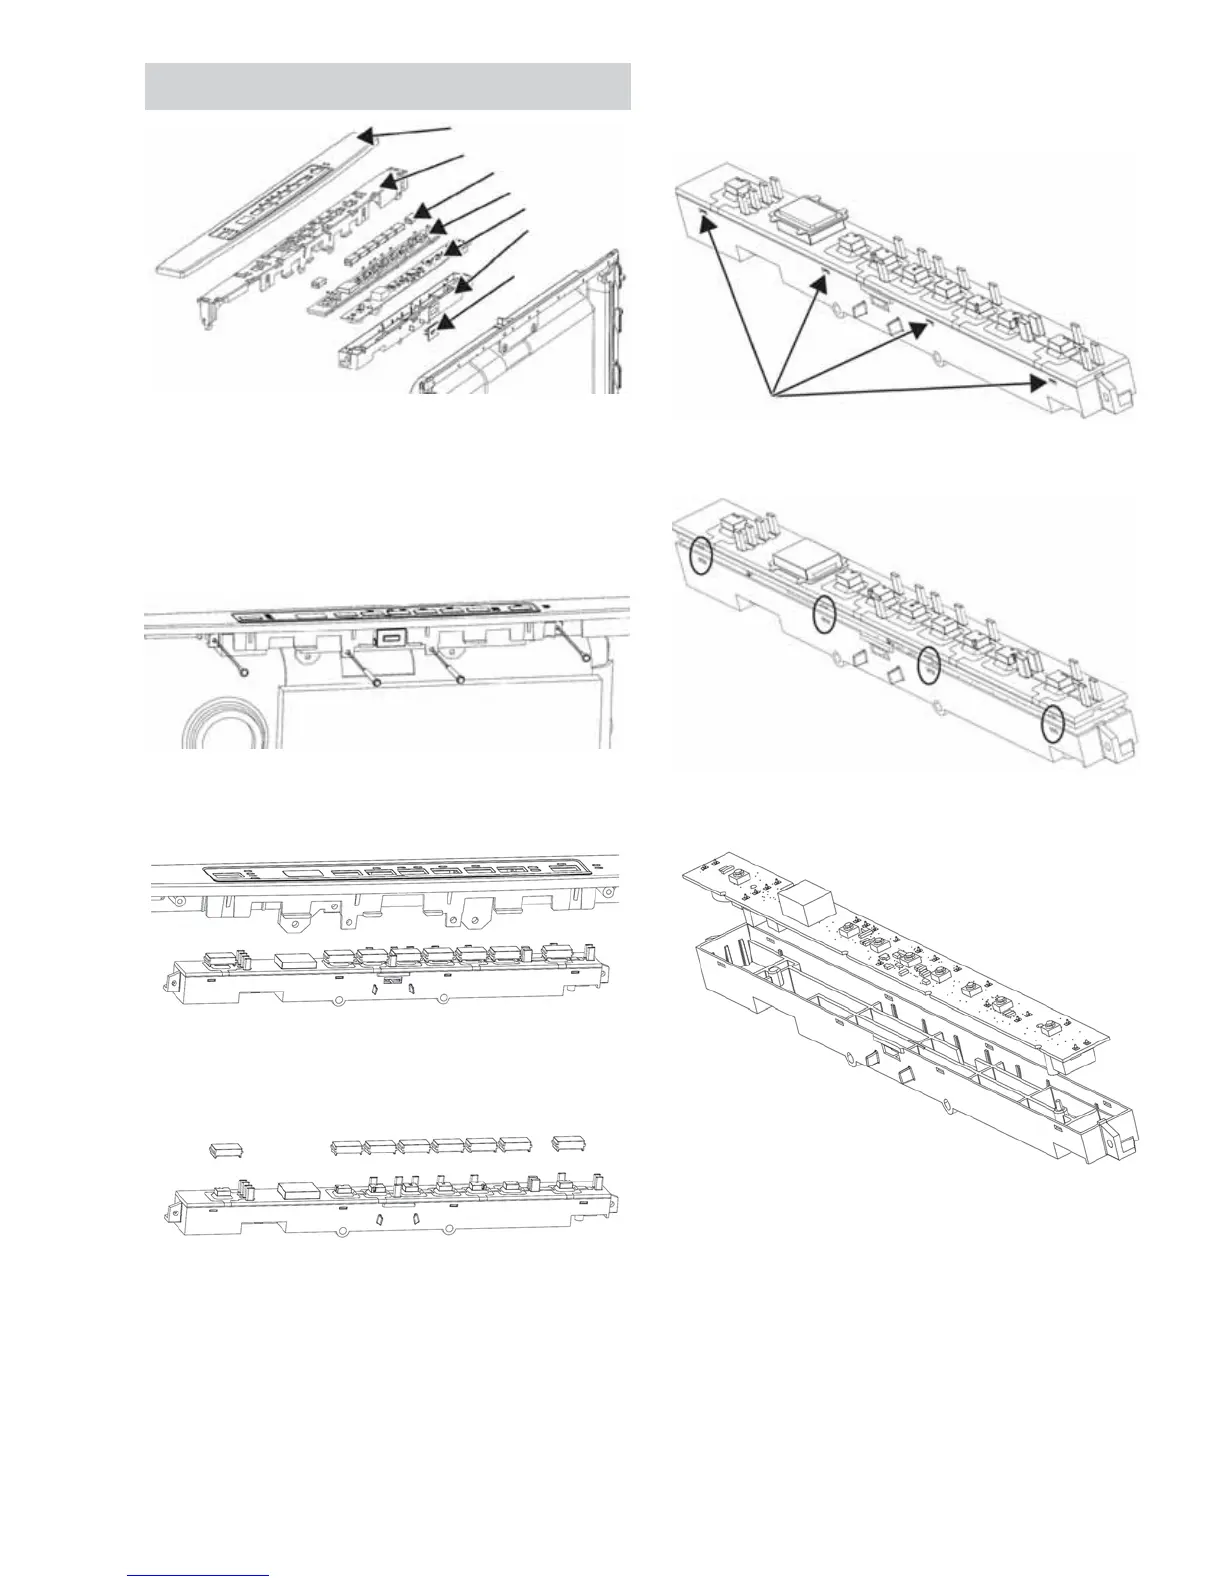
Top Control Panel, UI, Light Pipe and Buttons
Access the UI, Control Covers, Buttons and Light
Pipe
1. Remove and separate the door.
2. Remove four 1/4 in. hex head screws.
3. The control and bottom cover will drop down
from the control panel.
4. The buttons, and light pipe with silicone pad will
be removed from the bottom cover to access
the UI.
5. The light pipe separates from the bottom cover
with tabs. A small screwdriver may be needed to
VWDUWWKH¿UVWWDE
6. 7KHOLJKWSLSHPD\EHÀH[HGE\WZLVWLQJWR
release the remaining tabs (four each side).
7. With the light pipe removed, the UI may be lifted
out of the bottom cover.
• When replacing UI control boards, the new UI
%RDUGPXVWEHFRQ¿JXUHGDVSHULQVWUXFWLRQV
included with the replacement. If the personality
is not set by using the 4 jumpers, the buttons,
LED’s or cycles will not function properly.
• Diagnostics for both front and top control UI’s
are found in the electronic section of this guide.
Top Cover
Console
Buttons
Light Pipe
UI
Bottom
Cover
Lens
Tabs
 Loading...