#
BEFORE YOU BEGIN
~
Read these instructions completely and
carefully.
IMPORTANT: Save these instructions for the
local electrical inspector’s use.
IMPORTANT: OBSERVE ALL GOVERNING
CODES AND ORDINANCES.
NOTE TO INSTALLER Leave these
instructions with the appliance afterinstallation
is completed.
NOTE TO CONSUMER Keep this Use and
Care Guide and Installation Instructions for
fiture use.
N(YIE‘I& appliancemust be properlygrounded.
TOOLS YOU WILL NEED
Large blade screwdriver
Channel lock pliers
ELECTRICAL REQUIREMENTS
CAUTION, FOR PERSONAL SAF~
DO NOT USE AN EXTENSION CORDWITH
THIS APPLIANCE.
REMOVEHOUSE FUSE OR OPEN CIRCUIT
BREAKER BEFORE BEGINNING
INSTALLATION.
This appliancemust be suppliedwiththe proper
voltageand frequency,and connected to an
individual,properlygrounded branch circuit,
protected by a circuitbreaker or time delayfuse,as
noted on the rating plate.
Wfig must conformto NationalElectricCodes.
Ifthe electric service provideddoes not meet the
abovespecifications,itis recommended that a
licensed electricianinstallan approvedoutlet
Because range terminals are not accessibletier
range is in position,flexibleservice conduitor cord
must be used.
STEP 1
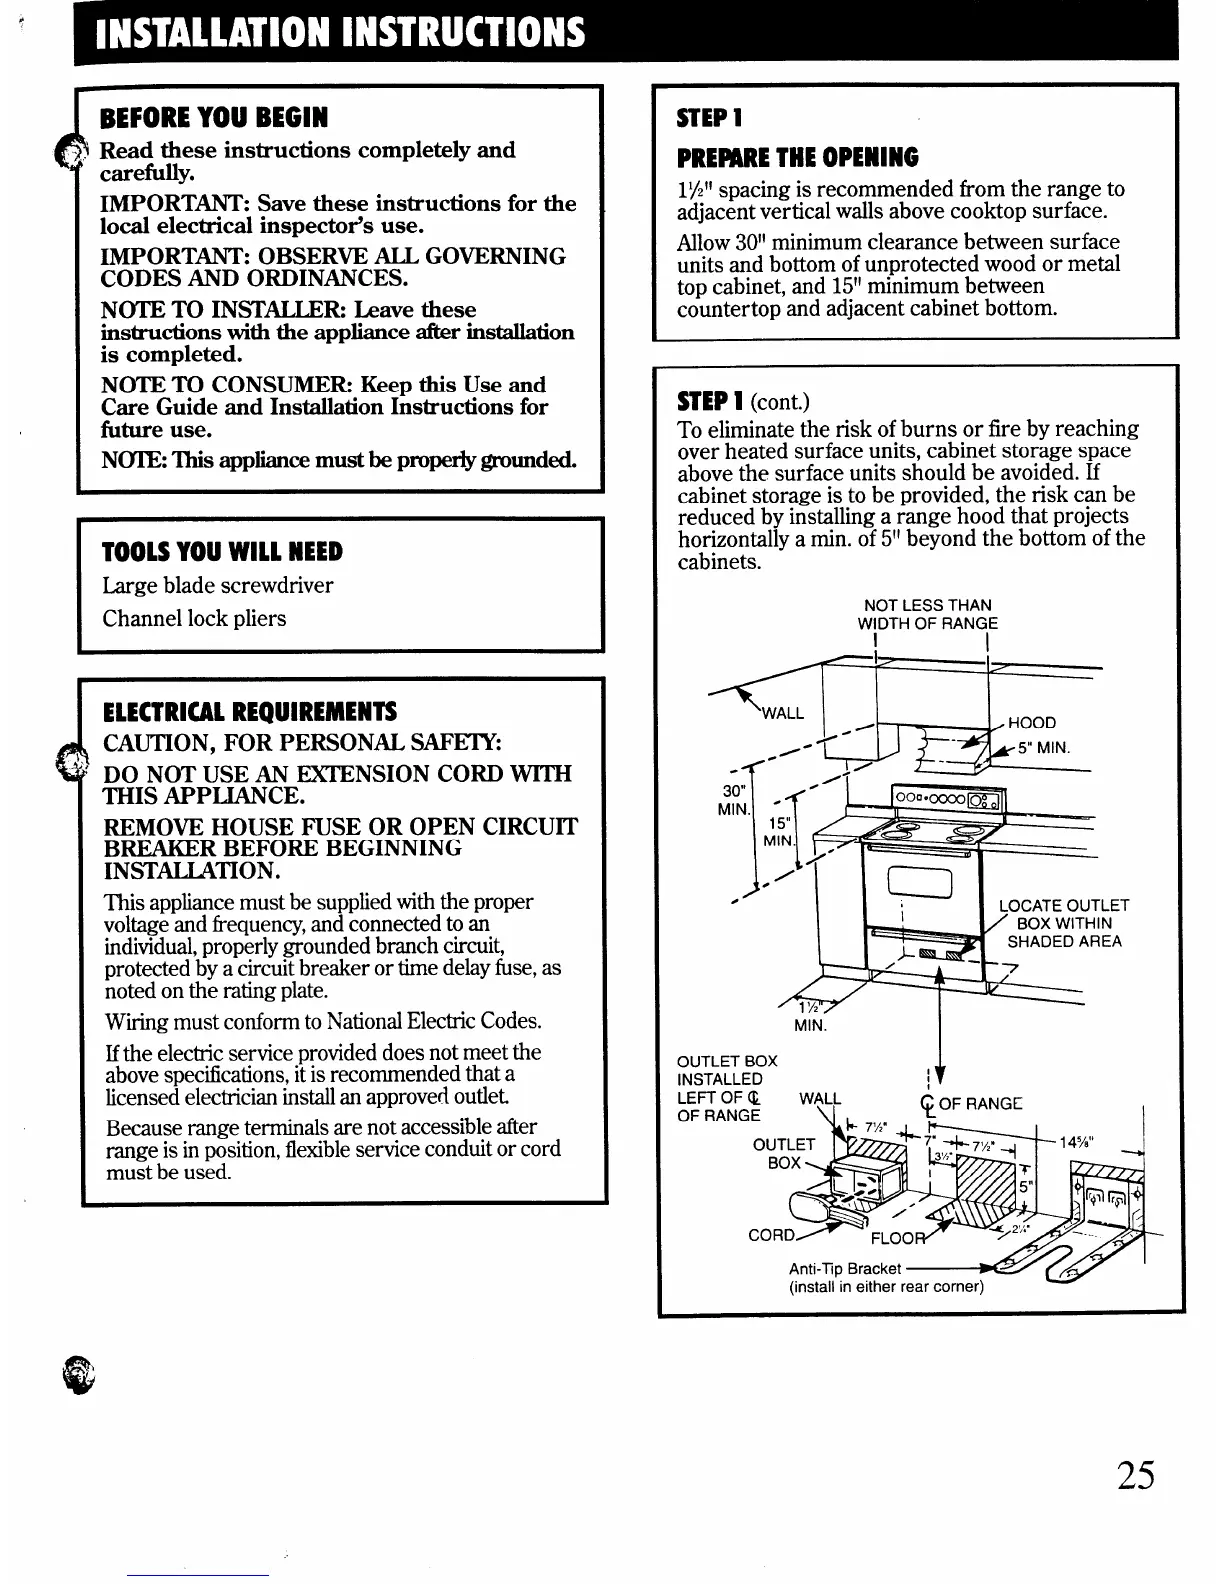
PREMRE THE OPENING
172”spacing is recommended from the range to
adjacent vertical walls above cooktop surface.
Allow301’minimum clearance between surface
units and bottom of unprotected wood or metal
top cabinet, and
151’minimum between
countertop and adjacent cabinet bottom.
STEP 1 (cont.)
To eliminate the risk ofburns or fire by reaching
over heated surface units, cabinet storage space
above the surface units should be avoided. If
cabinet storage is to be provided, the risk can be
reduced by installing a range hood that projects
horizontally a min. of 511beyond the bottom ofthe
cabinets.
NOT LESS THAN
WIDTH OF RANGE
I
1,
I
/
//
,
HOOD
./”
5“ MIN.
]1°”’ ~
// “
3;”
MIN. -
Ooocm o
m
15“
MIN.
0“
./
d
o
i
LOCATE OUTLET
/ BOX WITHIN
u
SHADED AREA
MIN.
OUTLET BOX
INSTALLED
I
I
I
LEFT
OF R
25