– 27 –
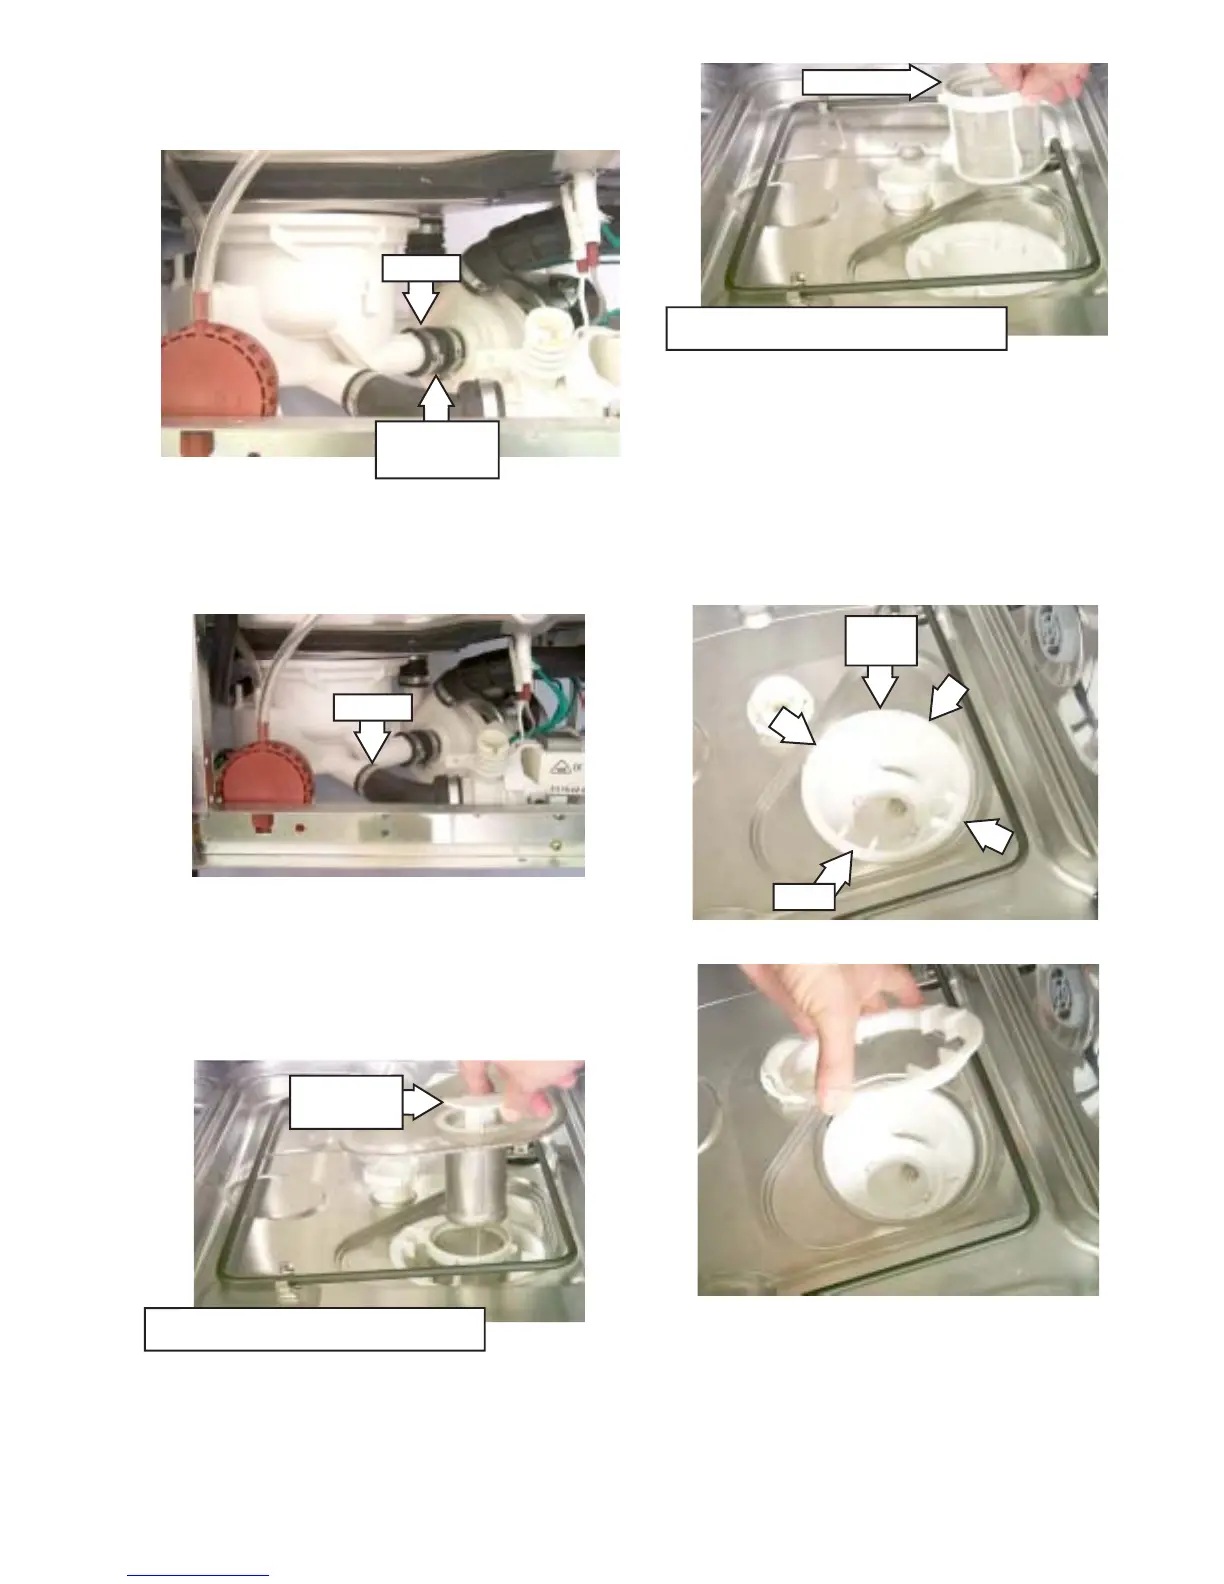
Note: The sump clamping nut turns
counterclockwise and may be difficult to remove.
It may be necessary to insert a screw driver or
other tool between the clamping nut tabs to
enable you to apply sufficient torque to break the
factory seal.
9. Remove the clamping nut.
10. Remove the sump gasket (not shown) and
sump.
11. Reverse the above procedure to install.
8. Remove the micro-filter.
5. Remove the clamp from the hose that
connects the sump to the drain pump
assembly.
6. Open the dishwasher door and remove the
bottom rack (not shown).
7. Remove the filter assembly.
Clamp
Clamp
Nut
Tabs
4. Remove the clamp from the hose that
connects the sump to the wash pump motor
hose.
Interconnect
Hose
Clamp
Assembly
Filter
Shown with washer arm removed.
Shown with washer arm removed.
Micro-filter
 Loading...