16
Continued directivity, or one of the three directivity null modes.
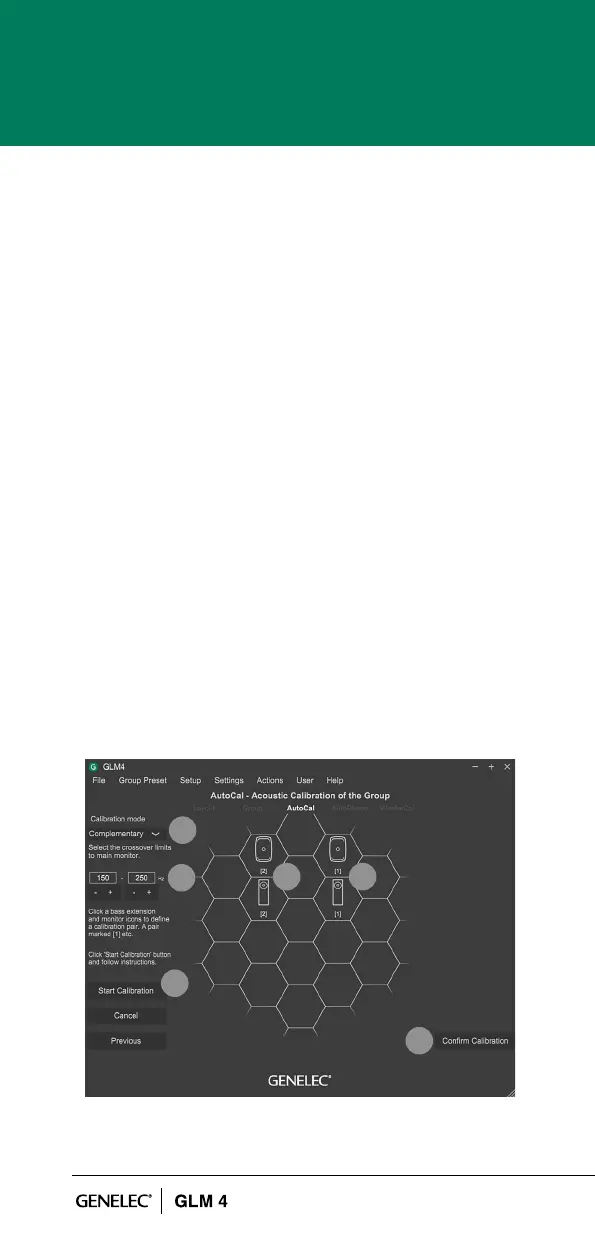
Each calibration mode or setting will require an individual
group to be created.
3. The parameters for setting the search limits for the crossover
to the main monitor should then be set. These controls are
available for all modes except the Continued directivity mode,
where the crossover value is xed based on the main monitor
connected in the pairing. This crossover has been set to
where the main monitor and woofer system have the closest
matched directivity.
4. Connect the measurement microphone to the GLM network
adapter, place the microphone at the listening position, at ear
height, and Click on the ‘Start Calibration’ button to start the
measurement and follow the dialog instructions.
• All Adaptive Woofer Systems and monitors will be measured.
• Optimization starts.
• Wait until optimization nished.
• The calibration results can be viewed by clicking any
loudspeaker icon.
5. Click ‘Conrm Calibration’ button to accept and save
the calibration to the setup le.
1
2
3
4
Figure 9. Adaptive woofer system calibration.
5
3

 Loading...