Do you have a question about the Generac Power Systems HTS and is the answer not in the manual?
Read safety information before installing, operating, or servicing equipment. Follow instructions on tags and decals.
Manufacturer cannot anticipate all hazards. Warnings are not all-inclusive. Use common sense and follow instructions.
Explains DANGER, WARNING, CAUTION symbols and their associated meanings and potential injury levels.
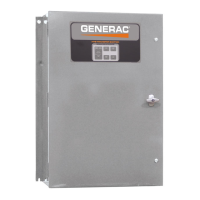
Describes the HTS transfer switch, its communication link with generators, and its function for critical load transfer.
Details communication methods between HTS and G/H panel generators, including Modbus and 2-wire start for non-G/H panels.
Explains how the HTS operates locally if communication with the generator is lost, using DIP switches or 2-wire start.
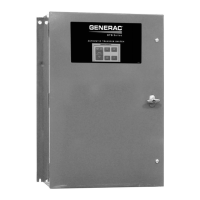
Information on the data label affixed to the enclosure, used for identifying the specific switch limits and for ordering parts.
Describes the standard NEMA 12 enclosure type, providing protection against dust, falling dirt, and dripping liquids for indoor use.
Emphasizes reading safety rules, complying with applicable codes, and consulting publications like NFPA 70 and UL 1008.
Outlines the steps involved in installing the transfer switch, including mounting, wiring, setting dip switches, and testing.
Instructions for carefully unpacking the transfer switch, inspecting for damage, and removing all packing material before installation.
Guidance on mounting the transfer switch enclosure, ensuring it is level and securely installed to a wall or support structure.
Details how to connect power source and load lines to the transfer mechanism terminals for both 100-400A and 600-2600A models.
Explains the transfer mechanism, its housing of main contacts, and its operation for 100-400A and 600-2600A models.
Describes the operational principles of the transfer mechanism for 100-400A and 600-2600A models, including solenoid coil activation.
Illustrates the main contacts configuration when connected to the normal (utility) power source, showing window indicators.
Illustrates the main contacts configuration when disconnected from both power sources, showing window indicators.
Illustrates the main contacts configuration when connected to the standby (emergency) power source, showing window indicators.
Provides instructions for connecting the HTS transfer switch to the engine generator connection panel using shielded 2-wire communication cable.
Details the function and settings of DIP switches on the HTS for voltage codes, Modbus address, TDN/INPHASE, CTTS/OTTS, and phase selection.
Explains that timers, voltage pickup, dropout, and exercise settings are programmed via the G/H control panel.
Describes how to add auxiliary contacts for customer accessories, remote lights, or annunciators by changing limit switches.
Guidance on performing functional tests after installation, ensuring proper operation and compliance with codes and standards.
Provides step-by-step instructions for manually operating the transfer switch, including specific procedures for different models and contact positions.
Procedures for performing voltage checks to ensure compatibility with power source voltages, including safety warnings.
Instructions for testing the electrical operation of the transfer system, including generator startup and transfer sequences.
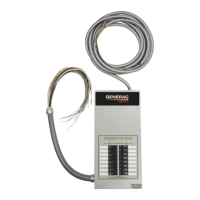
Identifies and explains the function of various switches and LEDs on the enclosure door and inside the switch for monitoring and control.
Details the step-by-step sequence of operations for utility failure, generator start, transfer, and return to utility.
Lists available transfer switch options such as Signal Before Transfer, Instrument Package, and different NEMA enclosure types.
Recommends operating the transfer switch monthly via a normal test to ensure proper function.
Instructions for annual cleaning and inspection of the transfer switch interior, looking for signs of damage.
Information on lubrication points for operating parts and main contacts, specifying approved lubricants.
Recommends annual checking of main current carrying contacts by an authorized technician for repair or replacement.
Specifies the type of batteries used in the controller and recommends replacement every three years.
Installation drawings for 100-400 Amp Low Voltage (LV) models, including dimensions and wiring specifications.
First part of installation drawings for the 0H6400ID-B model, showing enclosure dimensions and lug details.
Second part of installation drawings for the 0H6400ID-B model, detailing inside views and component labels.
Installation drawings for 100-400 Amp Low Voltage (LV) models, including dimensions and wiring specifications.
First part of installation drawings for the 0H6410ID-B model, showing enclosure dimensions and lug details.
Second part of installation drawings for the 0H6410ID-B model, detailing inside views and component labels.
Installation drawings for 100-400 Amp High Voltage (HV) models, including dimensions and wiring specifications.
First part of installation drawings for the 0H6420ID-B model, showing enclosure dimensions and lug details.
Second part of installation drawings for the 0H6420ID-B model, detailing inside views and component labels.
Installation drawings for 600-1000 Amp models, including dimensions and wiring specifications.
First part of installation drawings for the 0H6440ID-C model, showing enclosure dimensions and lug details.
Second part of installation drawings for the 0H6440ID-C model, detailing inside views and component labels.
Installation drawings for 1200-1600 Amp models, including dimensions and wiring specifications.
First part of installation drawings for the 0H6450ID-C model, showing enclosure dimensions and lug details.
Second part of installation drawings for the 0H6450ID-C model, detailing inside views and component labels.
Installation drawings for 2000-2600 Amp models, including dimensions and wiring specifications.
First part of installation drawings for the 0H6460ID-C model, showing enclosure dimensions and lug details.
Second part of installation drawings for the 0H6460ID-C model, detailing inside views and component labels.
Lists warranty requirements, including registration, proof of purchase, authorized service, and transferability.
Details items not covered by the warranty, such as normal maintenance, accidental damage, misuse, and wear and tear.
| Brand | Generac Power Systems |
|---|---|
| Model | HTS |
| Category | Switch |
| Language | English |