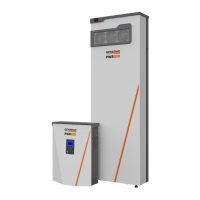
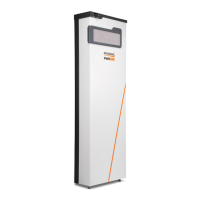
Installing PWRcell Battery
Installation Manual for Generac PWRcell Battery 15
Section 4: Installing PWRcell Battery
Carton Contents
• Wall bracket
• Lower wall mount and foot brackets (Outdoor
Rated model only).
• Chassis, including pre-installed electronics
package, battery jumpers, and cover.
• Hardware kit.
• Generac PWRcell Battery Installation Manual and
Generac PWRcell Battery Owner’s Manual.
NOTE: Lithium ion battery modules are shipped sepa-
rately. Keep battery modules in their original packaging
until installation. Observe storing and stacking require-
ments.
Preparing Location
• Verify grade is smooth. A sharply sloping or
irregular floor may hinder front cover installation.
• Sweep away any debris or dust that could get
pulled into the PWRcell Battery bottom intake vent.
Unboxing Battery Enclosure
1. Lay package on one of the long edges.
2. Remove top cardboard cap.
3. Remove Documentation and Hardware box and
set aside in a safe place.
4. Remove cardboard sleeve.
5. Lay unit onto its back.
6. Remove bottom cardboard cap.
7. Remove the battery front cover by sliding cover
toward the top of the unit, swinging cover bottom
out, and pulling the cover down.
8. Set cover aside in a safe place.
NOTE: Do not adjust the feet at this time. The feet are
shipped pre-positioned to ensure sufficient clearance for
front cover.
Installing Battery Enclosure
PWRcell Battery must be installed using wall bracket pro-
vided. PWRcell Battery must also have its pre-installed
adjustable feet supported from below. For outdoor rated
models, use the designated foot brackets.
To scale Installation Template for critical mounting loca-
tions and requirements located on inside of packaging.
See Figure 4-6 on the following page for battery dimen-
sions and knockout locations. See Specifications for
unit weight.
Fastener Requirements
NOTE: The details below are minimum guidance. Con-
sult local building codes and a structural engineer to
ensure the use of appropriate fasteners.
• Minimum 4 structural fasteners required for wall
bracket, corrosion protected steel, diameter 1/4 in.
• Minimum 4 structural fasteners required for foot
bracket.
• Fastener head clearance 5/8 in tall, 7/8 in diameter.
• Use a flat washer between the fastener head and
wall bracket if fastener is not a flanged head.
Fastening Recommendations
•
All fasteners must engage 1.5 in (3.8 cm) with a
structural member. If mounting into stud framing
use a stud finder to locate the center of the stud.
• If mounting into stud framing, the bracket must be
fastened to a minimum of two separate structural
members.
• If mounting to a foundation or masonry, make sure
fasteners are clear of any mortar joints.
• If stud is greater than 16 in on center, a cross brace
must be used.
• If mounting on vinyl siding, unistruts must be used.
• Brackets must be level.
• Verify distance between shelf bracket and bottom.
WARNING
(000697)
Personal injury. Use caution when handling heavy parts and
battery modules. Lift heavy parts in teams if necessary. Failure
to do so could result in death, serious injury, and equipment or
property damage.
WARNING
(000698b)
Personal injury. Install PWRcell Battery enclosure before
installing battery modules within the enclosure. Failure to
do so could result in death, serious injury, or equipment or
property damage.
 Loading...