Model 2180A
22
selection, (En or dE). Press the Mode button to toggle the selection. De-Energized (dE)
is the factory default for this selection.
The High LED on the front panel flashes while the latching/non-latching option displays.
The display indicates the current selection, (nL or LA). Press the Mode button to toggle
the selection. Latching (LA) is the factory default for this selection.
The last High alarm option to appear on the display is the alarm set point (trip level). If
this level is reached or exceeded, the High alarm outputs activate. The display indicates
the current High alarm set point. Press the Mode button repeatedly, until the desired high
alarm set point appears on the display. A set point of 60% of full-scale value is the
factory default for this selection.
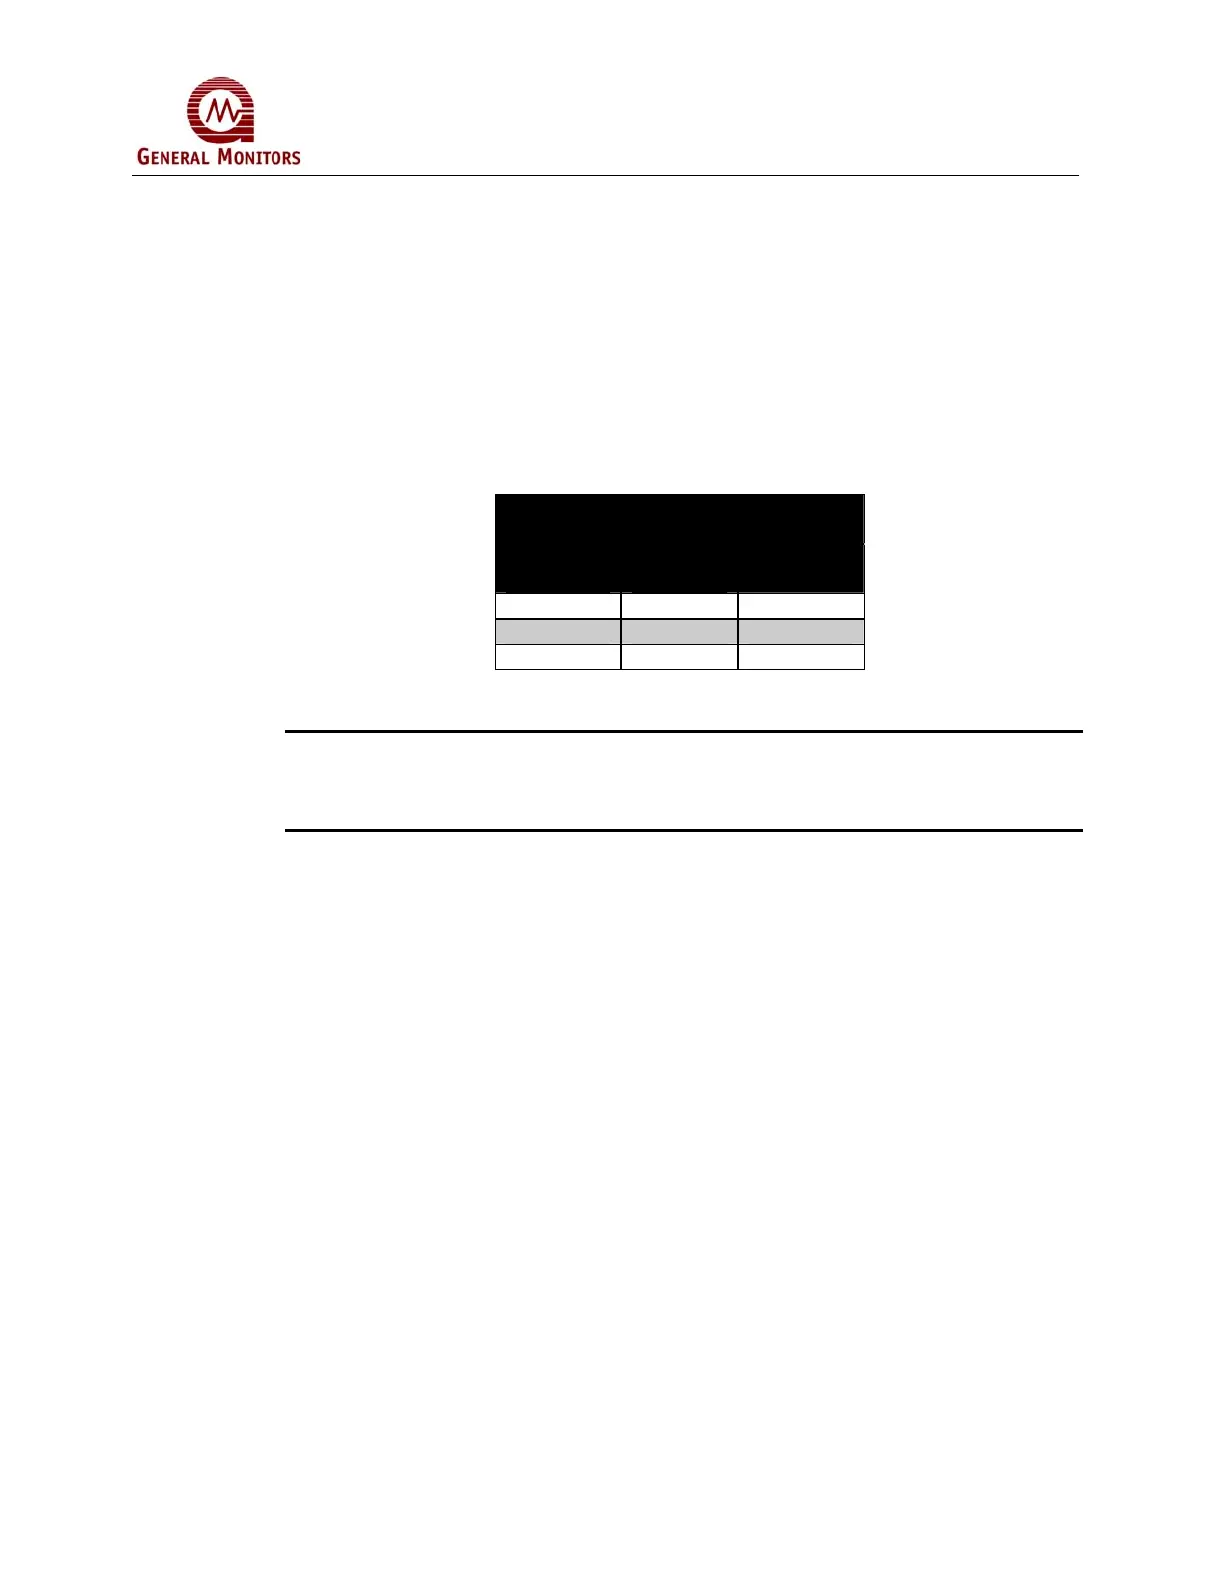
High Alarm
(All Values in ppm)
Measure
Range
Set Point
Range
Increment
0-100 5-95 5
0-50 2-48 2
0-20 1-19 1
Table 7: High Alarm Set Points
NOTE: The High set point cannot be set lower than the current Low set point. To
accomplish this, you need to go through setup twice. The Low set point should
be set lower than the desired High set point, then re-enter the Setup mode and
set the High set point.
3.8.3 Low Alarm Options
Next, the Low LED flashes while the energized/de-energized option displays. This option
is available only for discrete alarms configuration. The display indicates the current
selection, (En or dE). Press the Mode button to toggle the selection. De-Energized (dE)
is the factory default for this selection.
The Low LED on the front panel flashes while the latching/non-latching option is
displayed. The display will indicate the current selection, (nL or LA). Press the Mode
button to toggle the selection. Non-Latching (nL) is the factory default for this selection.
The last Low alarm option to appear on the display is the alarm set point (trip level). If this
level is reached or exceeded, the Low alarm outputs activate. The display indicates the
current Low alarm set point. Press the Mode button repeatedly, until the desired Low
alarm set point appears on the display. The Low set point cannot be set higher than the
High set point. A set point of 30% of full-scale value is the factory default for this
selection.
3.8.4 Password Enabled/Disabled Option
After the Calibration Level option has been selected the Password Enabled/Disabled
option displays. The display indicates the current selection, (PE or Pd). Press the Mode
button to toggle the selection. Password Disabled (Pd) is the factory default for this
selection.