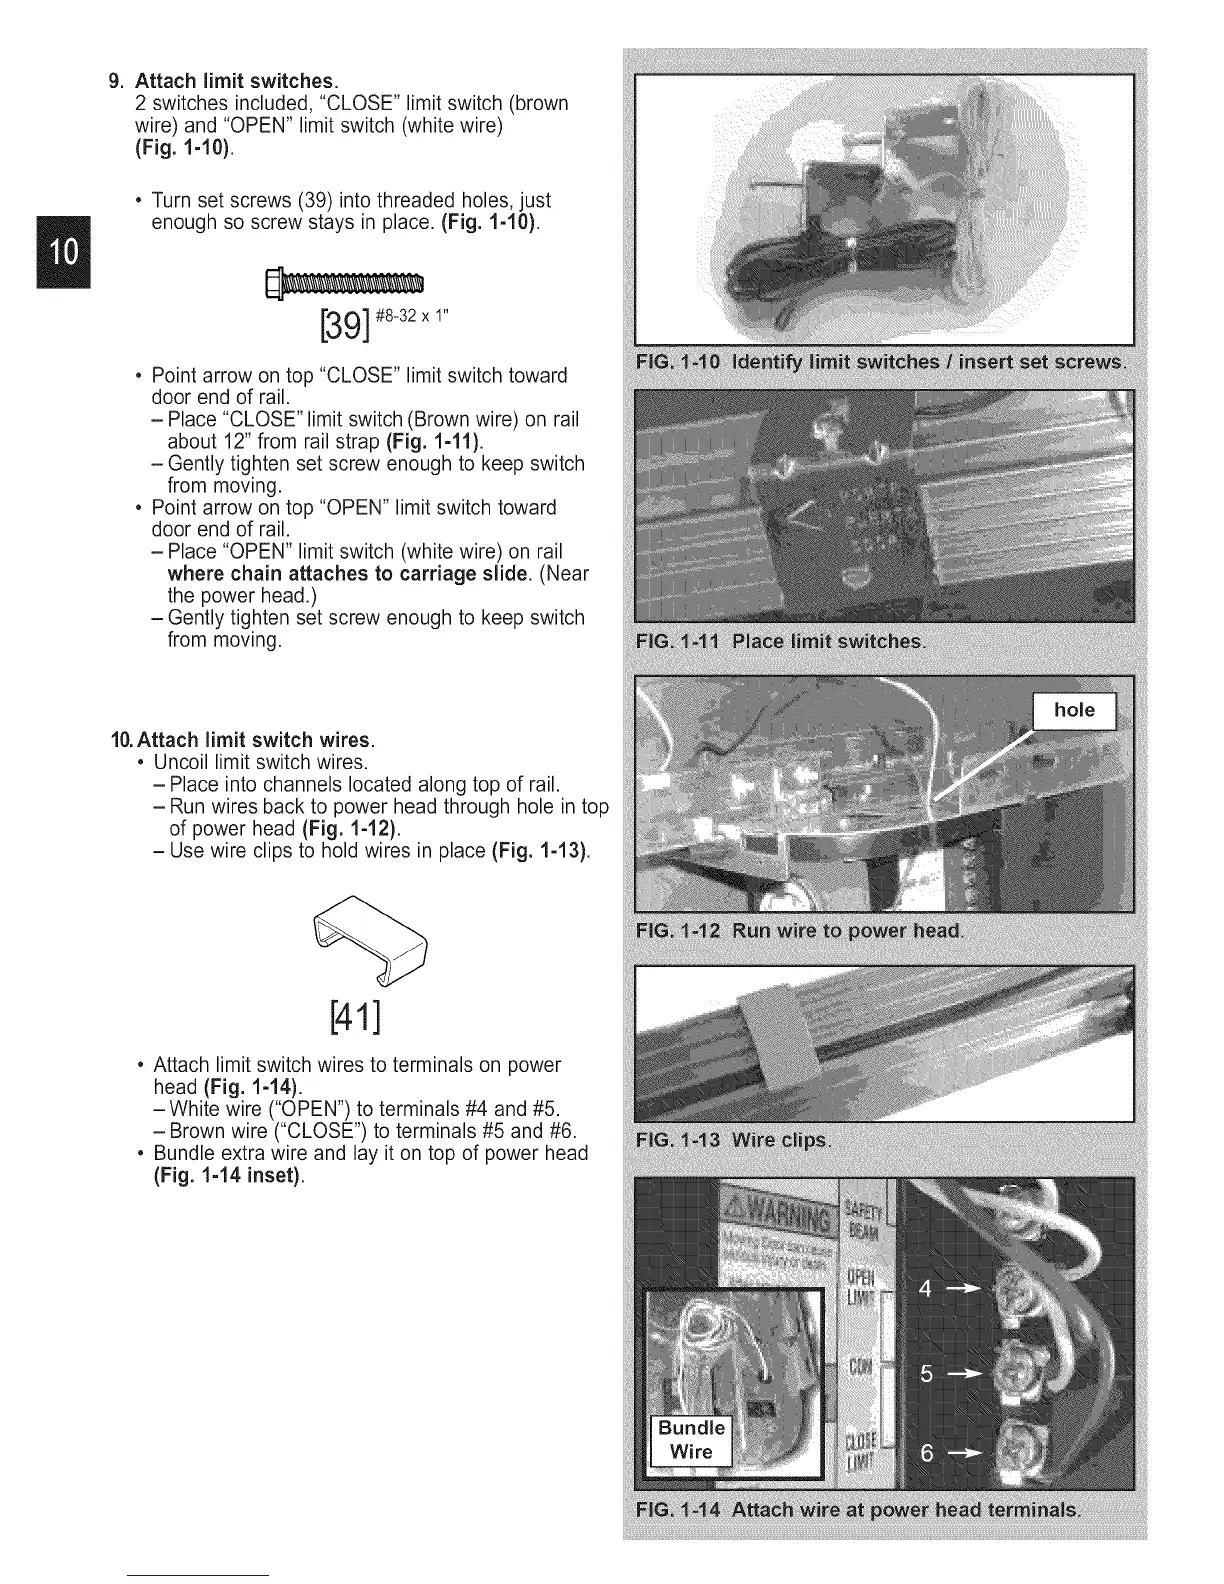
g. Attach limit switches.
2 switches included, "CLOSE" limit switch (brown
wire) and "OPEN" limit switch (white wire)
(Fig. 1-10).
• Turn set screws (39) into threaded holes, just
enough so screw stays in place. (Fig. 1-10).
[39]#8_32xi,,
Point arrow on top "CLOSE" limit switch toward
door end of rail.
- Place "CLOSE" limit switch (Brown wire) on rail
about 12" from rail strap (Fig. 1-11).
- Gently tighten set screw enough to keep switch
from moving.
Point arrow on top "OPEN" limit switch toward
door end of rail.
- Place "OPEN" limit switch (white wire) on rail
where chain attaches to carriage slide. (Near
the power head.)
- Gently tighten set screw enough to keep switch
from moving.
10.Attach limit switch wires.
• Uncoil limit switch wires.
- Place into channels located along top of rail.
- Run wires back to power head through hole in top
of power head (Fig. 1-12).
- Use wire clips to hold wires in place (Fig. 1-13).
[41]
• Attach limit switch wires to terminals on power
head (Fig. 1-14).
-White wire ("OPEN") to terminals #4 and #5.
- Brown wire ("CLOSE") to terminals #5 and #6.
• Bundle extra wire and lay it on top of power head
(Fig. 1-14 inset).
 Loading...