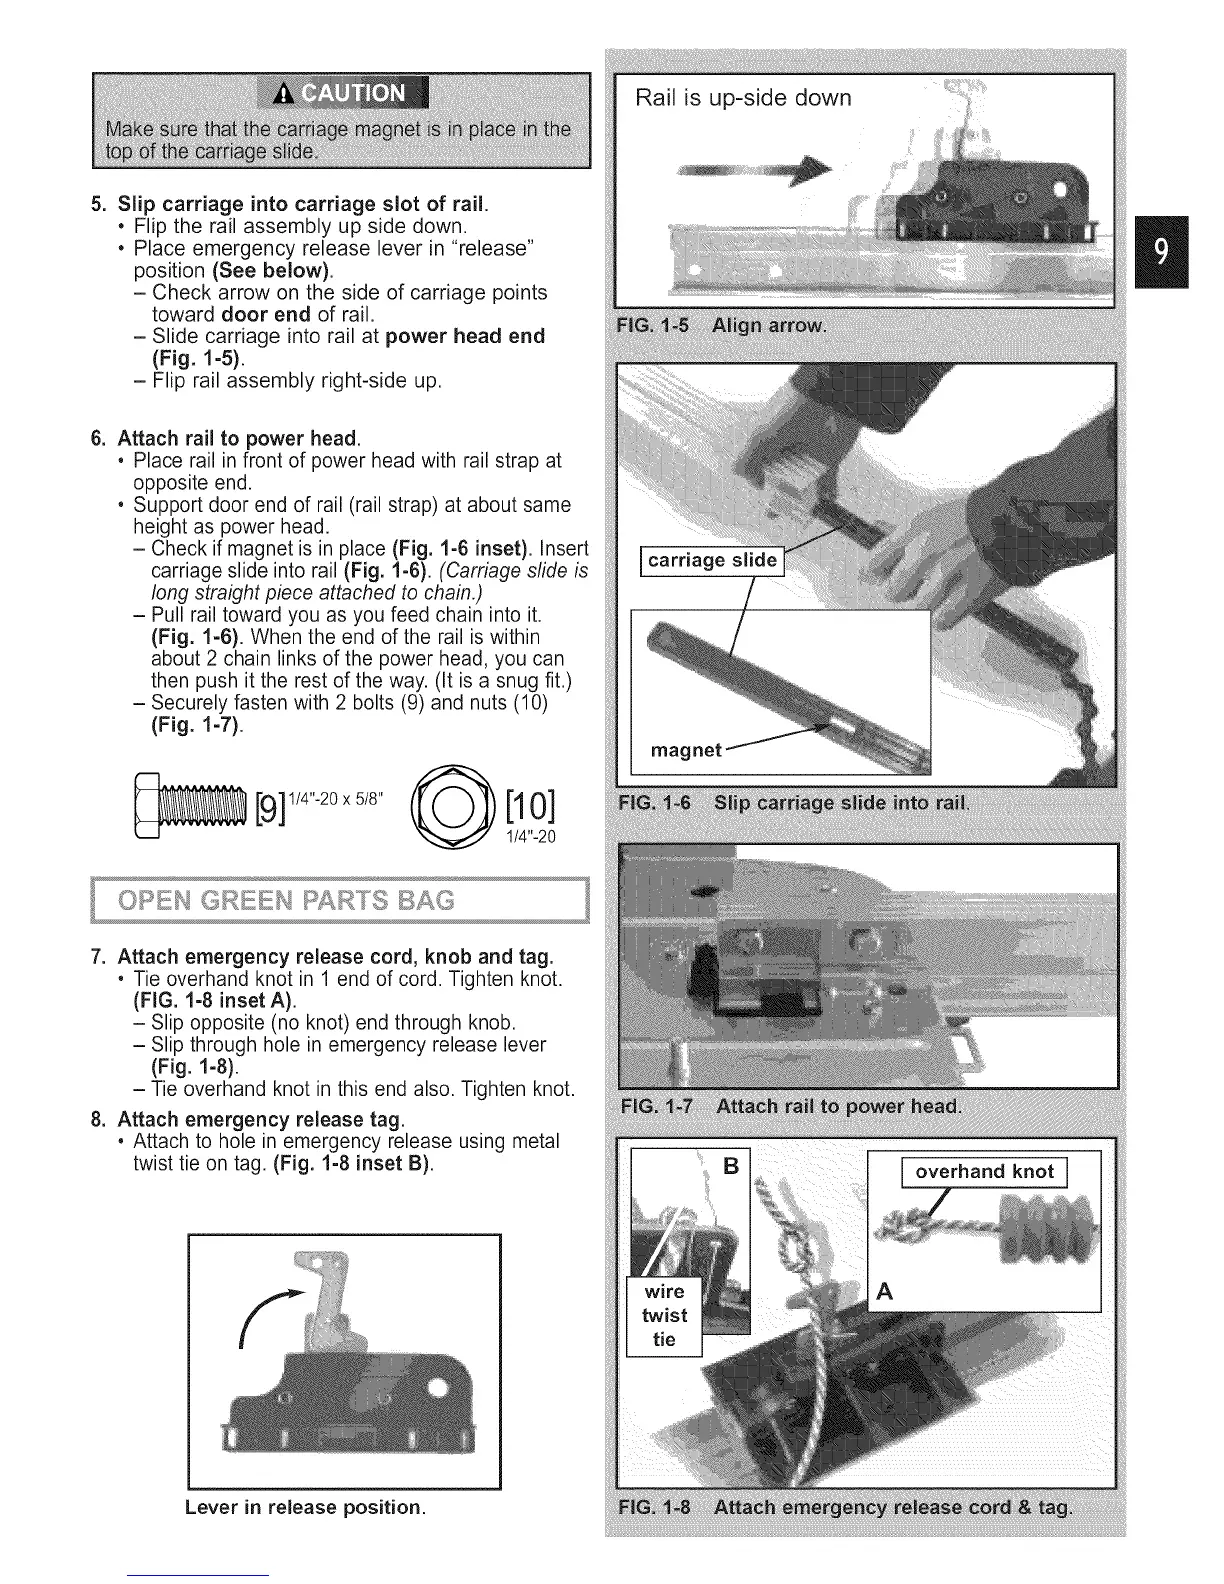
5. Slip carriage into carriage slot of rail.
• Flip the rail assembly up side down.
• Place emergency release lever in "release"
position (See below).
- Check arrow on the side of carriage points
toward door end of rail.
- Slide carriage into rail at power head end
(Fig. 1-5).
- Flip rail assembly right-side up.
6. Attach rail to power head.
* Place rail in front of power head with rail strap at
opposite end.
* Support door end of rail (rail strap) at about same
height as power head.
- Check if magnet is in place (Fig. 1-6 inset). Insert
carriage slide into rail (Fig. 1-6). (Carriage slide is
long straight piece attached to chain.)
- Pull rail toward you as you feed chain into it.
(Fig. 1-6). When the end of the rail is within
about 2 chain links of the power head, you can
then push it the rest of the way. (It is a snug fit.)
- Securely fasten with 2 bolts (9) and nuts (10)
(Fig. 1-7).
9] 1/4"-20x 5/8"
[10]
1/4"-20
7. Attach emergency release cord, knob and tag.
* Tie overhand knot in 1 end of cord. Tighten knot.
(FIG. 1-8 inset A).
- Slip opposite (no knot) end through knob.
- Slip through hole in emergency release lever
(Fig. 1-8).
- Tie overhand knot in this end also. Tighten knot,
8. Attach emergency release tag.
* Attach to hole in emergency release using metal
twist tie on tag. (Fig. 1-8 inset B).
Lever in release position.
B
overhand knot ]
 Loading...