SmartObserver User Manual
SmartObserver Data Logger
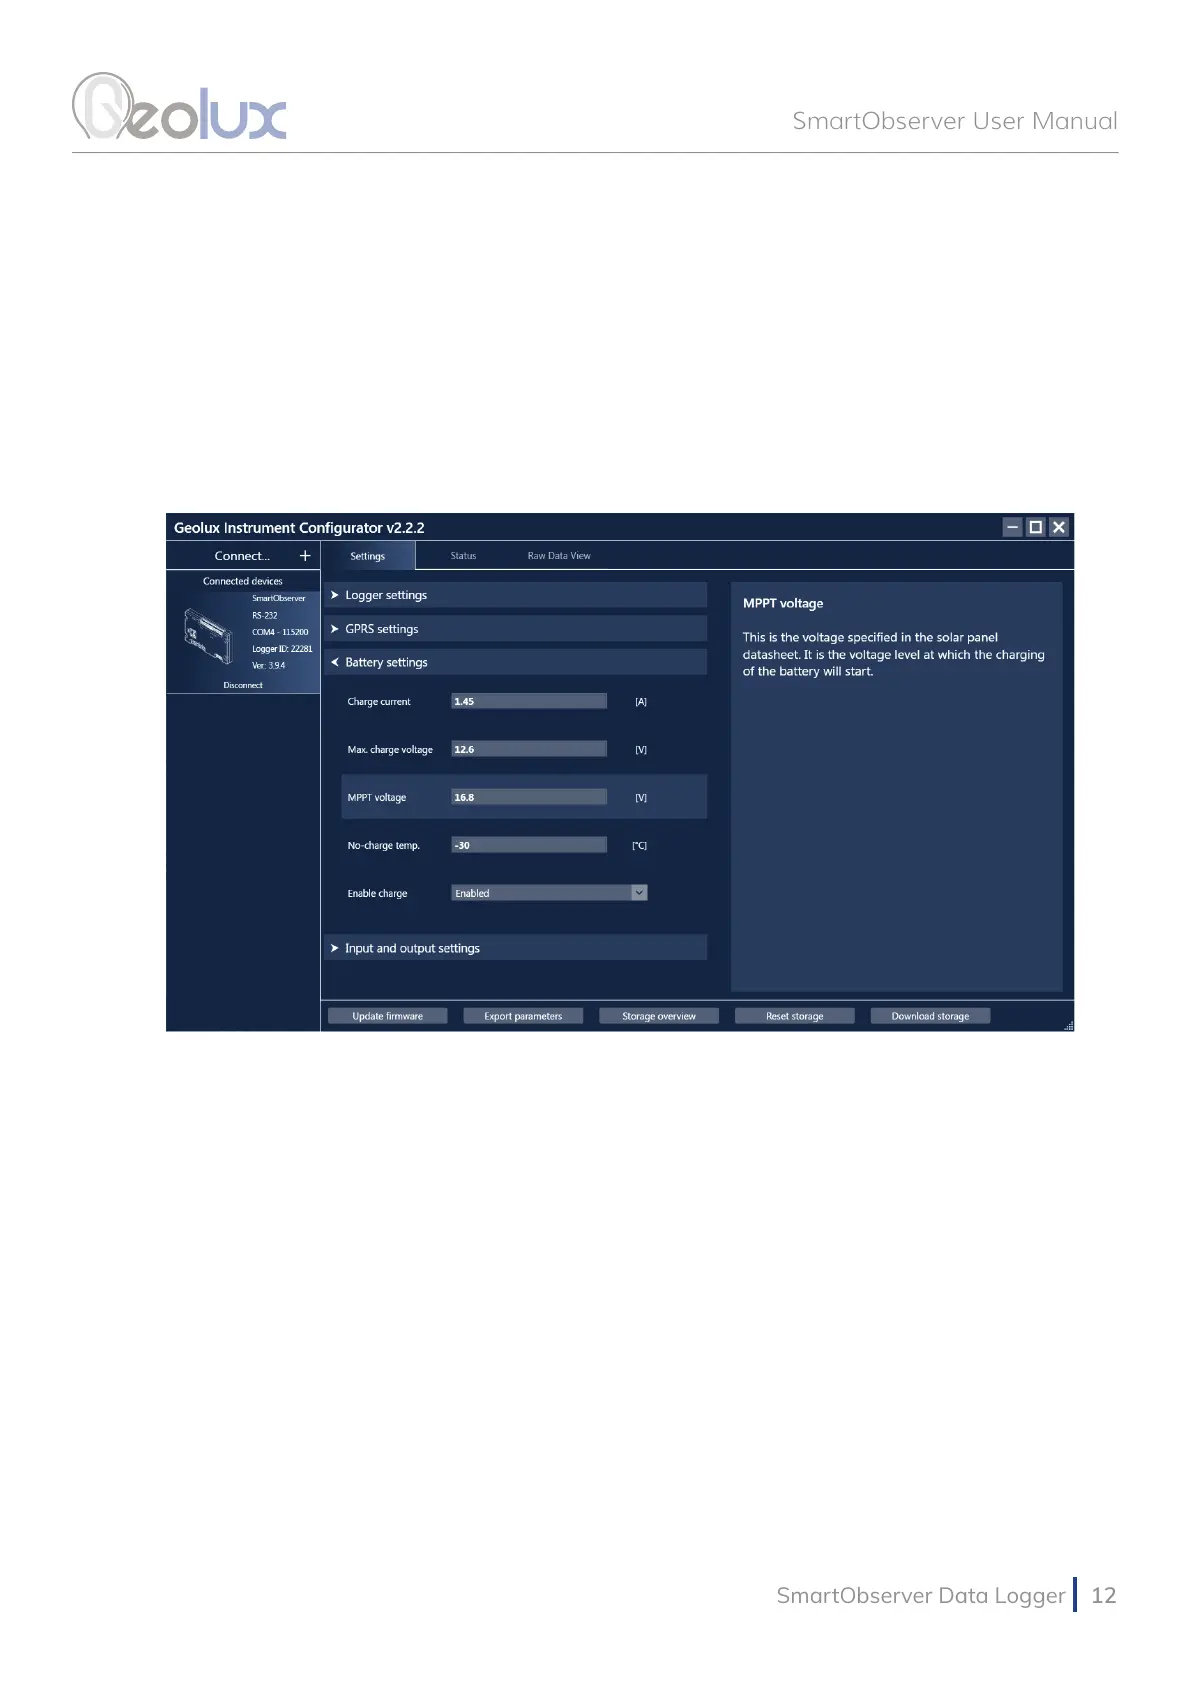
Picture 10. Geolux Instrument Congurator - Settings View
A detailed description of the selected parameter appears on the right side of the window when the
user clicks on, or begins to change, a specic setting. When a setting is changed, the Set button
will appear next to the setting. By clicking the Set button, the user conrms the change and the
new setting is saved. The Update rmware button allows the user to update the rmware of the device,
while the Export parameters button exports the current settings to .txt le. By clicking the Storage
overview button the user can view the stored data count, as well as the date and time of the rst and
last data stored. The entire storage can be reset by clicking the Reset storage button, or downloaded by
clicking the Download storage button.
Navigating to the Status tab shown in Picture 11. allows the user to view different status
information.
To check the GPRS connectivity status, a progress bar on the top indicates the strength of the
modem signal. The strength of the signal is checked and the progress bar value is updated every
10 seconds. If necessary, the user can check the strength of the signal at any time by clicking the
Reload button next to the progress bar. Clicking the Send SMS button allows the user to send an
SMS message from the data logger to any mobile phone number to verify that the data logger has
successfully connected to the GSM network. SMS messages can also be sent to the data logger for
diagnostic purposes. SMS diagnostics is described in chapter 8.
Clicking the Check device info button displays the SmartObserver’s ID and the number of
connected devices. If there are any devices connected, additional information about them will be
displayed and the user can view information about the connected instruments’ readings by clicking
the Check device readings button.
The Check power status button gives information about the input voltage and charging current
of the data logger, as well as the battery voltage, while the Check modem status button displays
information about the modem.
If the HydroCam camera is connected to the SmartObserver data logger, the user can obtain the
image from the camera by clicking the Check camera picture button.