20
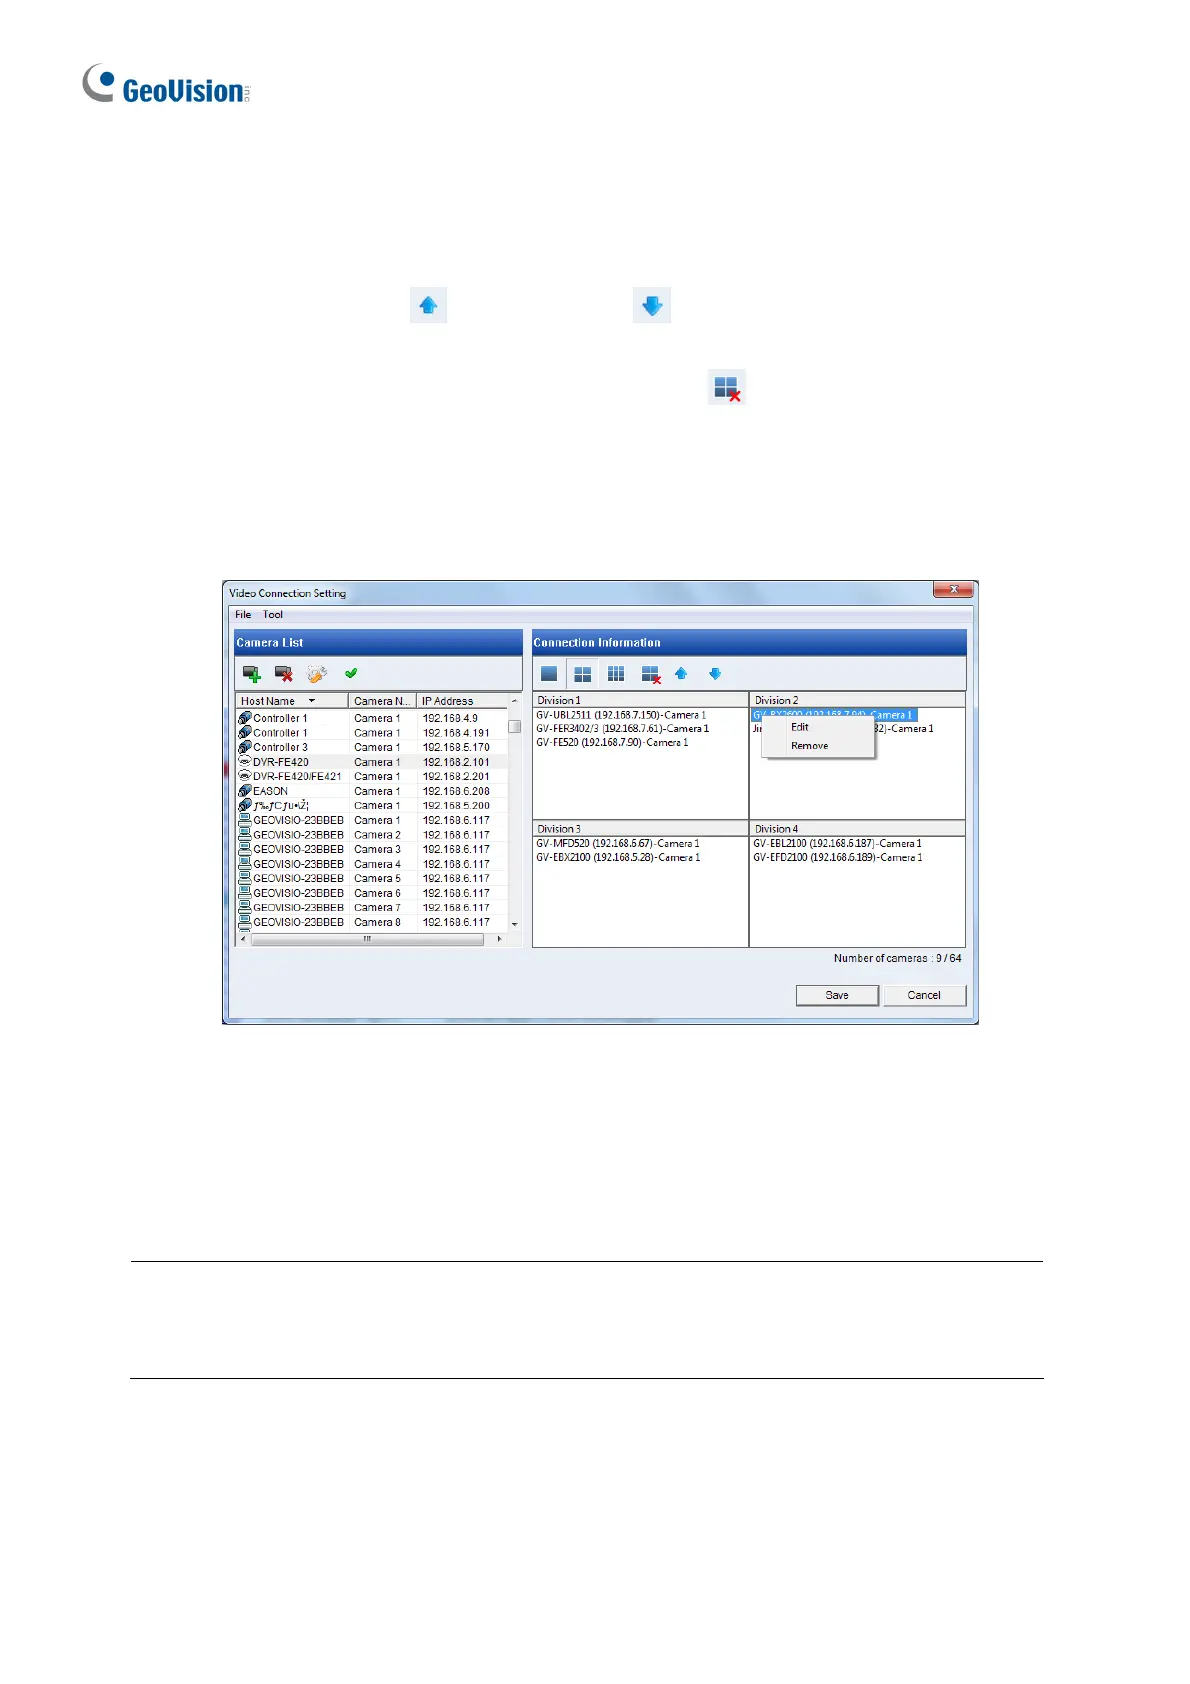
6. Add channels to the Connection Information column.
A. Drag and drop the camera from the Camera List to the Connection Information
column.
B. Use the Move Up
and Move Down buttons to change the display order of
these channels.
C. To remove a selected camera, click the Remove
button.
D. If you have changed the default ID and password of the added GV-IP Devices and
GV-Mobile Server, right-click the channel, select Edit and type the username and
password to log in for connection. By default, the login ID and password for all GV-IP
Devices are admin.
7. Click Save.
The cameras in the Connection Information c
olumn will be updated to GV-IP Decoder Box
Series / GV-Pad Mini and looped at a 30-second interval by default.
Note: Fisheye dewarping is only supported by GV-IP Decoder Box Plus. To dewarp the
fisheye view, you will need to choose 1-division layout or assign the camera to Grid 1 of the
4-division view.
For details on adding a third-party device that adhere to ONVIF or RTSP, see 2.7.2 Adding
a Third-party Device in GV-IP Decoder Box and GV-Pad Mini User’s Manual.
 Loading...