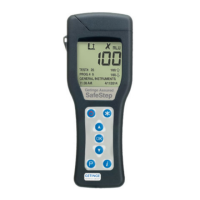
GETINGE SAFESTEP ATP MONITOR GETINGE SAFESTEP ATP MONITOR
21 22
The handheld management tab is for adding/deleting and
managing the handheld devices. In the device management
you can delete devices by clicking the delete handheld
device. The systemtime and date can be set by the drop
down for date and time. Get factory default allow you to
reset the device to the factory default. Load handheld to
database puts the device information in the handheld
database. There is a default template upload to put a
default data set into the handheld itself. Data will be
downloaded from a device that is not registered, however
all devices must be registered for reports to be created.
If you would like to change the path to where the data
resides to another local folder or a network folder, you can
modify the location in this tab by clicking the Get Database
Location buon and modifying that location. You must
move the database folder to the new location specified.
An additional database backup is available to copy the
database to a USB drive, network drive or a flash drive.
The ping, clear & disconnect commands are for testing the
characteristics of a device with support.
The program numbers tab allows admins to assign program
numbers to each device set. The handheld can handle 5000
program points. You can assign a template that may be
assigned to another device by checking “Default Upload
Template.”
Contact your Getinge representative for installation or
soware assistance.
Click the back arrow on the top right to close the soware.
We can assist with soware or hardware issues with the
hardware or soware that we supplied.
The Getinge SafeStep ATP Monitor unit does not require
any specific routine operator or service engineer
maintenance.
6.1 Cleaning the Casework
Clean the unit casework when required using a dry or
slightly damp cloth only.
WARNING: Never clean the unit using a wet cloth, or by
washing it under running water.
CAUTION: Do not use solvents or other strong cleaning
solutions as these may aack and deform the unit’s plastic
components, and seriously degrade its performance.
6.2 Replacing the Baeries
For best results, the baeries should replaced when the low
baery warning icon is flashing.
Refer to section 2.4 for how to fit new baeries – taking care
not to mix the old baeries with the new ones.
IMPORTANT: Always dispose of old baeries in accordance
with your local authority regulations.
6.3 Cleaning and Replacing the
Protective Pocket
The unit is designed with a special protective pocket, which
can be removed for cleaning or replacement if required.
WARNING: Always turn off the unit before removing the
protective pocket.
To remove the protective pocket, open the unit’s lid, tightly
grasp the finger grip of the pocket, gently pull the pocket
upwards, and remove it from the unit.
1. Grasp finger grip. 2. Pull pocket upwards. 3. Remove pocket.
CAUTION: Great care should be taken when removing the
pocket not to damage it or the surrounding casework. Do
not use excessive force. Never use a tool to pull the pocket
out.
Carefully clean the interior of the pocket using water or a
very mild detergent solution – ensuring that the pocket is
completely dry and clean before placing it back into the
unit.
WARNING: Do not use solvents or other strong chemicals
as these will degrade the clear optical section of the pocket
and affect the performance of the unit.
To replace the pocket, carefully insert the pocket ensuring
that it is correctly orientated, and then push it fully down
until it clicks into position.
1. Insert pocket in the 2. Push fully down until 3. Push RS232 cover
orientation shown. it clicks into place. back under lip.
WARNING: Do not use excessive force when replacing the
pocket. If the pocket jams during insertion, remove it fully,
check for obstructions or damage, and then try again.
Finally ensure that the black rubber RS232 cover is pushed
down and that the lid can be fully closed – see section 6.3.
6. Operator Maintenance

 Loading...