GETINGE SAFESTEP ATP MONITOR GETINGE SAFESTEP ATP MONITOR
7 8
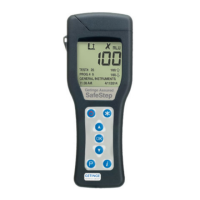
With the unit turned on, and having completed its internal
calibration self-checks, it is then ready to perform a new
sample measurement, and the display shows the following
details:
Insert Sample Icon
Program Number Upper & Lower
and Location Threshold
Plan Number and Name User Name
Various keypad options are now available, as detailed in
each of the following sections:
Buon Action Section
Access set-up menu options
4
Select different User ID 4.1
Select program number
4.2
Select different Test Plan
4.3
Perform calibration 2.7
Start new measurement 3
View previous test results 4.5
Show statistical result data 4.6
Turn unit off 2.8
3.1 Programmable Test Locations
The unit can store up to 5000 individual programmable test
locations (numbered PROG# 0 to PROG# 4999).
Each location is assigned a pair of upper ( ) and lower ( )
result threshold values, plus an optional location name.
When a sample measurement result is displayed, the
RLU reading is compared against the selected Program
thresholds to determine the overall Pass or Fail result:
Banding Result
Reading ≤ lower threshold ( ) Pass
Reading > upper threshold ( ) Fail
For details of how to determine the appropriate program
thresholds for your particular operating procedures, please
contact your Getinge representative.
To set-up the Program thresholds, refer the section 4.2.
To select a Program location press the “P” buon, then use
the up and down buons to change the Program PROG# to
the desired Program location, followed by the “OK” buon
to accept the new location, or the “P” buon to cancel the
selection.
TIP: While selecting a PROG#, the display also shows the
time and date that the Program location was last tested.
NOTE: If the selected Program location does not have
any thresholds defined, they must be set-up using the
PROGRAM menu option (see section 4.2) before the
Program can be used.
3. Sample Measurements and
Test Results
3.2 Taking a Sample Measurement
IMPORTANT: Please refer to the Test Swab and Test Sponge
Product Specification and Kit Inserts for full details of how
to use the Test Swab and Test Sponge device.
NOTE: Always allow the unit sufficient time to acclimatise
to any change in environment, temperature or humidity
before taking sample measurements.
To perform a sample measurement, follow the steps below:
For Flat Surfaces Using the Test® Swab
• Swab the sample area and activate the Test® Swab device
(see Kit Insert for complete useage details)
• Open the unit lid, insert the Test® Swab device into the
unit, and close the lid
• Press the “OK” buon and wait 15 seconds for the result
to be displayed
For Scopes and Cannulated Instruments Using the Test
Sponge and Test Swab
• Pass Test Sponge through channel. (See Kit Insert for
complete useage details)
• Cut off tip of Test Sponge into the Test Swab tube
• Swab outside surface of scope or instrument and activate
Test® Swab device
• Open the unit lid, insert the Test Swab device into the
unit, and close the lid
• Press the “OK” buon and wait 15 seconds for the result
to be displayed
WARNING: Always ensure that the exterior of the Test®
Swab device is clean and dry before inserting it into the
unit. Never insert anything other than a Test® Swab device
into the unit. Never insert a device into the unit when the
protective pocket is removed (refer to section 6.3).
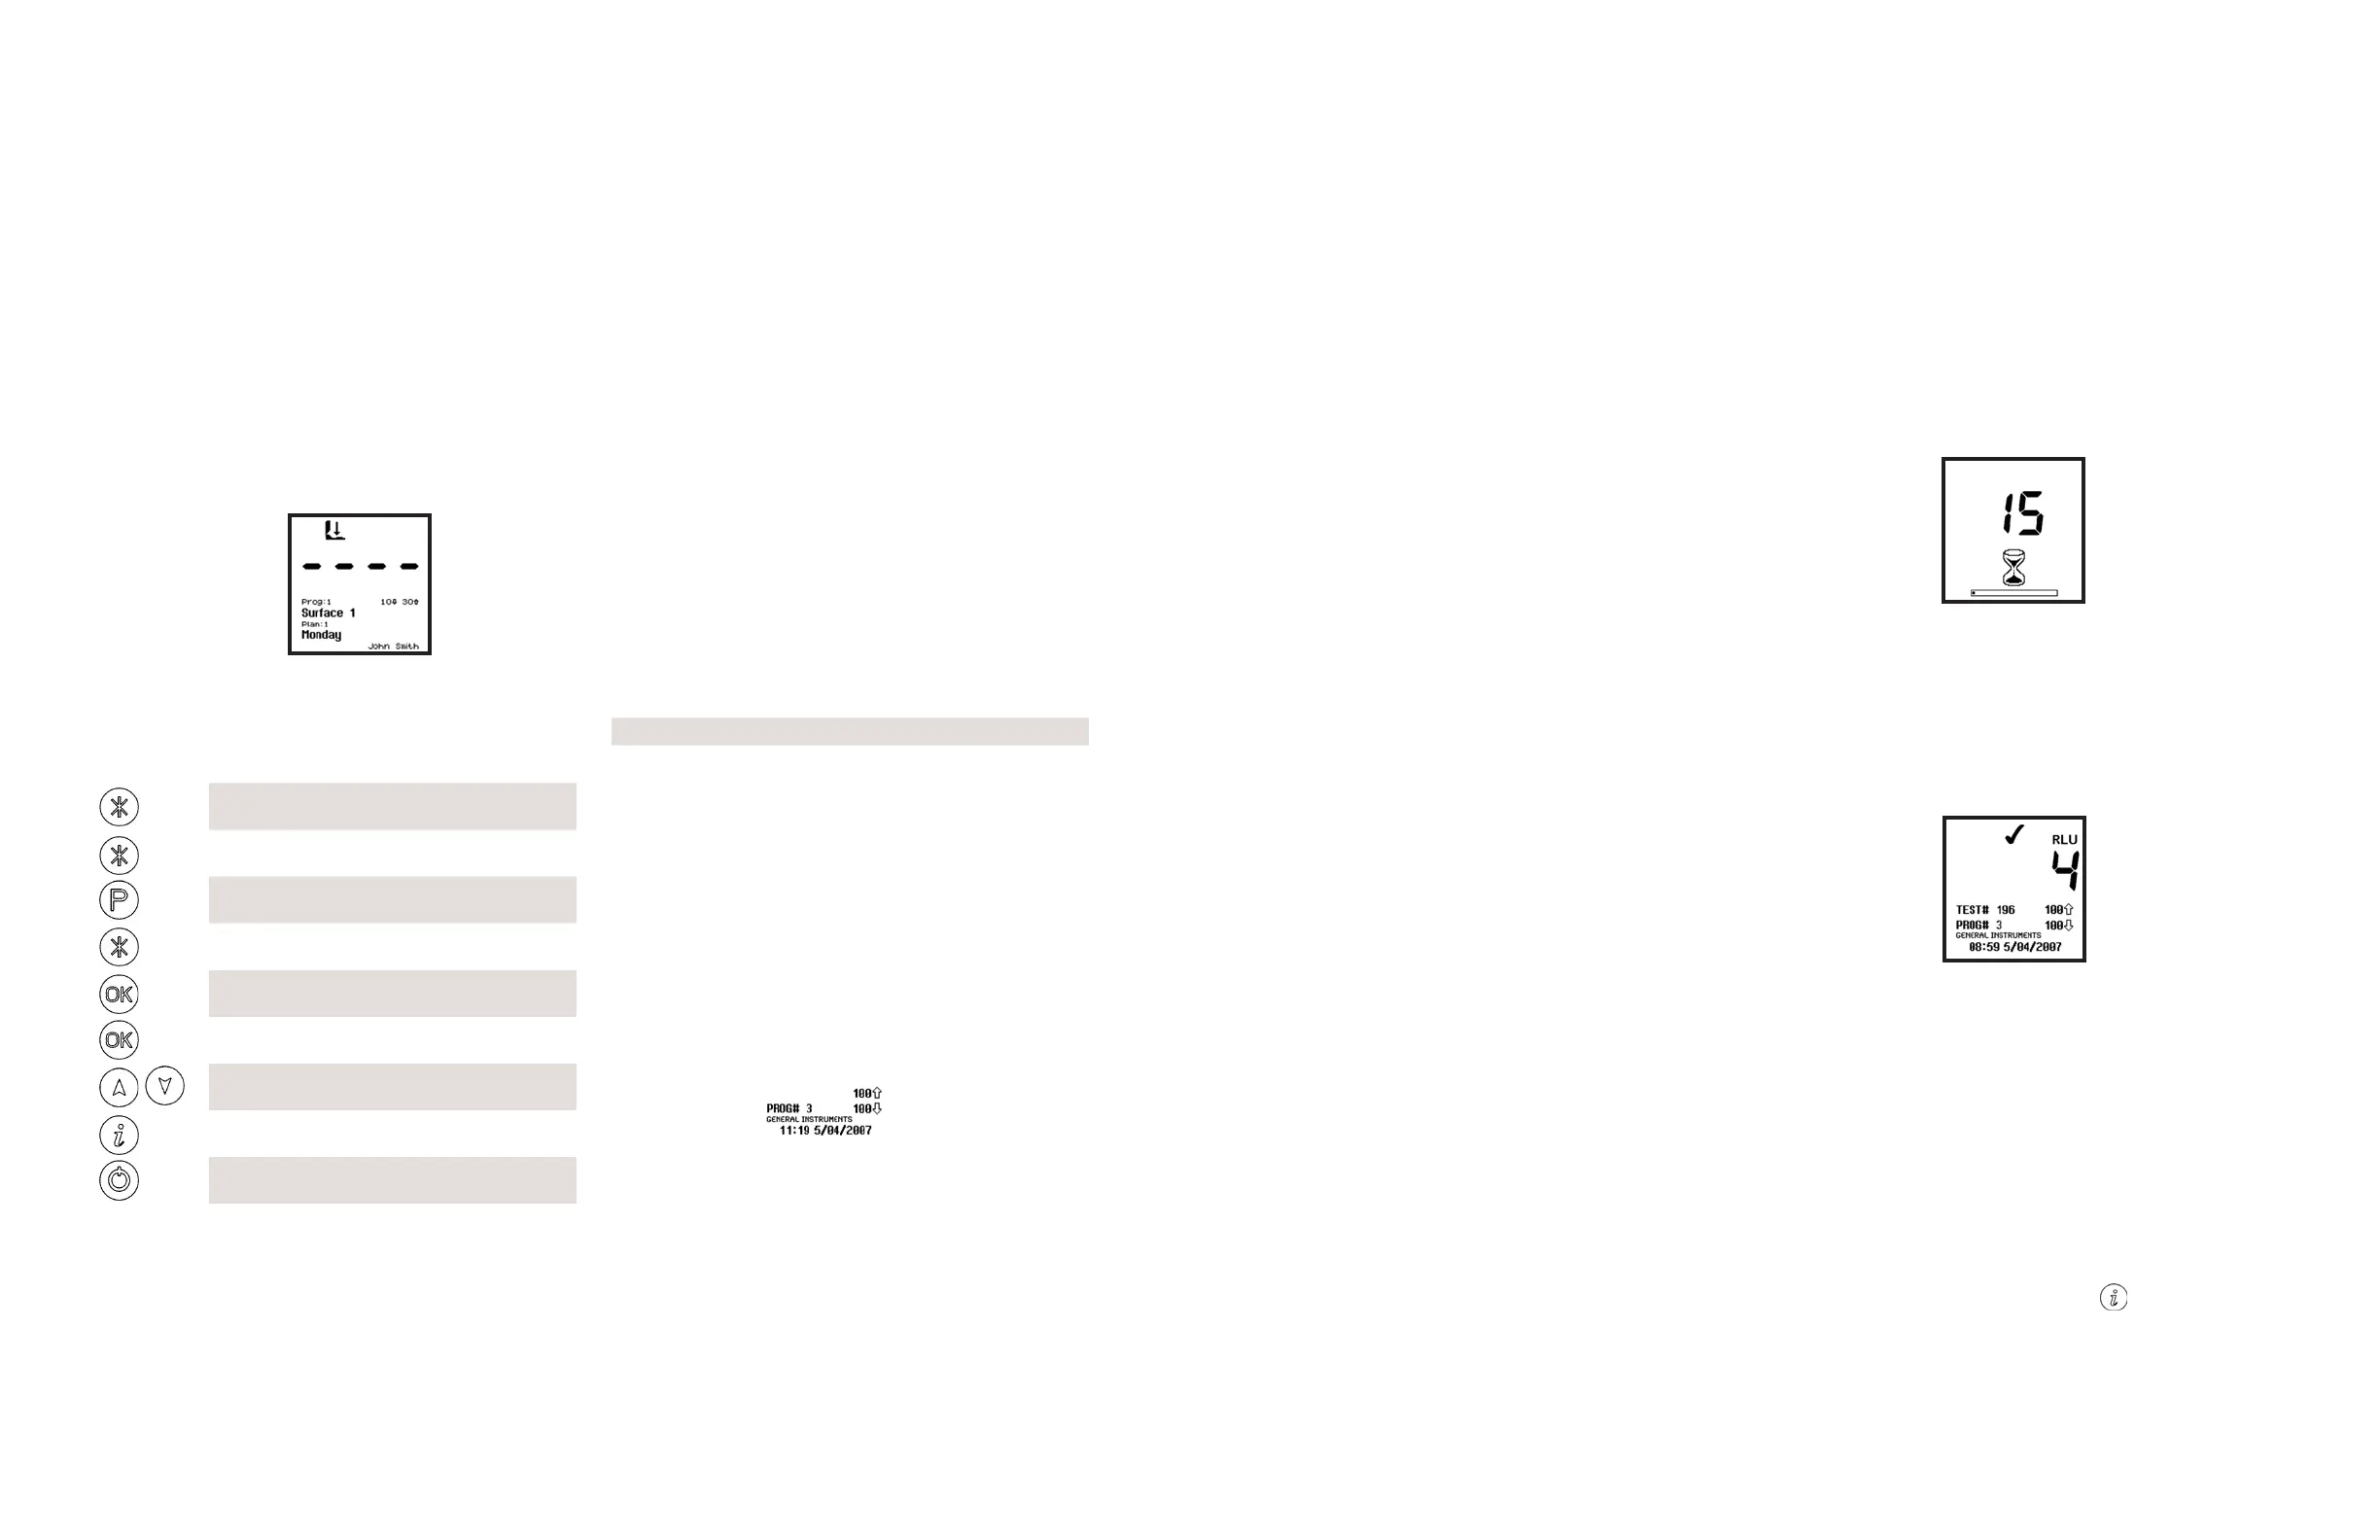
While the measurement is being performed, the display
counts down from 15 to 0:
NOTE: For consistent results, always keep the unit upright
and steady while it is performing a measurement to ensure
that the liquid in the Test® Swab device is at the boom of
the tube.
When the measurement is complete, the test result and
overall pass/fail result are displayed:
Pass/Fail
Test number Upper threshold
Program location Lower threshold
Test time Test date
TIP: A failed test result ( ) can be selected for retesting
by pressing the “P” buon, followed by the “OK” buon to
select the Program location. See section 3.3 for details.
Now remove the Test® Swab device and dispose of it.
NOTE: For best results, and to prevent dust and dirt ingress,
always keep the unit lid closed when not inserting or
removing a Test® Swab device.
Previous test results can be viewed by pressing the up and
down buons (see section 4.5), or the results statistical
data can be obtained by pressing the
buon
(see section 4.6).