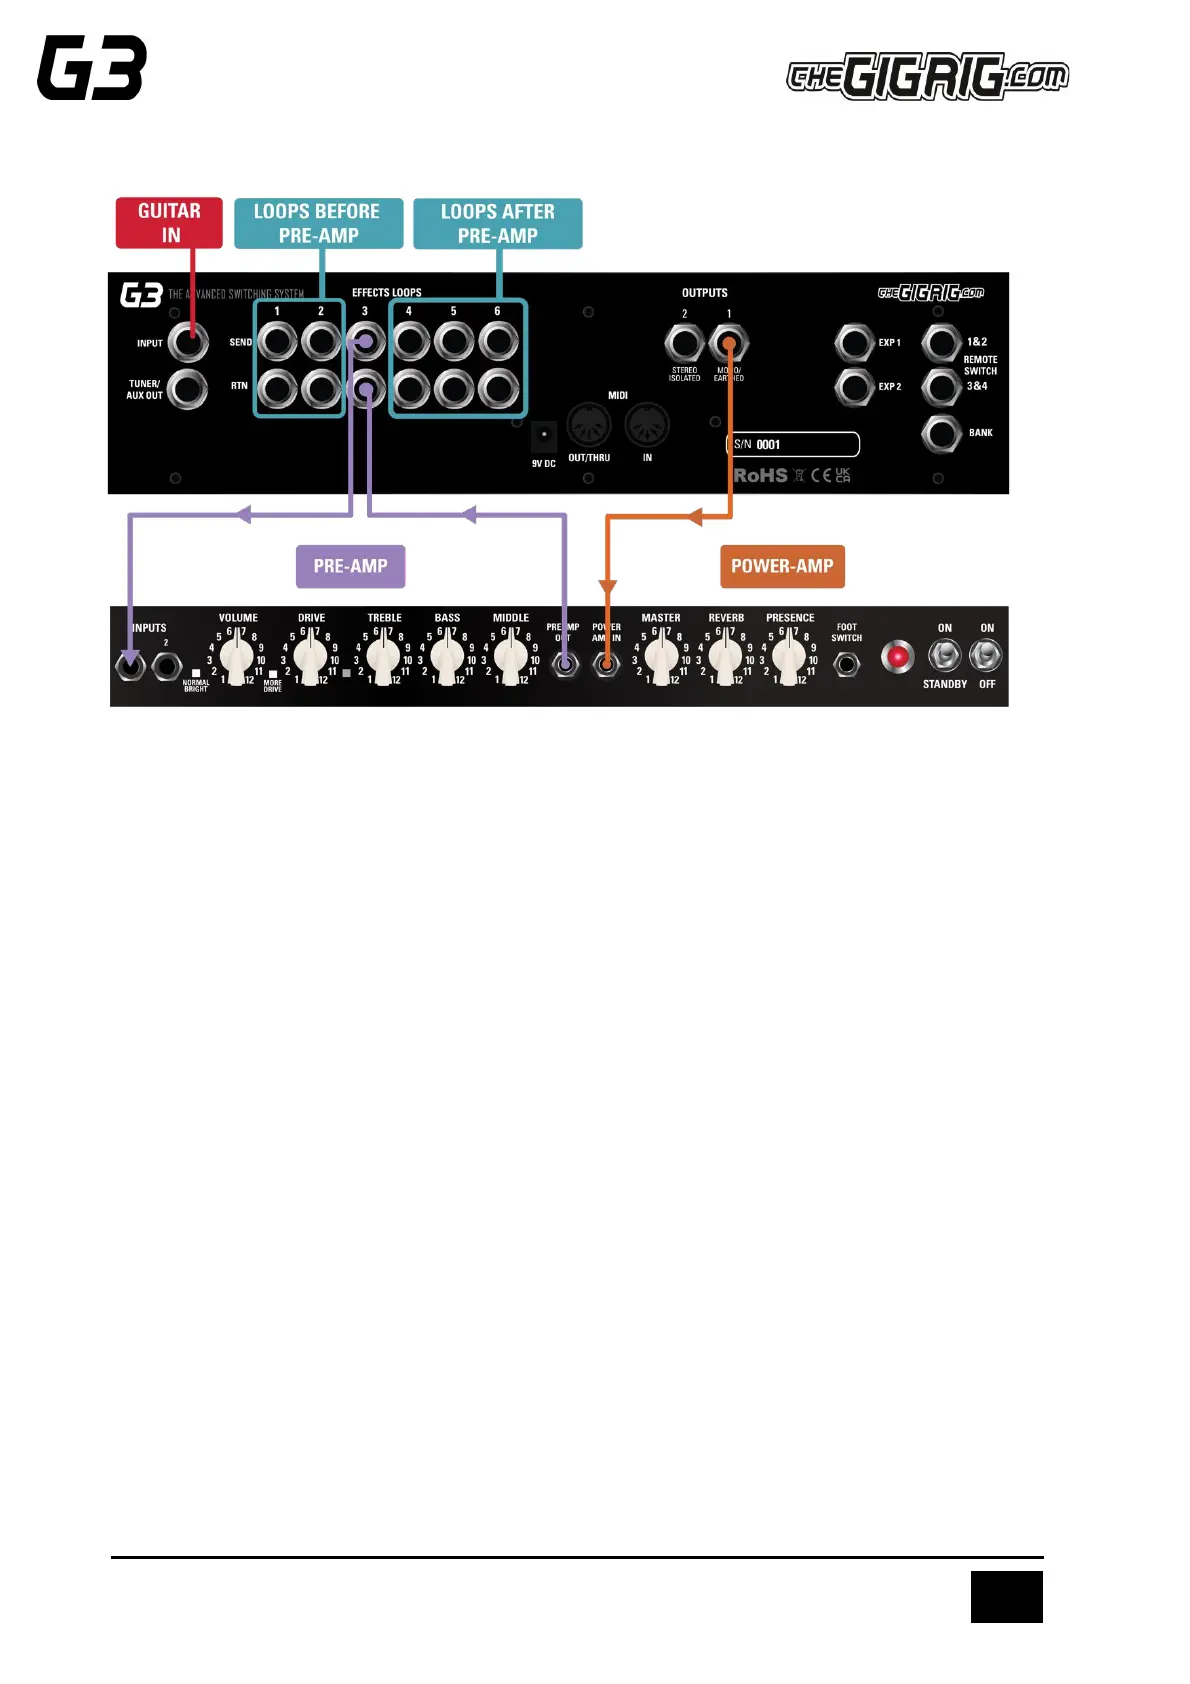
CONNECTING AMPLIFIERS’ EFFECTS LOOP
There are three important steps to connecting to your amplifier’s effects loop.
I find the best way to explain this is to think of your amps’ preamp as another pedal. Your preamp is connected
to your amps’ power section, and this is where the amps FX LOOP sits, between the preamp and power amp.
a. First select a G3 Atom loop to connect with your amps FX loop. In the diagram above, loops 1-2 are
placed before the pre-amp, loop 3 contains the preamp and loops 4-6 are placed inside the FX loop
(note - any loop can be selected).
b. Connect the SEND from the chosen G3 Atom effects loop to the input of the amplifier. The connections
needed to achieve this are:
c. G3 Atom Loop 3 SEND to AMP INPUT
d. AMP FX Loop SEND to G3 Atom Loop 3 RETURN
e. G3 Atom Output 1 to AMP FX Loop RETURN
f. As the amps’ preamp is contained within Loop 3, this needs to be engaged on all presets