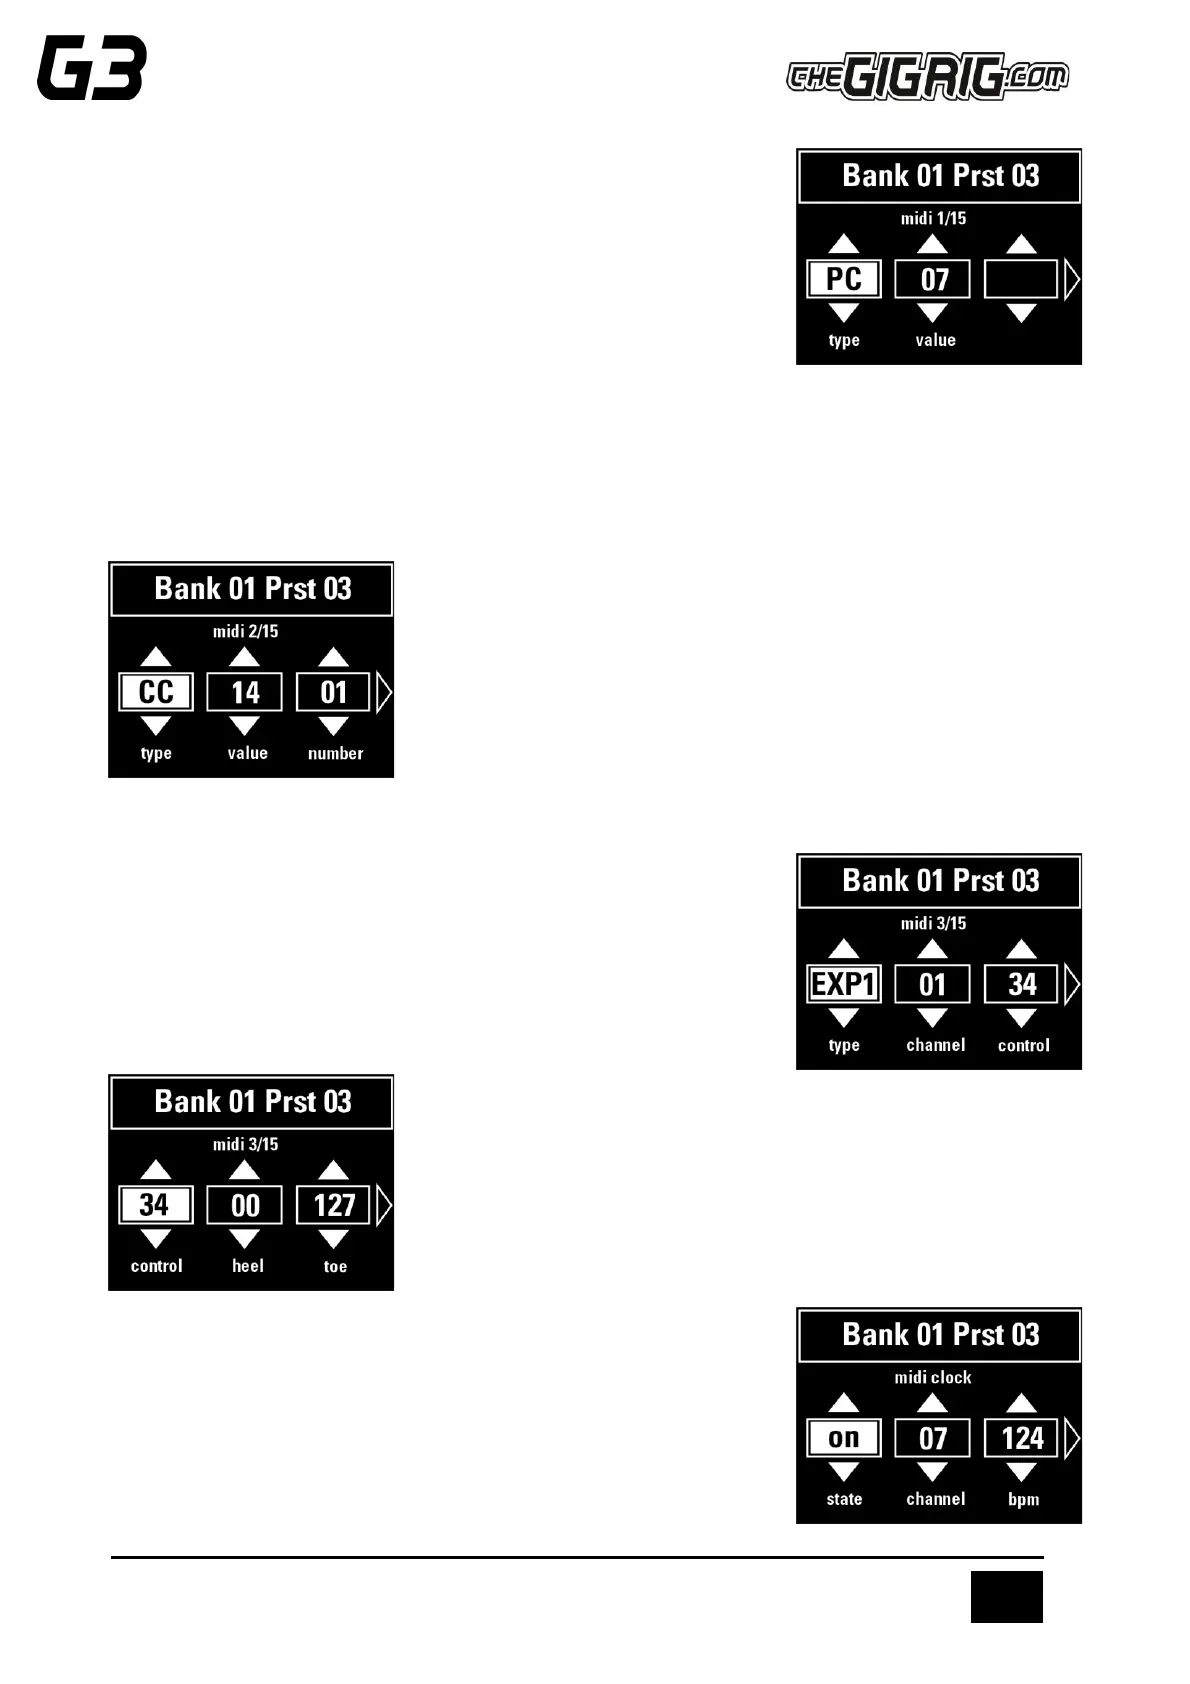
For example, if you want to programme channel 7 and would like Preset
Number 1 on the Atom to send MIDI programme 7 on MIDI channel 3, you
will need to:
a. Select a MIDI command (1-15).
b. Edit MIDI Channel (in this instance, to MIDI channel 3).
c. Set Type to PC.
d. Set Value to 7.
e. Press DEEP EDIT. Push button 3 to exit.
You can repeat this process up to 15 separate times per individual preset.
To Set Up Control Change (Cc) Messages.
a. Select a MIDI command (in this example, MIDI command 2 is selected)
b. b. Scroll right to set Type to ‘CC’
c. c. Scroll right again to set VALUE and NUMBER.
EXPRESSION PEDAL MIDI
This is the same procedure as the above,
Select Expression Pedal from the MIDI Type list.
Choose the CHANNEL number and the CONTROL number.
Scroll right and choose the HEEL down position number and the TOE down
position number.
There are two expression pedal inputs in the G3 Atom, so you have the
choice of which expression pedal you want to use, to send your EXP
commands.
MIDI CLOCK
The G3 Atom’s MIDI CLOCK enables you to send a MIDI clock message that
can sync all your clock input enabled time-based effects. You can send this
message out on individual MIDI channels or you can send this out on Omni
which is all MIDI channels simultaneously.