2
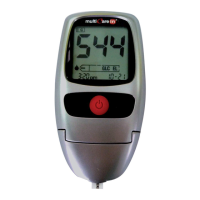
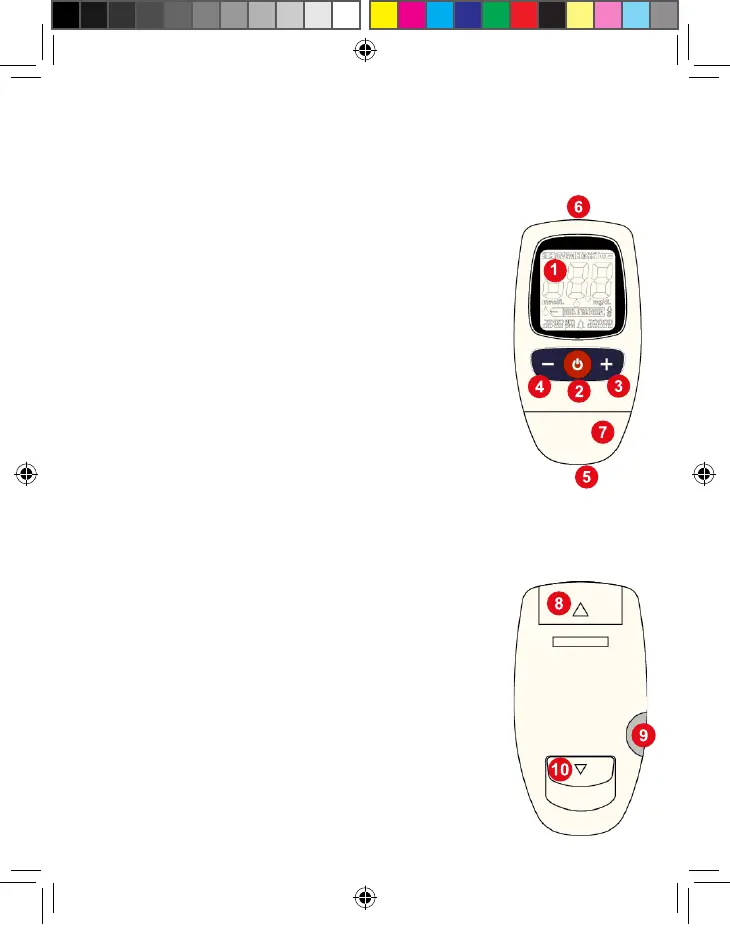
The meter
1. Display – Shows test results, messages, and
results stored in memory.
2. Power Button – Press this button to:
a. Turn on the meter or turn off the meter.
b. Enter the SET mode in the STANDBY mode.
c. Go to the next step in the SET mode.
d. Exit the SET mode and enter the STANDBY mode.
3. “+” Button -- Press this button to:
a. Enter the MEMORY mode.
b. Recall previous stored results in the MEMORY mode.
c. Change parameters displayed and increase
values in the SET mode.
4. “-” Button – Press this button to:
a. Enter the MEMORY mode.
b. Recall next stored results in the MEMORY mode.
c. Change parameters displayed and decrease
values in the SET mode.
d. Reset the test results.
5. Test Strip Slot – Insert test strip here.
The meter automatically enters the TEST mode
when a test strip is inserted.
6. PC Connector – Transfers data from the meter to a
computer.
7. Cover – Open this for cleaning.
8. Battery Cover.
Put your nger on this to let the battery cover slide.
9. Data-chip Slot – Insert the data-chip.
10. Ejector – Press to discharge the used strip.
Front
Rear
Manuale MCIN UK_ED2013 APRILE MFAP Definitivo.indd 2 13/06/2013 16:52:35