16
o2) Mix up a small amount of Kwik Bond
5 Minute Epoxy. Use a couple of small dabs
of epoxy to glue the balsa gear cover (D-29)
onto the aluminum gear, flush with the bot-
tom of the fuselage.
There are three holes predrilled through
the block that allow the screws to be re-
moved should the gear need servicing. You
can leave these holes covered by the covering
or remove the covering from over them now
using a modeling knife.
INSTALLING THE WHEEL PANTS
o 1) Working with one wheel pant at a time,
use a Dremel Tool and remove the plastic that
covers the wheel opening on the bottom of
the wheel pant.
Look carefully at each side of the wheel
pant and you will notice a molded dimple.
One dimple is about 1/8” higher on one side
than the other. If you will be flying off a hard
surface we recommend you drill out the dimple
that is higher. If flying off of grass we rec-
ommend you drill out the dimple that is lower.
This will raise the wheel pant higher on the
axle and give more clearance between the
wheel pant and the ground.
o 2) Using a 5/32” drill bit, drill out only
the one dimple that you choose.
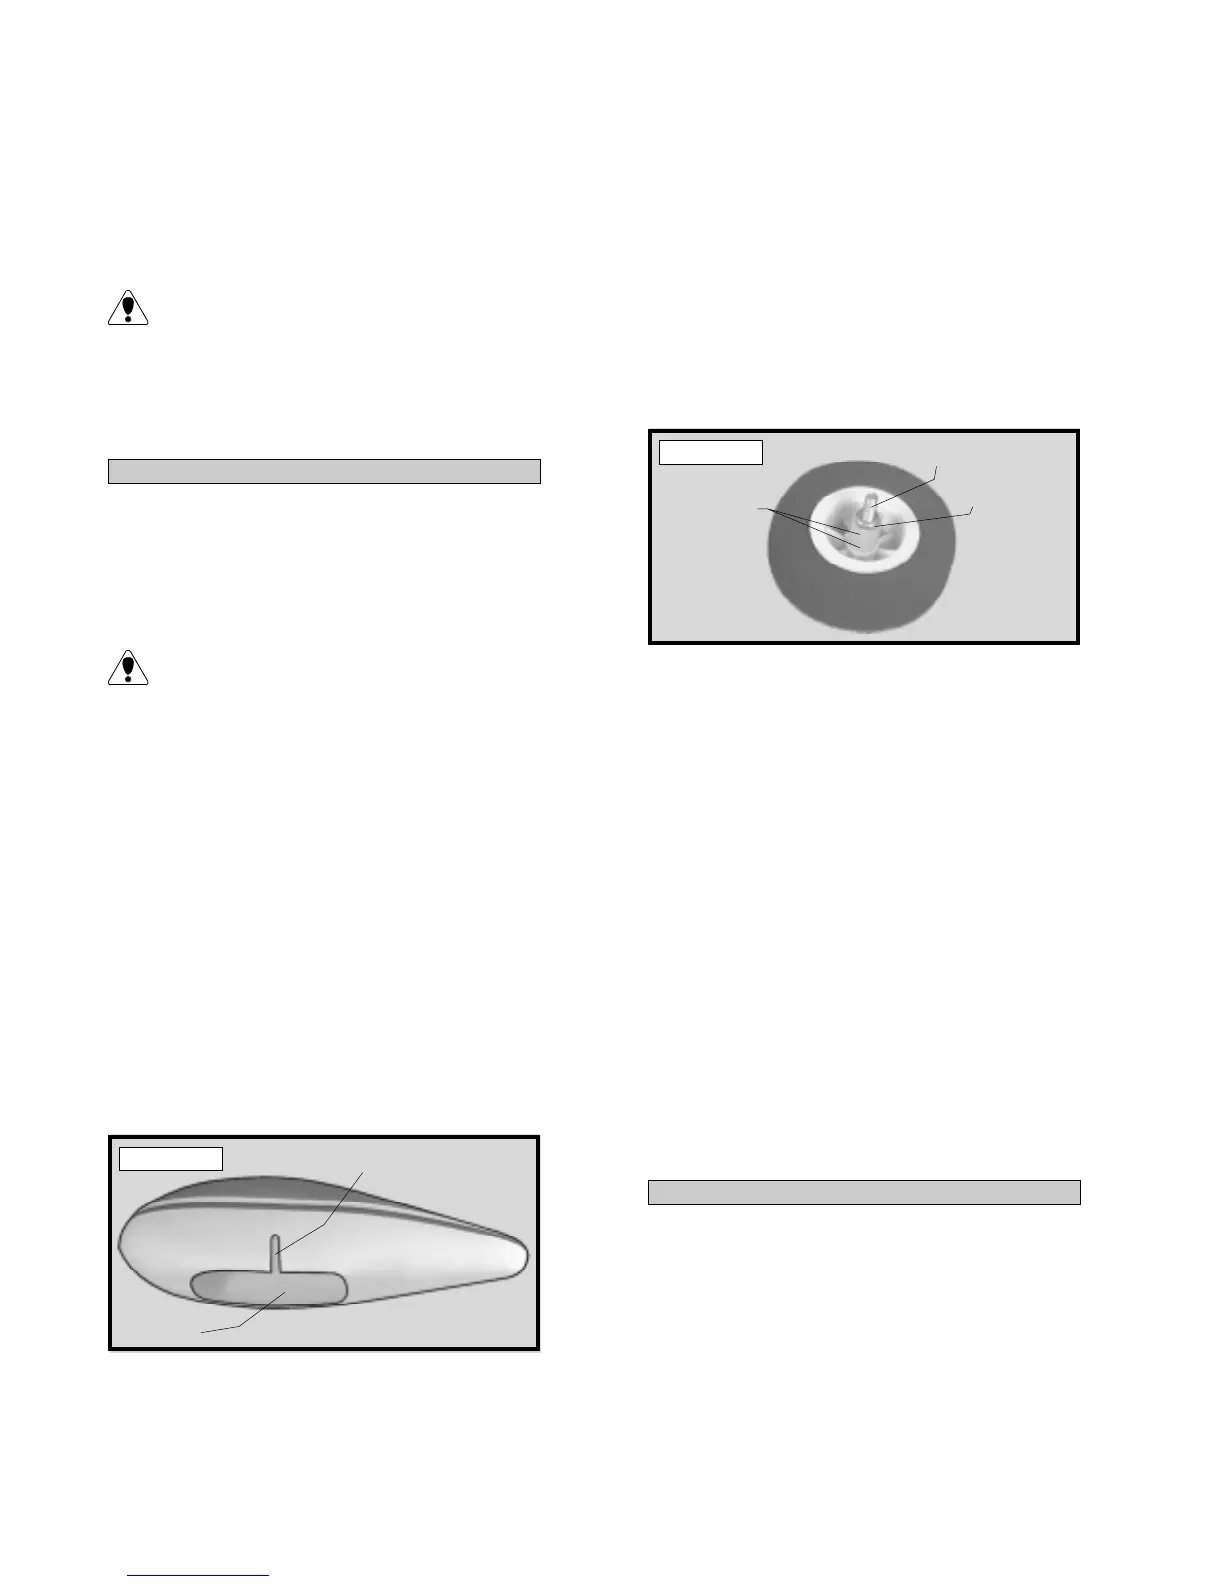
o 3) Using a modeling knife, cut a slot from
the hole down to the wheel pant opening. See
photo # 26 below.
Photo # 26
o 4) Slide one 60mm diameter wheel onto
one 4mm x 35mm axle screw. The wheel
should go on with flat side of the hub first.
o 5) Slide two 4mm nylon spacers over the
axle screw and up against the wheel. Thread
one 4mm hex nut onto the axle screw.
o 6) Tighten the hex nut against the nylon
spacers as tight as it can be, but still allow
the wheel to spin free on the axle. Secure
the nut in place by carefully applying a couple
of drops of Kwik Bond Thick C/A to the
threads. Allow the C/A to fully cure. See
photo # 27 below.
Photo # 27
o 7) Slide one 4mm washer over the axle
screw and up against the hex nut. Carefully
slip the wheel and axle assembly into the
wheel pant. The axle screw should slip firmly
into the slot in the wheel pant and the flat
washer should be positioned inside the wheel
pant.
o 8) Slide the axle bolt through the pre-
drilled 4mm hole in the aluminum gear
bracket and secure in place using one 4mm
lock nut. Tighten the lock nut completely,
at the same time making sure the hex nut does
not come loose. Double check that the wheel
does not bind when rotated.
o 9) Repeat steps # 1 - # 8 for the opposite
side.
ADJUSTING THE WHEEL PANTS
o 10)With both wheels and wheel pants in-
stalled on the gear bracket, set the airplane on
it's wheels on a level surface. Adjust the wheel
pants so the rear portion of the wheel pant is
level with the ground. Double check that both
wheel pants are level with each other.
CUT SLOT
REMOVE
COVER
AXLE SCREW
NYLON
SPACERS
HEX NUT