EasyManua.ls Logo

Global Ultimate User Manual

Global Ultimate
32 pages
To Next Page IconTo Next Page
Page #1 background imageLoading...
Page #1 background image
1
Instructions for Final Assembly
Would you like to fly your own Ultimate Biplane? Do you want to be flying in a weekend?
Are you ready for an aerobatic 46 size performance biplane? Then you’ve chosen wisely.
The Global ARF Ultimate was made for you. Features like an all balsa and plywood built up
airframe, just like you'd do it yourself from a kit. A generous tail section combined with a
long fuselage moment and swept wings make this an aerobatic performer that you'll always
want to fly. A super strong metal wing center cabane system with outer plywood interplane
struts hold everything together when you're performing snap rolls and inverted spins. To go
along with this we've provided a prepainted four color cowling, prepainted wheel pants and
a clear molded canopy. There is no other aerobatic biplane in it's class that is easier to
assemble or that flys better. We know you’ll enjoy building the Ultimate, but you bought this
airplane to fly. And that's what it does best. Set up for sport flying, it’s predictable and
tracks like it's on rails. Deceivingly easy to fly, change the set-up parameters and you’ll
push the envelope like an experienced airshow performer. Complete inverted flat spins and
torque rolls like you’ve never performed before!
Version V1.0 3-99 Kit # 123820 All Contents © Copyright 1999
.46 SIZE AEROBATIC ARF PERFORMANCE BIPLANE.46 SIZE AEROBATIC ARF PERFORMANCE BIPLANE
.46 SIZE AEROBATIC ARF PERFORMANCE BIPLANE
Question and Answer IconNeed help?

Do you have a question about the Global Ultimate and is the answer not in the manual?

Global Ultimate Specifications

General IconGeneral
BrandGlobal
ModelUltimate
CategoryToy
LanguageEnglish

Summary

Instructions for Final Assembly

Bottom Wing Mounting

Align the Bottom Wing

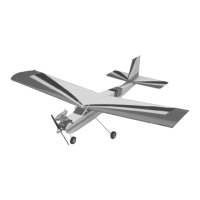
Align the bottom wing with the fuselage saddle and marks.

Installing the Blind Nuts

Install blind nuts into the wing mounting block.

Horizontal Stabilizer Mounting

Align the Horizontal Stabilizer

Align the horizontal stabilizer with the fuselage and wings.

Mounting the Horizontal Stabilizer

Epoxying the horizontal stabilizer to the fuselage.

Vertical Stabilizer Mounting

Align the Vertical Stabilizer

Align the vertical stabilizer to the fuselage.

Mounting the Vertical Stabilizer

Epoxying the vertical stabilizer into the fuselage slot.

Top Wing Mounting

Align the Top Wing

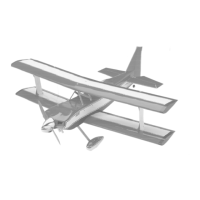
Set the incidence angles for the top wing.

Mounting the Top Wing

Secure the top wing to the fuselage and struts.

Control Surface Installation

Hinge the Elevator Halves

Hinge the elevator halves to the horizontal stabilizer.

Hinge the Rudder

Hinge the rudder to the vertical stabilizer and fuselage.

Engine Mounting

Mounting Engine to Motor Mount

Assemble and mount the engine to motor mount beams.

Mounting the Engine to Firewall

Secure the engine and mount to the firewall.

Fuel Tank

Fuel Tank Assembly

Assemble the fuel tank components.

Fuel Tank Installation

Install the assembled fuel tank into the fuselage.

Main Landing Gear

Installing the Gear Bracket

Mount the main landing gear bracket to the fuselage.

Installing the Wheel Pants

Prepare and attach the wheel pants.

Aileron Servo

Installing the Aileron Servo

Install aileron servos into the wing.

Installing the Aileron Linkage

Connect aileron servos to control horns.

Radio Installation

Installing the Servo Tray

Install the servo tray inside the fuselage.

Installing the Servos

Mount rudder, elevator, and throttle servos.

Installing the Receiver & Battery

Position receiver and battery pack.

Installing the Switch

Mount the power switch to the fuselage.

Throttle Linkage

Installing the Throttle Connector

Connect throttle servo to carburetor linkage.

Rudder Pushrod

Installing the Rudder Control Horn

Mount control horn onto the rudder.

Installing the Rudder Pushrod

Connect rudder servo to rudder control horn.

Elevator Pushrod

Installing the Elevator Control Horns

Mount control horns to elevator halves.

Installing the Elevator Pushrod

Connect elevator servos to control horns.

Aileron Links

Installing the Control Horns

Mount control horns to the ailerons.

Installing the Aileron Links

Connect aileron servos to control horns.

Canopy

Trimming the Canopy

Cut and fit the canopy to the fuselage.

Cowling

Mounting the Cowl

Fit and secure the engine cowling.

Trim Chart

Control Centering

Adjust control surface centering for straight flight.

Center of Gravity Longitudinal Balance

Adjust weight for proper longitudinal balance (CG).

Lateral Balance

Correct lateral balance for stable loops.

Related product manuals