Page 16
6. Plug in the power cord.
INSPECTION
INSPECTING THE SLICER FOR DAMAGED OR BROKEN PARTS INCLUDING
GASKETS & SEALS. A thorough visual inspection should be made of the entire
slicer and its parts. Globe urges the owner/operator to inspect all components
often and for an authorized service agent to inspect the entire slicer at least every
6 months, including all parts that are detachable for cleaning and sanitizing. This
inspection should include: looking for damaged parts, broken seals or gaskets,
and areas that may be more dif cult to clean and sanitize.
Cleaning
Figure 16-1
Figure 16-2
Figure 16-3
REINSTALL REMOVABLE PARTS
After cleaning, sanitizing and allowing the parts to air dry, they must be
reinstalled.
BE ALERT. The slicer knife is exposed. Always be aware of the
placement of your hands/ ngers in relationship to the knife.
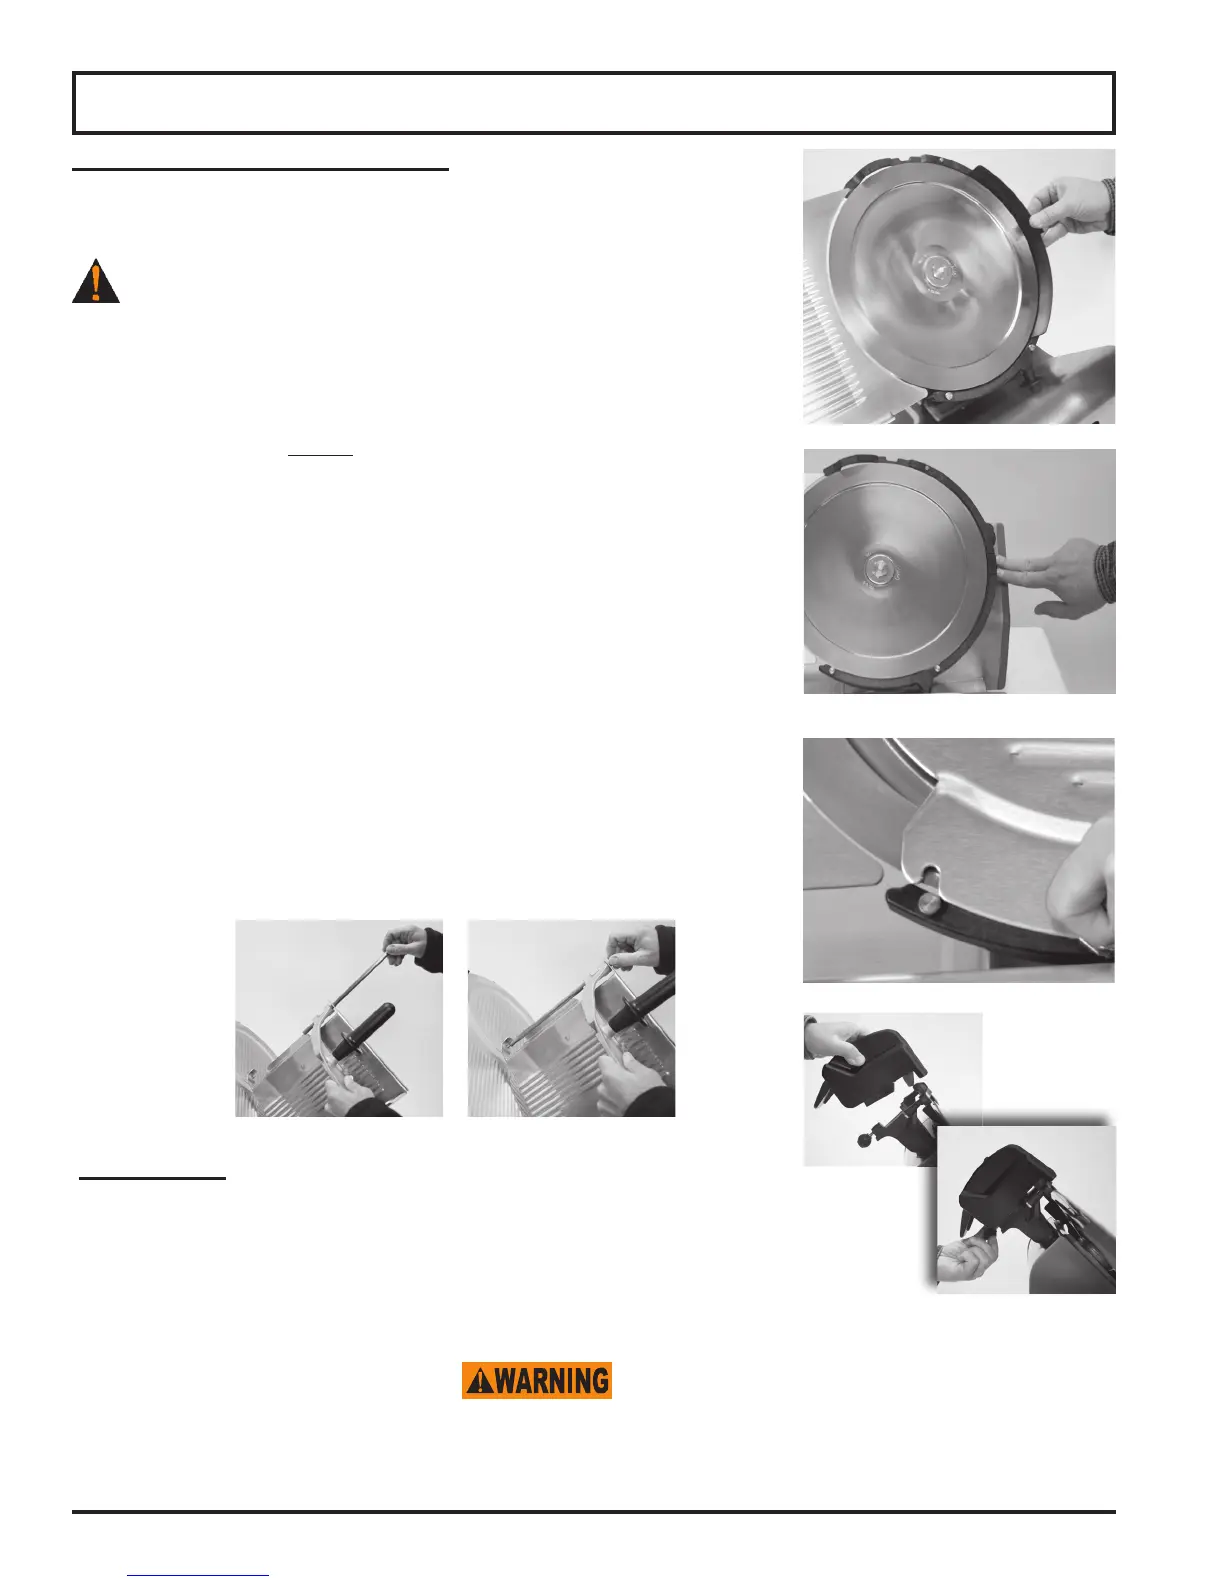
1. Carefully insert the slice de ector into place between the knife and
the ring guard (Figure 16-1). Align the tab over the lock notch and, with
two ngers, press the tab over the lock notch (Figure 16-2). You will hear
it “click” when it has securely locked into place. (Note: if the slice
de ector does not securely “click” into place, the slice de ector is not
properly reinstalled. Do not operate the slicer unless the slice de ector
has been properly installed.)
2. Reinstall the knife cover by aligning the notches of the knife cover with the
pins located at the bottom and one at the top of the knife ring guard
(Figure 16-3). The locator pin at the top of the knife ring guard must be set
through the knife cover and pressed into place. Once the locator pin is
seated over the pin, screw the knife cover knob back into place on the top of
the slicer.
Note: Slicer will not operate unless the knife cover is secured in place.
3. Reinstall the knife sharpener. Attach it to the top of the slicer
(Figure 16-4) and secure it with the knife sharpener release knob.
4. Place the cleaned and sanitized food chute back onto the chute arm.
Securely tighten the food chute release knob to prevent any “play”
between the food chute and the chute arm.
5. Reinstall the end weight. Align the end weight with the chute and insert the
slide rod through the chute and end weight’s pivot point (Figure 16-5). Allow
the end weight to rest in the locked position and securely screw in the slide
rod to the slicer chute (Figure 16-6).
Figure 16-4
IF A SEAL OR GASKET IS FOUND TO NOT PROPERLY SEAL, IS DAMAGED, OR IS MISSING,
THE SLICER MUST BE REMOVED FROM SERVICE UNTIL IT IS REPAIRED BY AN AUTHORIZED SERVICER.
Figure 16-5 Figure 16-6