4242 4343
Select the "go-e Controller" setting option if
your go-e Charger is not yet connected to your
Controller. You can also check the connection
there.
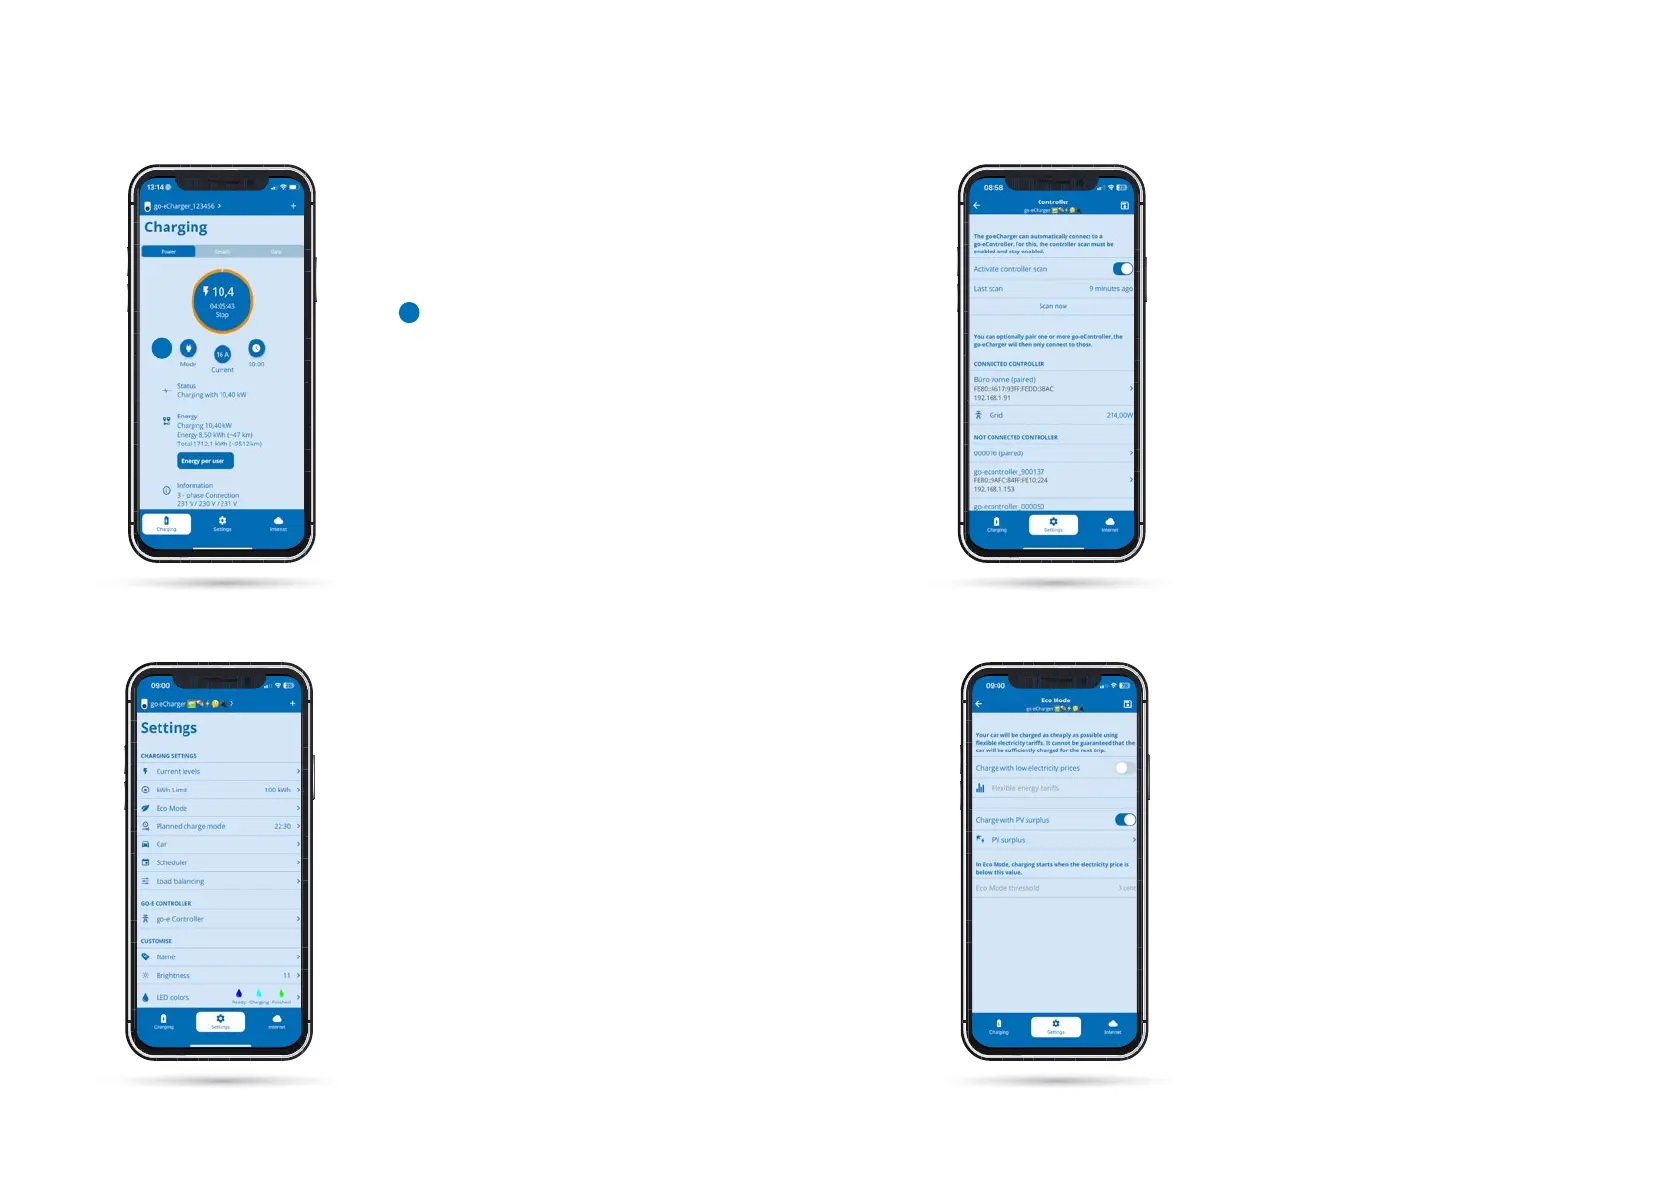
After switching from your go-e Controller to
the go-e Charger, you will be taken to its home
screen with the "Charging" view.
Note the "Mode" button here, which you need
to tap later if you want to activate one of the
modes for PV surplus charging.
First switch to the "Settings" view.
Start screen (go-e Charger)
Settings (go-e Charger)
Already installed go-e Controllers can be auto-
matically integrated into the go-e app here.
Normally, Controllers are searched for auto-
matically. Only if the Controller has just been
installed or you have switched o the automa-
tic scanning function do you have to tap "Scan
now" here. By the way, a Charger can only be
connected to a single Controller, but the Con-
troller itself can be connected to an unlimited
number of Chargers at the same time.
Once you have ensured that your go-e Charger
is connected to the go-e Controller, you can now
congure the settings for PV surplus charging.
Select either the "ECO mode" or "Next trip mode".
If you have an electricity provider with exible
electricity prices that is listed in the go-e app,
you can combine ECO mode with the corre-
sponding electricity tari by activating "Charge
with low electricity prices" via the slider here.
However, this is not absolutely necessary for PV
surplus charging.
Now activate the "Charge with PV surplus" sli-
der and then click on PV surplus below it to ad-
just the detailed settings for charging with solar
power.
Settings (go-e Charger) / go-e
Controller
Settings (go-e Charger) / PV surplus
charging (ECO mode)
a
a
11 PV Surplus Charging / Load Balancing
a