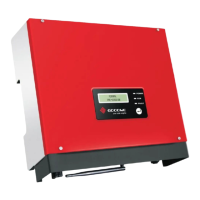
SDT4~10KW inverter illustration.
Positive DC Plug:SDT4~10KW 2 pairs.
Negative DC Plug:SDT4~10KW 2 pairs.
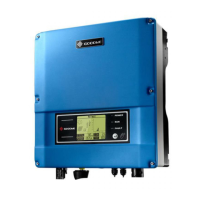
4PIN terminal: SDT4~10KW: 1pcs for tigo gateway communication
The installation position shall not prevent access to the disconnection means.
1. PV input terminals
2. Waterproof vent
3. DC Switch(Optional)
4. Wi-Fi&LAN
5. RS485 & GATEWAY
6.
7. LED lights
8. LCD display
9. Buttons
AC output terminal
①
②
③
④
⑤
⑥
⑦
⑧
⑨
Expansion screw×6
Flat Head Screw
AC Terminal X6
AC Junction
Box screw
AC connector×1
3.2.2 Package
Inverter×1
Wall-mounted
Bracket×1
Positive DC Plug
Negative DC Plug
User manual×1
Quick Installation
Guide×1
User
manual
Fast installation
instructions
①
②
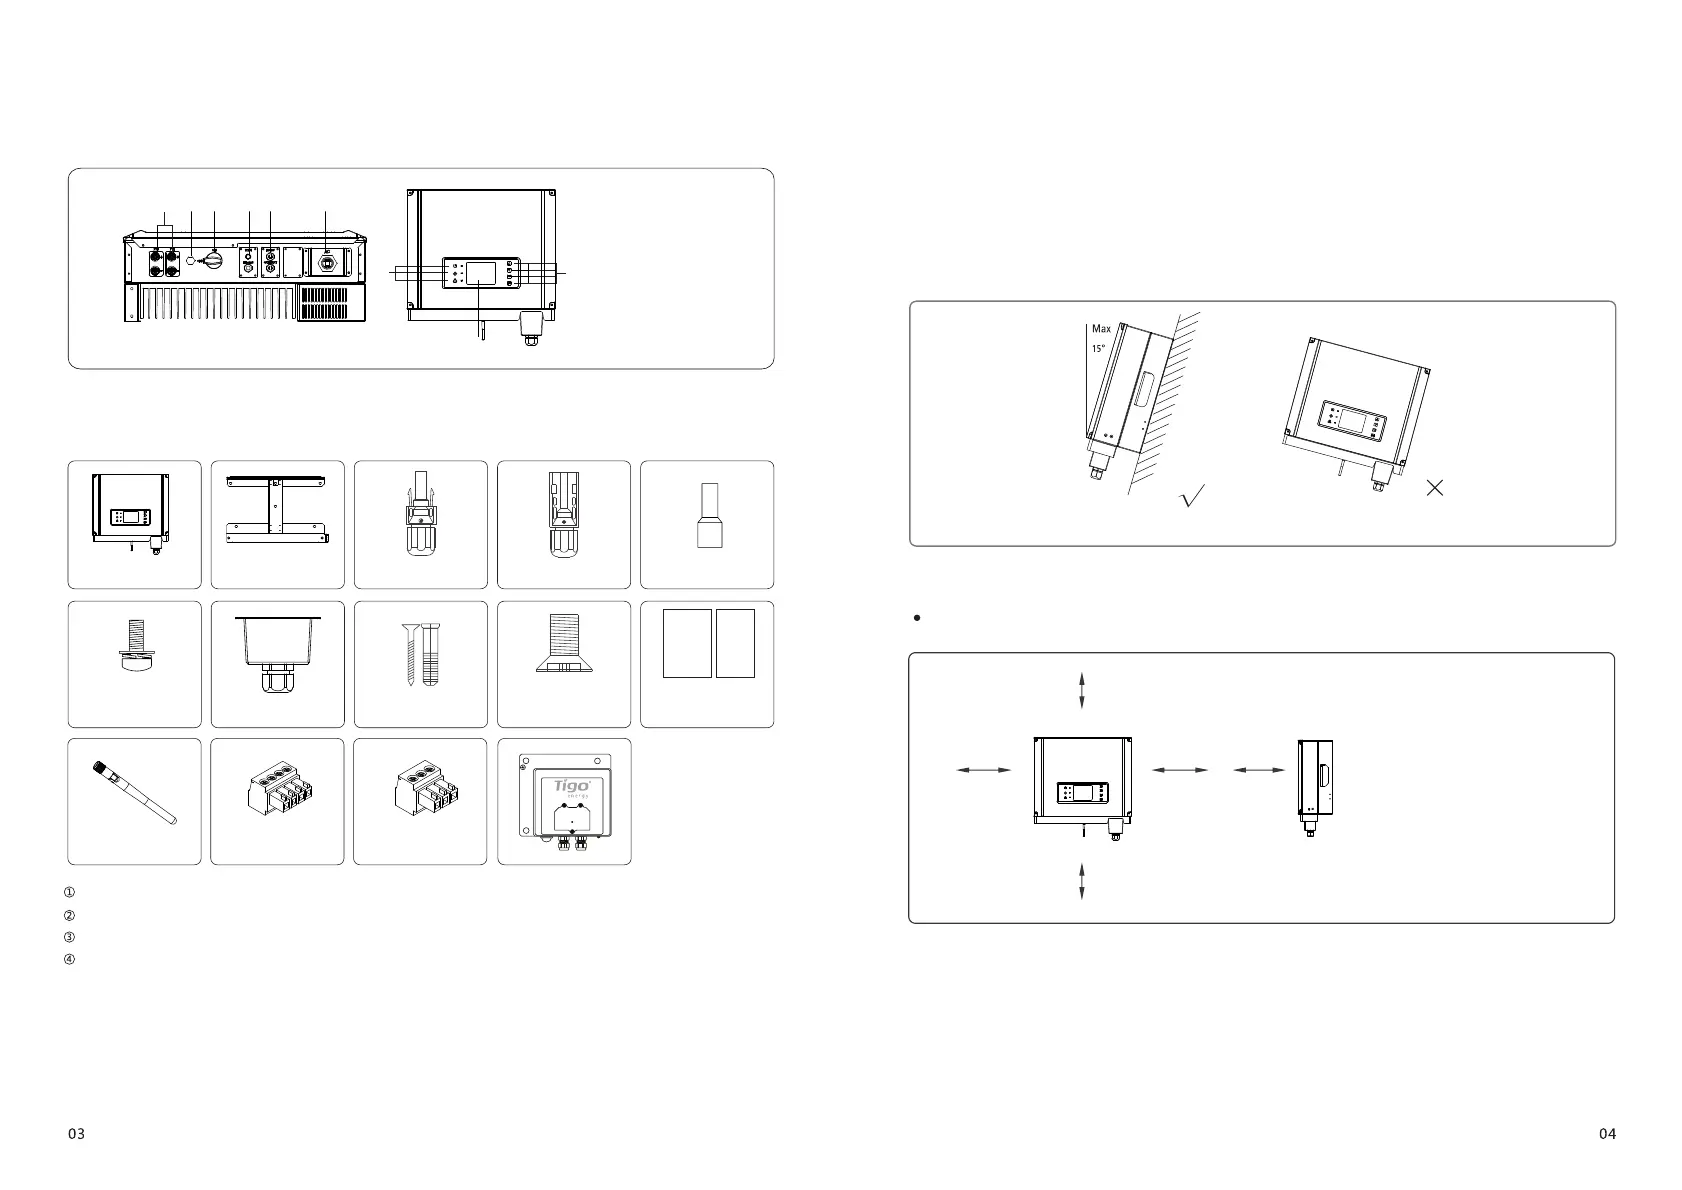
3.3 Inverter Installation
3.3.1 Selecting the Installation Position
Installation position should be selected based on the following aspects:
● The installation method and mounting location must be suitable for the inverter's weight and dimensions.
● Mount on a solid surface.
● Select a well ventilated place sheltered from direct sun radiation.
●
point downwards.
Install vertically or tilted backward by max 15°. The device cannot be installed with a sideways tilt. The connection area must
Refer to Figure 3.3.1-1.
● In consideration of heat dissipation and convenient dismantlement, the minimum clearances around the inverter should be no less
than the following value:
Figure 3.3.1-1
⑤
⑤
AC Junction Box :RS485 6pcs; WiFi 12 screw pcs.
⑥
⑥
Flat Head Screw: 2pcs(optional).
3.2.1 Inverter Overview
Antenna×1
4PIN terminal×1 3PIN terminal×1
Upward----------200mm
Downward-------500mm
Front--------------300mm
Both sides-------500mm
Figure 3.3.1-2
200mm
500mm
500mm 500mm 300mm
3PIN terminal: SDT4~10KW: 1pcs for RS485 communication
 Loading...