GpsGate VehicleTracker User Guide
Version: 1.3.2 - Rev: A.
5 Panel Details
In the right column on the Map view page you
have the options to select Users/Vehicles and
display and export tracks. The Track Export is
explained in more detail in the Export Tracks
section.
The right column has three main panels, Vehicles,
Tracks and Track Points. The three panels are
logically connected from the top down. This means
that everything you change in one panel will affect
the panel below.
5.1 Selecting Vehicles
You select a User/Vehicle either by clicking on its name on the map, or in the Vehicle list in the
Vehicles panel. A selected User/Vehicle will be marked in green color on the map and highlighted in
the Vehicle list.
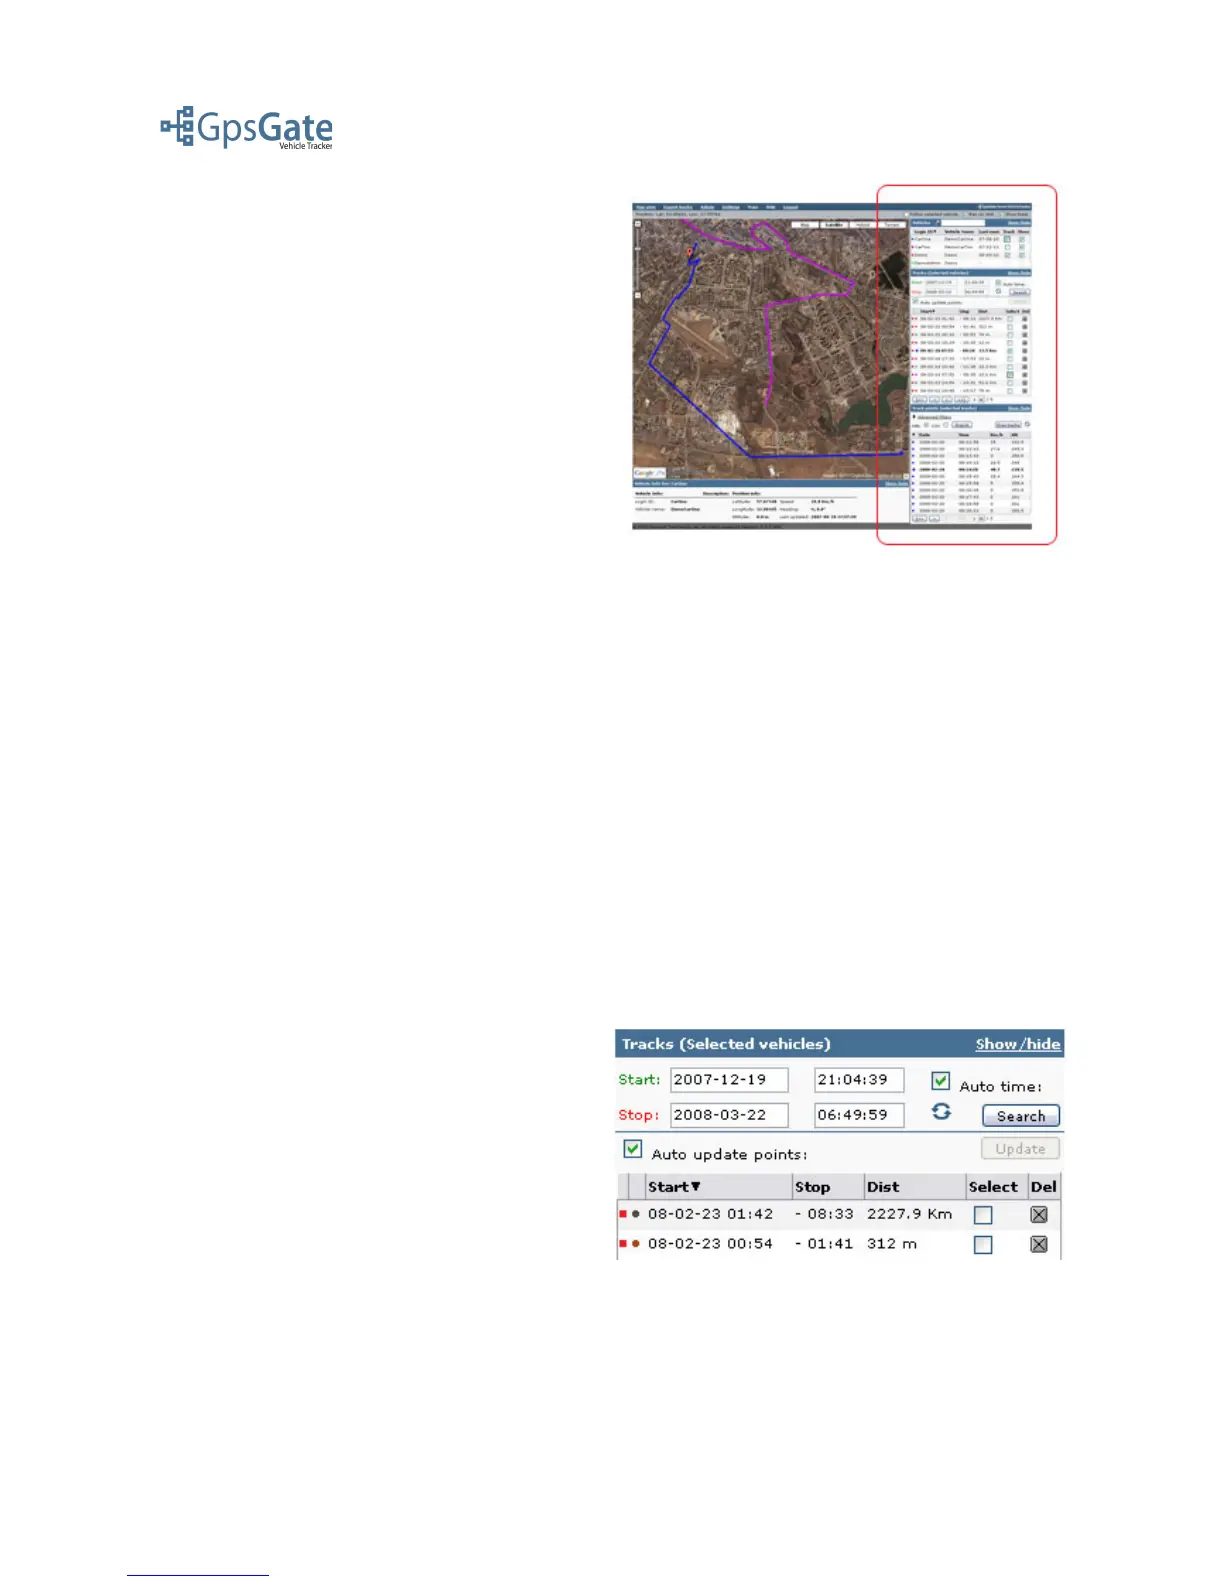
5.2 Selecting Tracks
You can show multiple tracks for multiple Users/Vehicles at the same time on the map. First you
select the users/vehicle you wish to see the tracks for by checking the Track box next to the name in
the Vehicle list in the Vehicle panel. This will open the Tracks panel below the Vehicle panel that
displays the selected Users/Vehicles different tracks, sorted with the newest track first in the list.
You can sort the lists in another order by clicking the column headers. You can limit the tracks you
wish to show by narrowing the start and stop time stamps. By doing this you will only display
Tracks that have Track points inside the selected time period.
To view a Track click on the check-box in the Select column in the Track list. This will open then
Track points panel and fill the Track points list with all the Track points from the selected Track.
If you have selected the “Auto update points”
option all you changes in the Tracks panel will
instantly take effect in the Track Points panel. If
you are working with many tracks and Track
Points at the same time you can disable this
function by clearing the check-box. This will
Speed up the load time. If you have done this then
use then Update-button to load the Track Points
into the Track Points panel.
Date: April 4, 2008 Page 12(17)