1.
2.
Read and follow the warnings
on
pages
4
and
5
before installing or operating this sprayer.
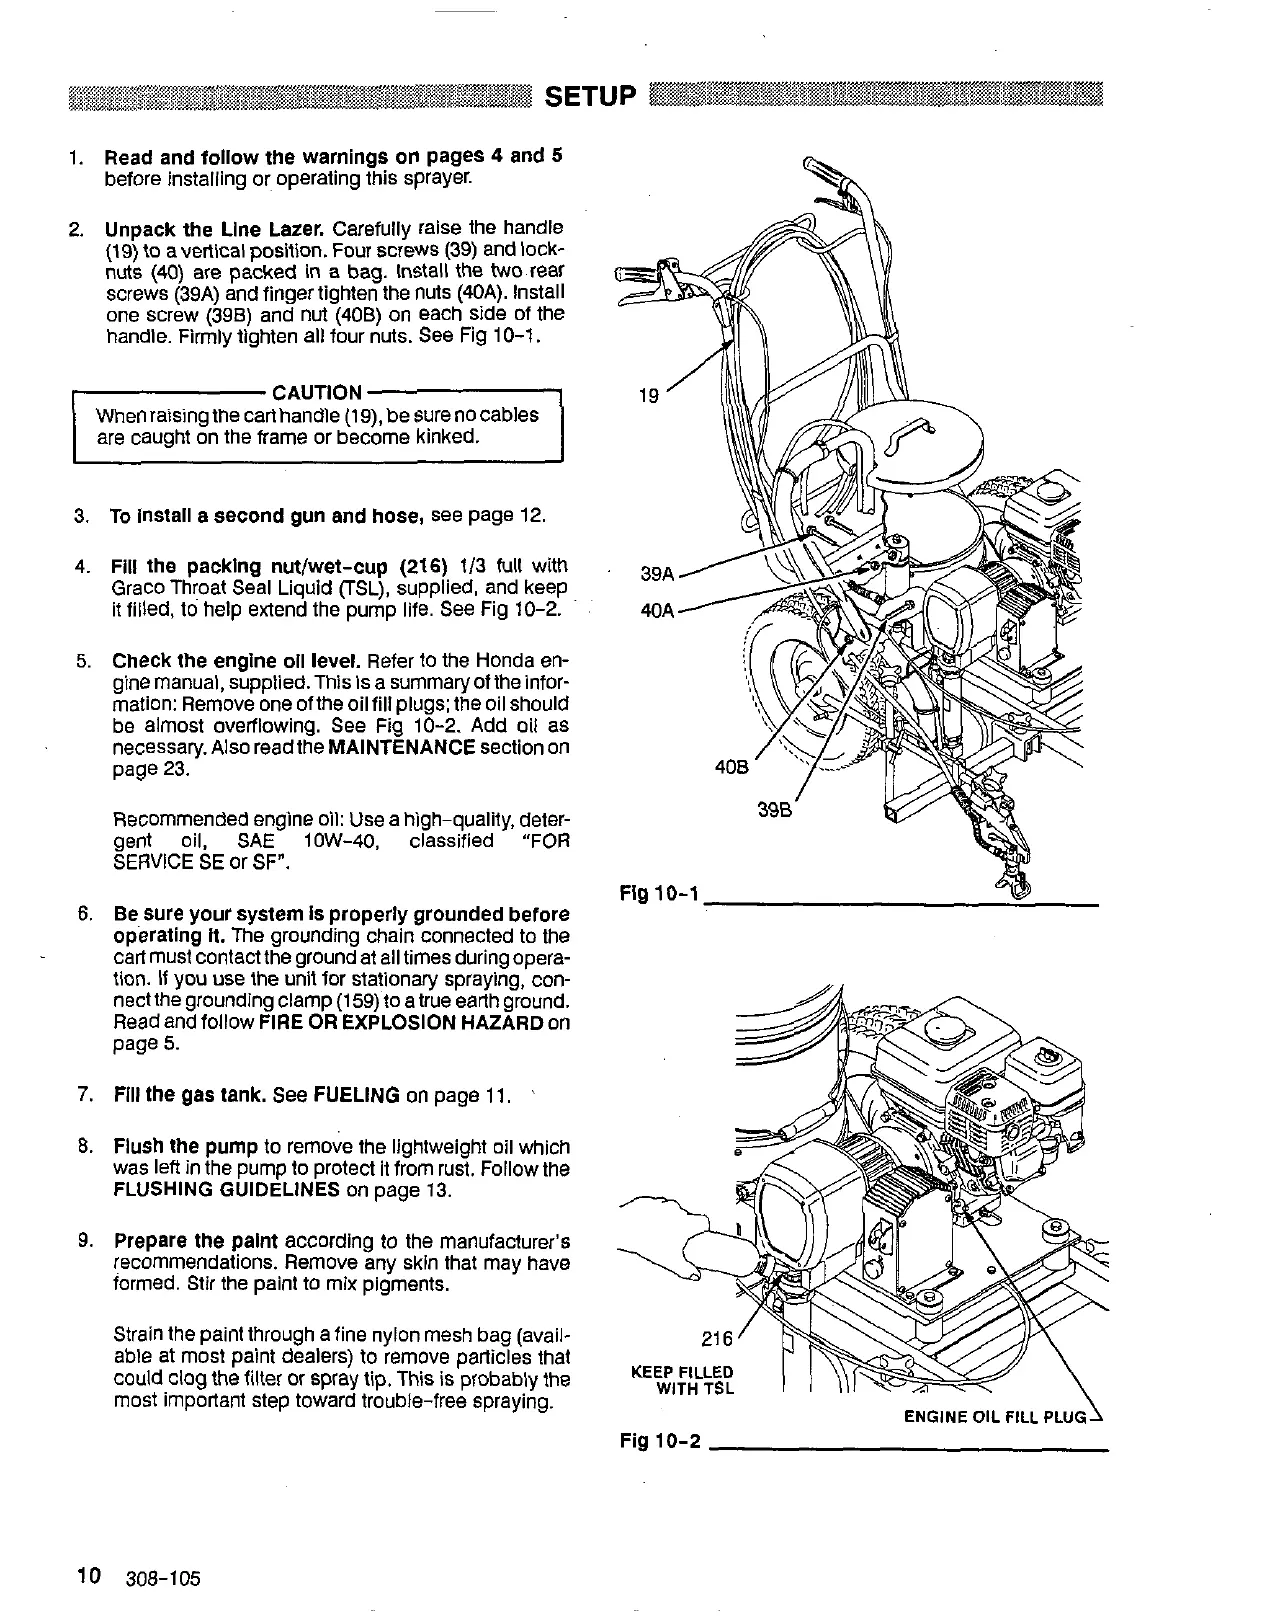
Unpack the Llne Lazer. Carefully raise the handle
(19)
to averticai position. Four screws
(39)
and iock-
nuts
(40)
are packed
in
a bag. Install the
two
rear
screws
(39A)
and finger tighten the nuts
(40A).
lnstaii
one screw
(398)
and nut
(408)
on each side of the
handle. Firmly tighten all four nuts. See Fig
10-1.
are caught on the frame or become kinked.
3.
To
install a second
gun
and hose, see page
12.
4.
Fill the packlng nut/wet-cup
(216)
1/3
full
with
Graco Throat Seal Liquid (TSL), supplied, and keep
It
filled, to help extend the pump life. See Fig
10-2.
5.
Check the engine
oll
level. Refer to the Honda en-
mation: Remove one ofthe oil fill plugs; the oil should
gine manual, supplied.
This
Is
a summary of the infor-
be airnost overflowing.
See
Fig
10-2.
Add oil as
necessary.
Also
readthe MAINTENANCE section on
page
23.
Recommended engine oil: Use a high-quality, deter-
gent oil,
SAE
IOW-40,
classified “FOR
SERVICE
SE
or
SF”.
6.
Be sure your system
Is
properly grounded before
operating It. The grounding chain connected to the
tion. if you use the unit for stationary spraying, con-
cart must contact the ground at all times during opera-
nect the grounding clamp (1
59)
to a true eaflh ground.
Read and follow FIRE
OR
EXPLOSION HAZARD on
page
5.
7.
Fill
the gas tank.
See
FUELING
on
page
11.
I
8.
Flush the pump to remove the lightweight oil which
was
left
in
the pump to protect it from rust. Follow the
FLUSHING GUIDELINES on page
13.
9.
Prepare the paint according to the manufacturer’s
recommendations. Remove any skin that may have
formed. Stir the paint to mix pigments.
Strain the paint through afine nylon mesh bag (avaii-
could clog the filter or spray tip. This
is
probably the
able at most paint dealers) to remove particles that
most important step toward trouble-free spraying.
Fig
10-1
ENGINE
OIL
FILL
PLUG\
Fig 10-2

 Loading...


