~~;~~,~~~,~~~~~~~~~~~~~~~~~~~~~~~~~~
D
I
S
PUC
E
WARNING
To reduce the risk of serious bodily injury, alwaysfol-
low the Pressure Relief Procedure Warning on
page 13 before repairing the sprayer.
Removing the pump. See
F/g
18-1.
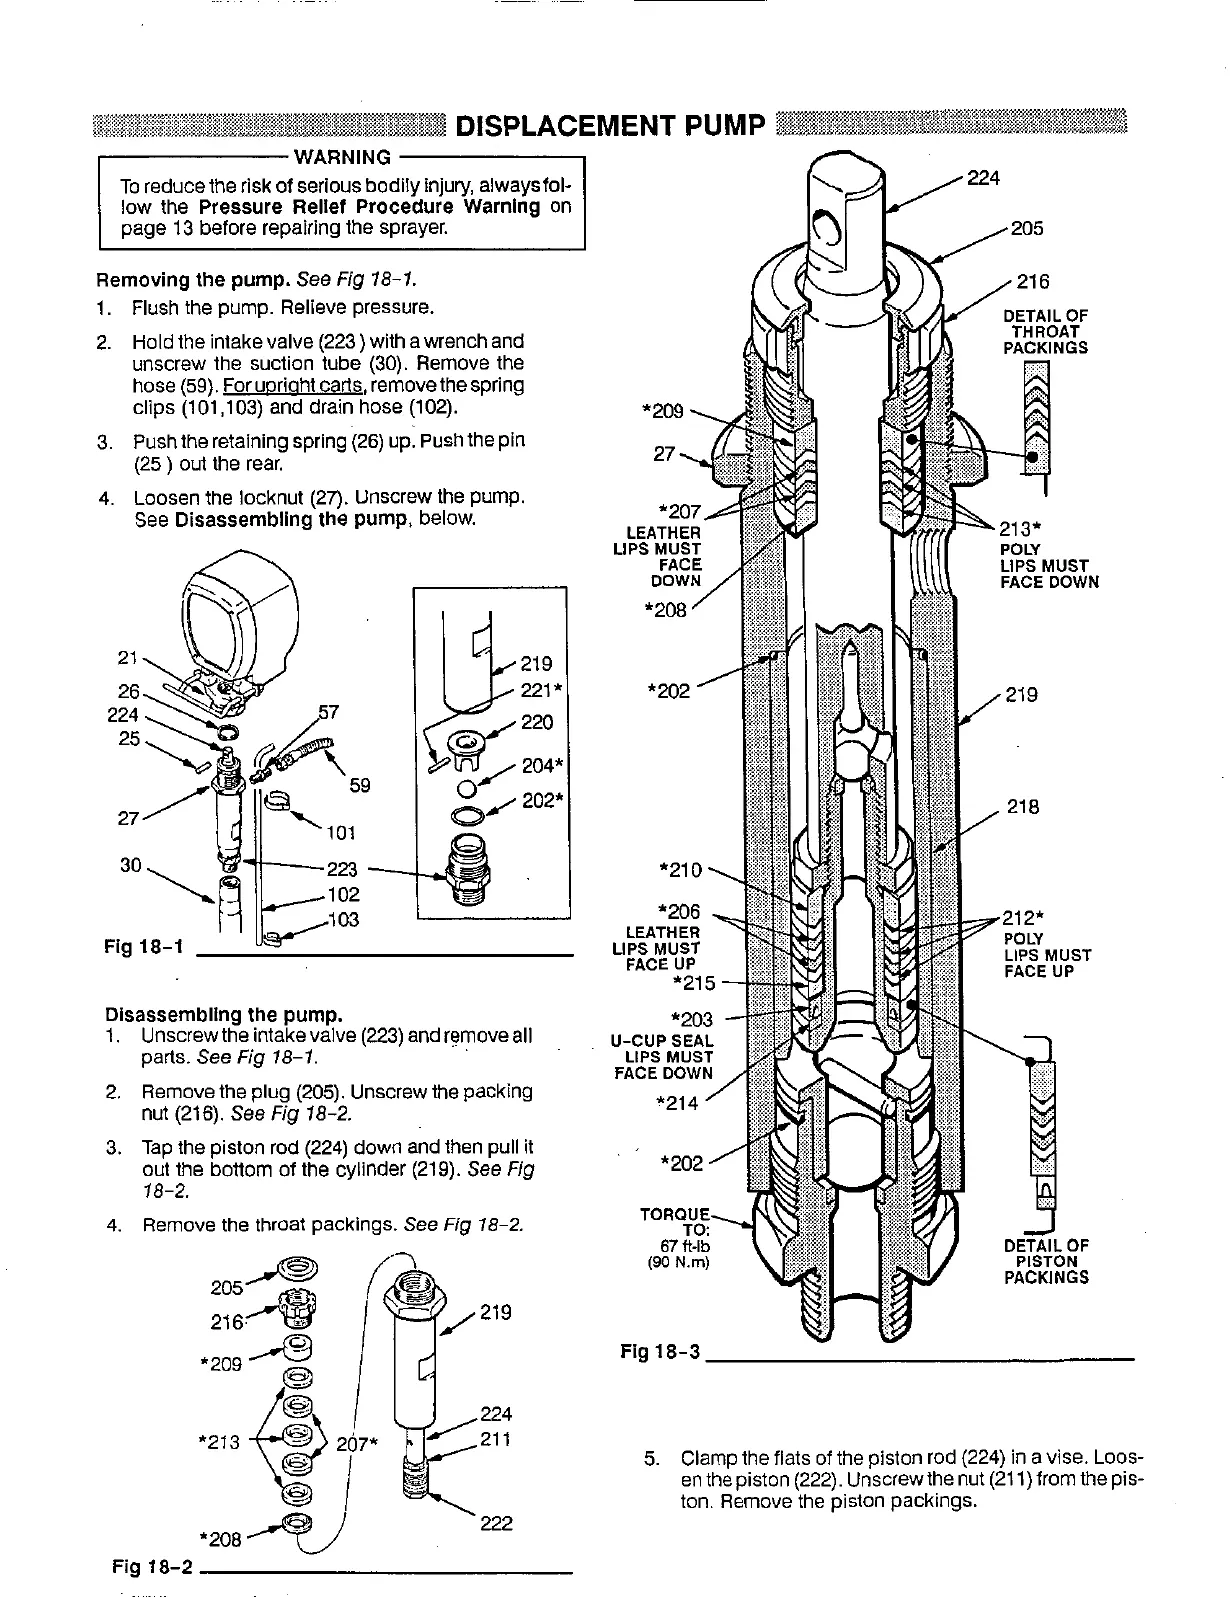
1.
Flush the pump. Relieve pressure.
2. Hold the intake valve (223) with a wrench and
unscrew the suction tube
(30).
Remove the
hose
(59).
ForuDriaht carts,removethespring
clips (101,103) and drain hose (102).
3.
Push the retaining spring
(26)
up. Push the pin
(25
)
out the rear.
4. Loosen the locknut (27). Unscrew the pump.
See
Disassembling the pump, below.
Dlsassembllng the pump.
1.
Unscrewthe intakevalve (223) andremoveall
parts.
See
F;g
18-1.
2.
Remove the plug (205). Unscrew the packing
nut (216).
See
Ffg
18-2.
3. Tap the piston rod (224) down and then pull it
out the bottom of the cylinder (219). See
F;g
18-2.
4. Remove the throat packings. See
Fig 18-2.
5. Clamp the fiats of the piston rod (224) in a vise.
Loos-
ton. Remove the piston packings.
en
the piston (222). Unscrewthe nut (21
1)
from the pis-
Fig
18-2
-