Displacement
Pump Repair
Installing pump
WARNING
If
the pin works loose, it or other parts could break
of
f due to the force of the pumping action. These
parts could be projected through the air and result
in serious bodily injury or property damage, includ
-
ing damage to the pump, connecting rod or bearing
housing.
CAUTION
If the pump locknut loosens during operation, the
threads of the bearing housing will be damaged.
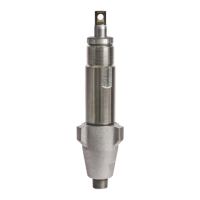
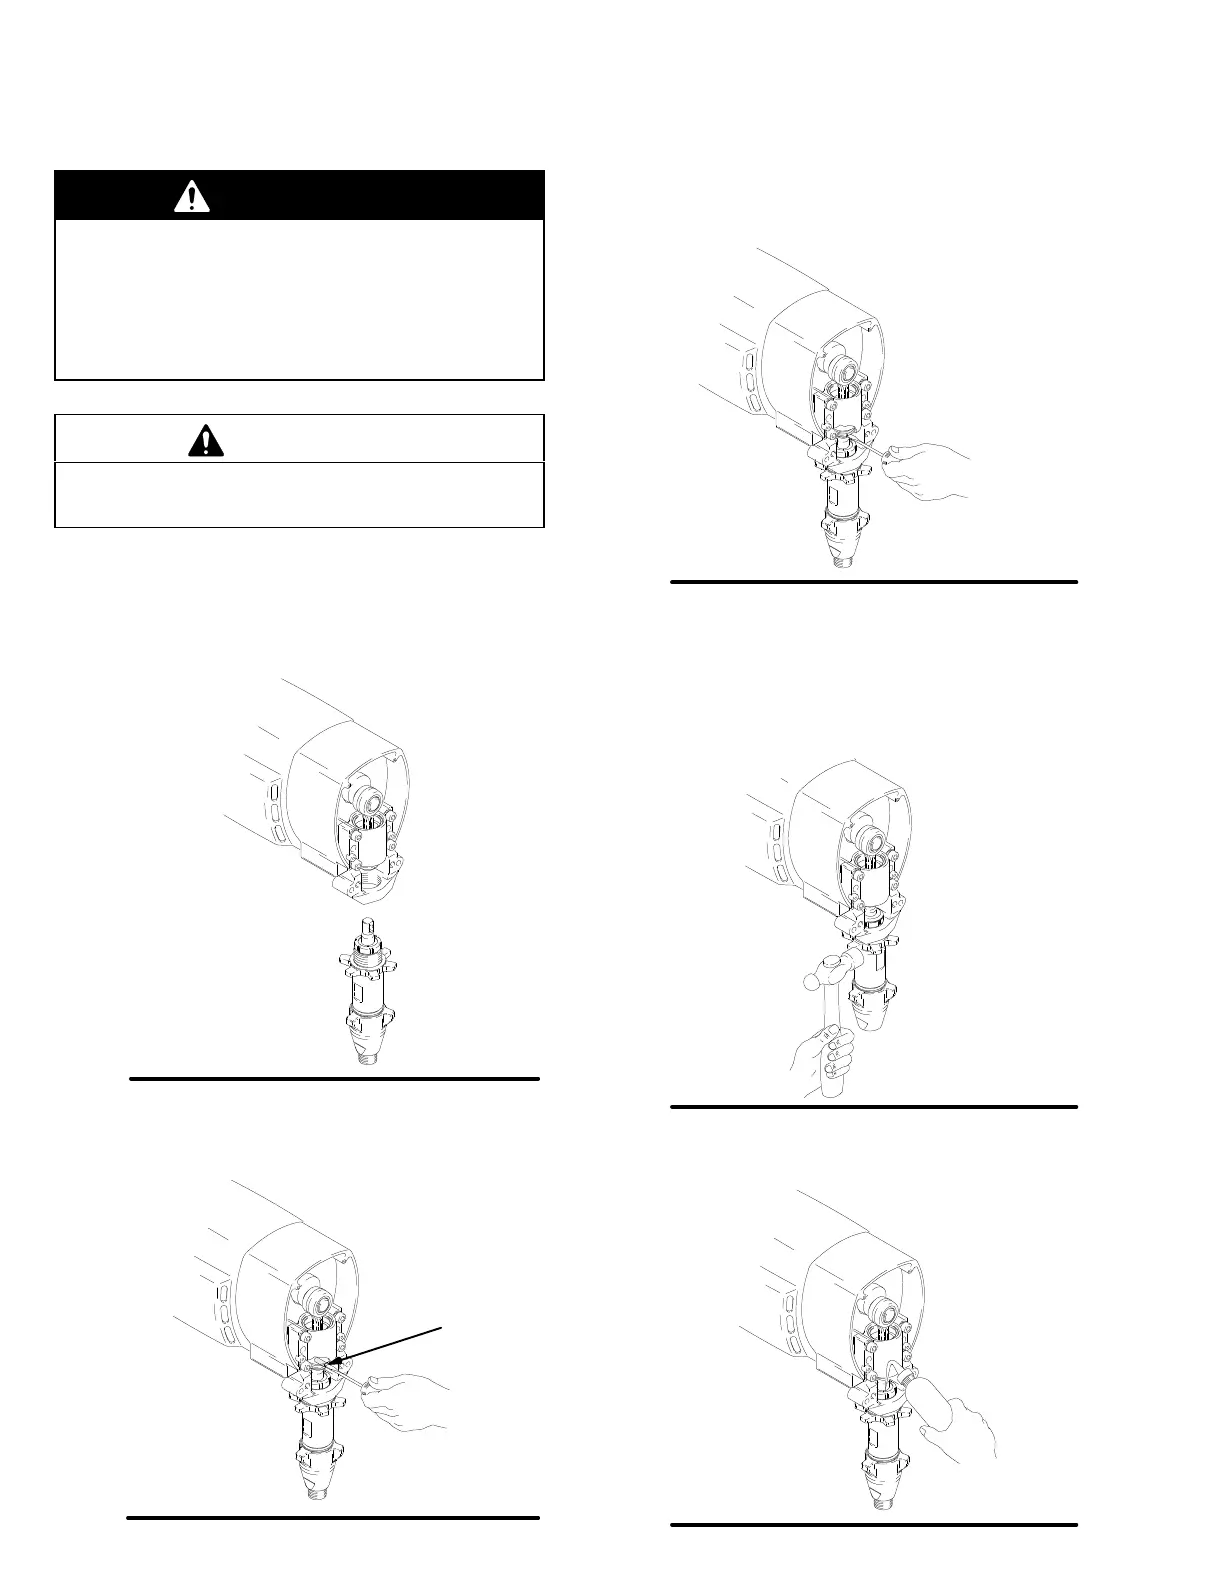
1.
Fig. 24. Pull piston rod out 1.5 in. Screw in pump
until holes in bearing cross link and piston rod
align.
Fig. 24
7676A
2.
Fig. 25. Push pin (21) into holes.
Fig. 25
21
7675A
3.
Fig. 26. Push retaining spring into groove all the
way around connecting rod.
Fig. 26
7674A
Fig. 27. Screw jam nut down onto pump until stops.
Screw pump up into bearing housing until it is stopped
by jam nut. Back of
f pump and jam nut to align pump
outlet to back. Tighten jam nut by hand, then tap 1/8 to
1/4 turn with a 20 oz (maximum) hammer to approxi
-
mately 75
5 ft–lb (102 N
m).
Fig. 27
7673A
Fig. 28. Fill packing nut with Graco TSL, through one
of the slits, until fluid flows onto the top of seal.
Fig. 28
7677A
 Loading...