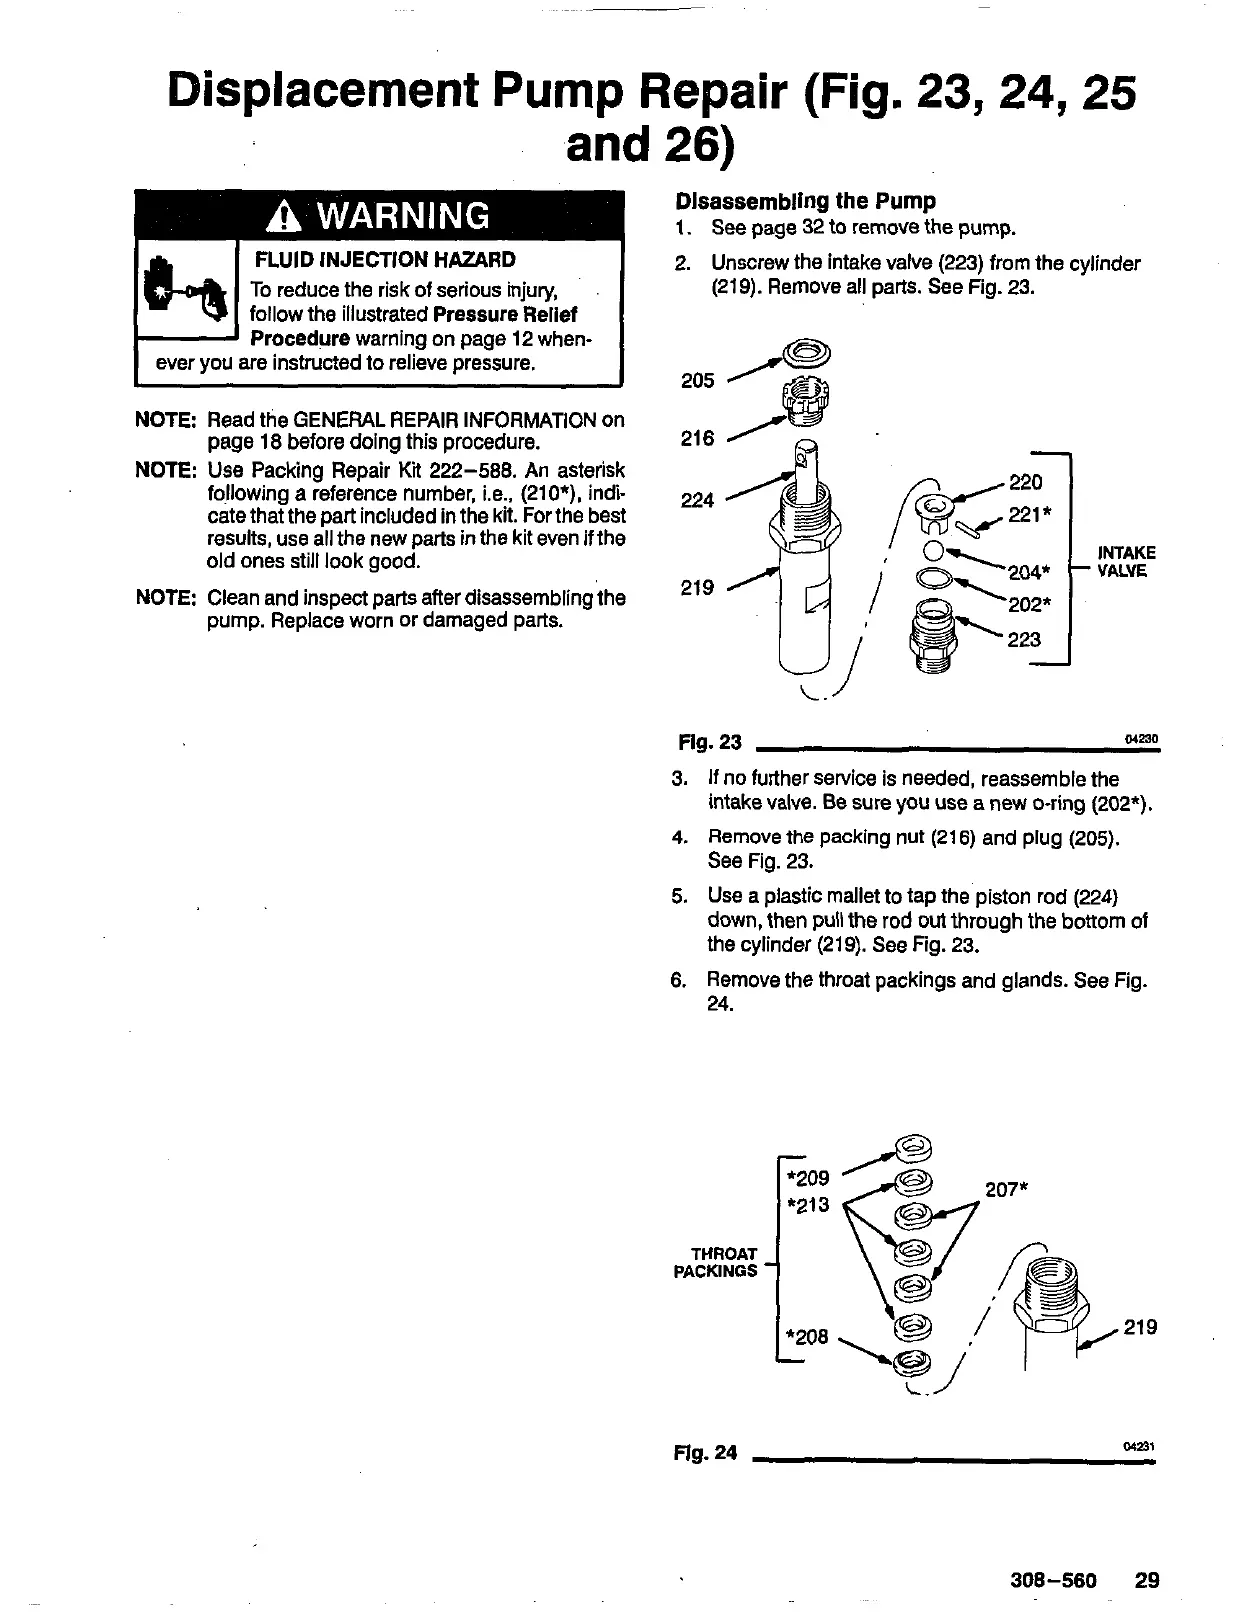
Displacement Pump Repair
(Fig.
23,
24,
25
and
26)
lhl
FLUID INJECTION
HAZARD
follow the illustrated
Pressure
Relief
To
reduce the risk
of
serious injury,
I
Procedure
warning on page
12
when-
ever you are instructed to relieve pressure.
Disassembling
the
Pump
1.
See page 32
to
remove the pump.
2.
Unscrew the intake valve (223) from the cylinder
(219).
Remove ail parts. See Fig. 23.
NOTE Read the GENERAL REPAIR INFORMATION on
page
18
before doing this procedure.
NOTE:
Use Packing Repair
Kii
222-588.
An asterisk
following a reference number, Le.,
(2109,
indi-
224
cate that the part included in the kit. For the best
results, use all the new parts in the kit even
if
the
old ones still look good.
NOTE Clean and inspect parts after disassemblingthe
pump. Replace worn or damaged parts.
Fig.
23
ME34
3.
If
no further service
is
needed, reassemble the
intake valve. Be sure
you
use a new O-ring
(202*).
4.
Remove the packing nut
(21
6) and plug (205).
See Fig.
23.
5.
Use a plastic mallet to tap the piston rod
(224)
the cylinder
(219).
See Fig. 23.
down, then pull the rod
out
through the bottom
of
6.
Remove the throat packings and glands. See Fig.
24.
PACKINGS
THROAT
219
C./
flg.
24
01211
308-560
29