7
3. INSTALLATION GUIDE
3.1. INSTALLATION RECOMMENDATIONS
▪ This dehumidier is intented for indoor residential
applications only. It should not be used for
commercial or industrial applications.
▪ Place the dehumidier on a smooth level surface.
▪
The dehumidier will have no effect in drying adjacent
enclosed area such as closets, pantries, etc.
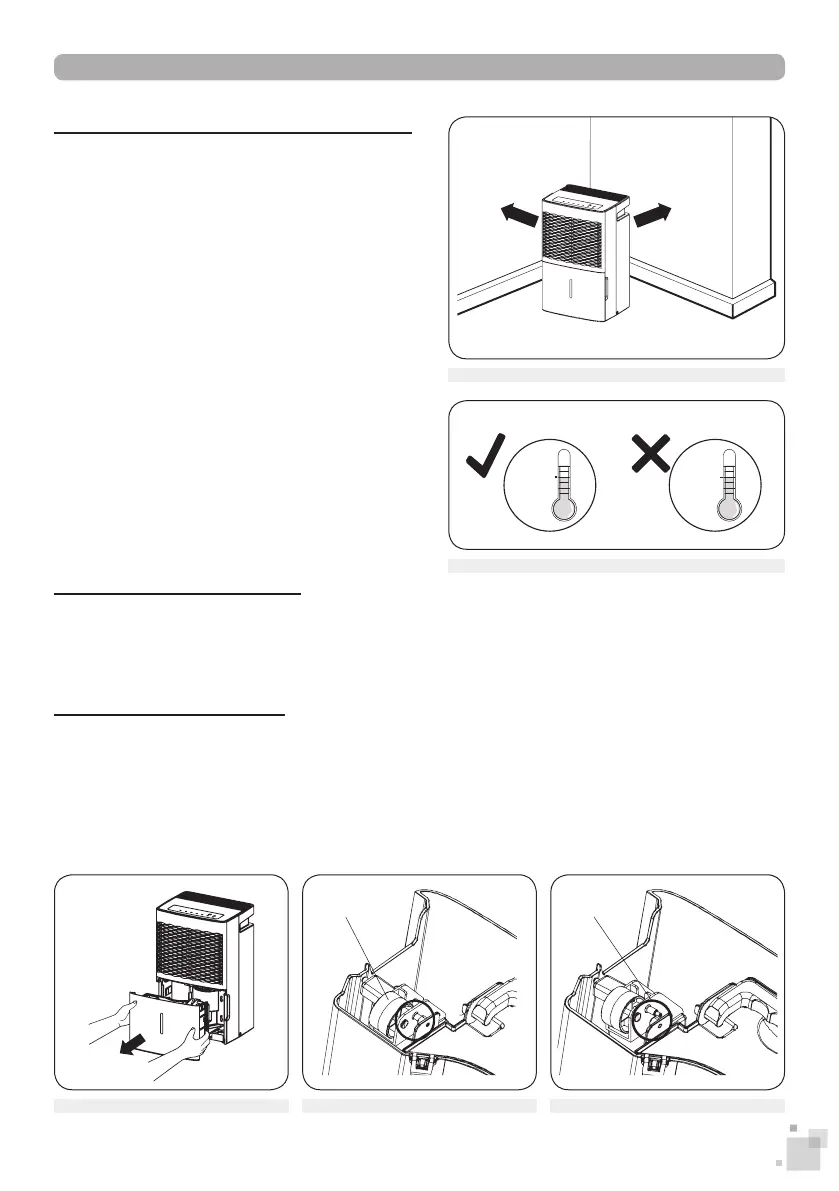
▪ Allow at least 46 cm (18 in) of clearance on all
sides around the unit.
▪ Place the dehumidier in an area where the
temperature stays between 5 and 32 °C
(41 and 90 °F). The relative humidity should range
from 30 to 90 %.
▪ Close all doors, windows and other outside
openings to improve efciency.
▪ Please keep the air inlet and outlet of the unit
clean and unobstructed.
▪ Do not use the dehumidier in a bathroom.
▪ Avoid placing the appliance in direct sunlight.
3.2. CASTOR INSTALLATION
The castors which you can install to facilitate transport are stored inside the unit's drain bucket. Firmly
insert each castor into the holes under the dehumidier. Do not attempt to roll the appliance over objects,
uneven surfaces or carpets. Water may spill out from the drain bucket or the unit may get stuck.
3.3. PRE-USE INSPECTION
Before running the unit, please verify that the oat of the drain bucket is properly in place. Follow the
steps below.
1.
Place your ngers into the hand holds found on both sides of the bucket, then pull toward you to remove it.
2. Check if the oat in the bucket is positioned correctly, it may have come off its hinges during
transportation. If this is the case, manually t the oat correctly on its hinges.
3. Put the drain bucket back into the unit.
FIG. 3 – Removing the drain bucket FIG. 4 – Float : Correct position
Float
FIG. 5 – Float : Incorrect position
Float
Above
5 °C
(41 °F)
YES
Below
5 °C
(41 °F)
NO
FIG. 2 – Recommended temperature range
FIG. 1 – Clearance space
At least
46 cm (18 in)
At least
46 cm (18 in)