GMV DC Inverter VRF
33
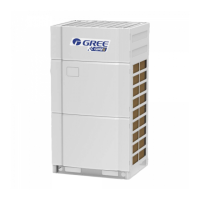
Step 4
1) Pull the canvas casing
upside down and press
it on the butt flange of
the steel pipe
ventilation pipe with
steel bars;
2) Drill holes with the
manual drill and fix
them with self-
tapping screws;
3) Seal the two butt joints
with tinfoil panel and
check the reliability of
the connection.
—
3.6 Vacuum and Drying of Refrigeration System
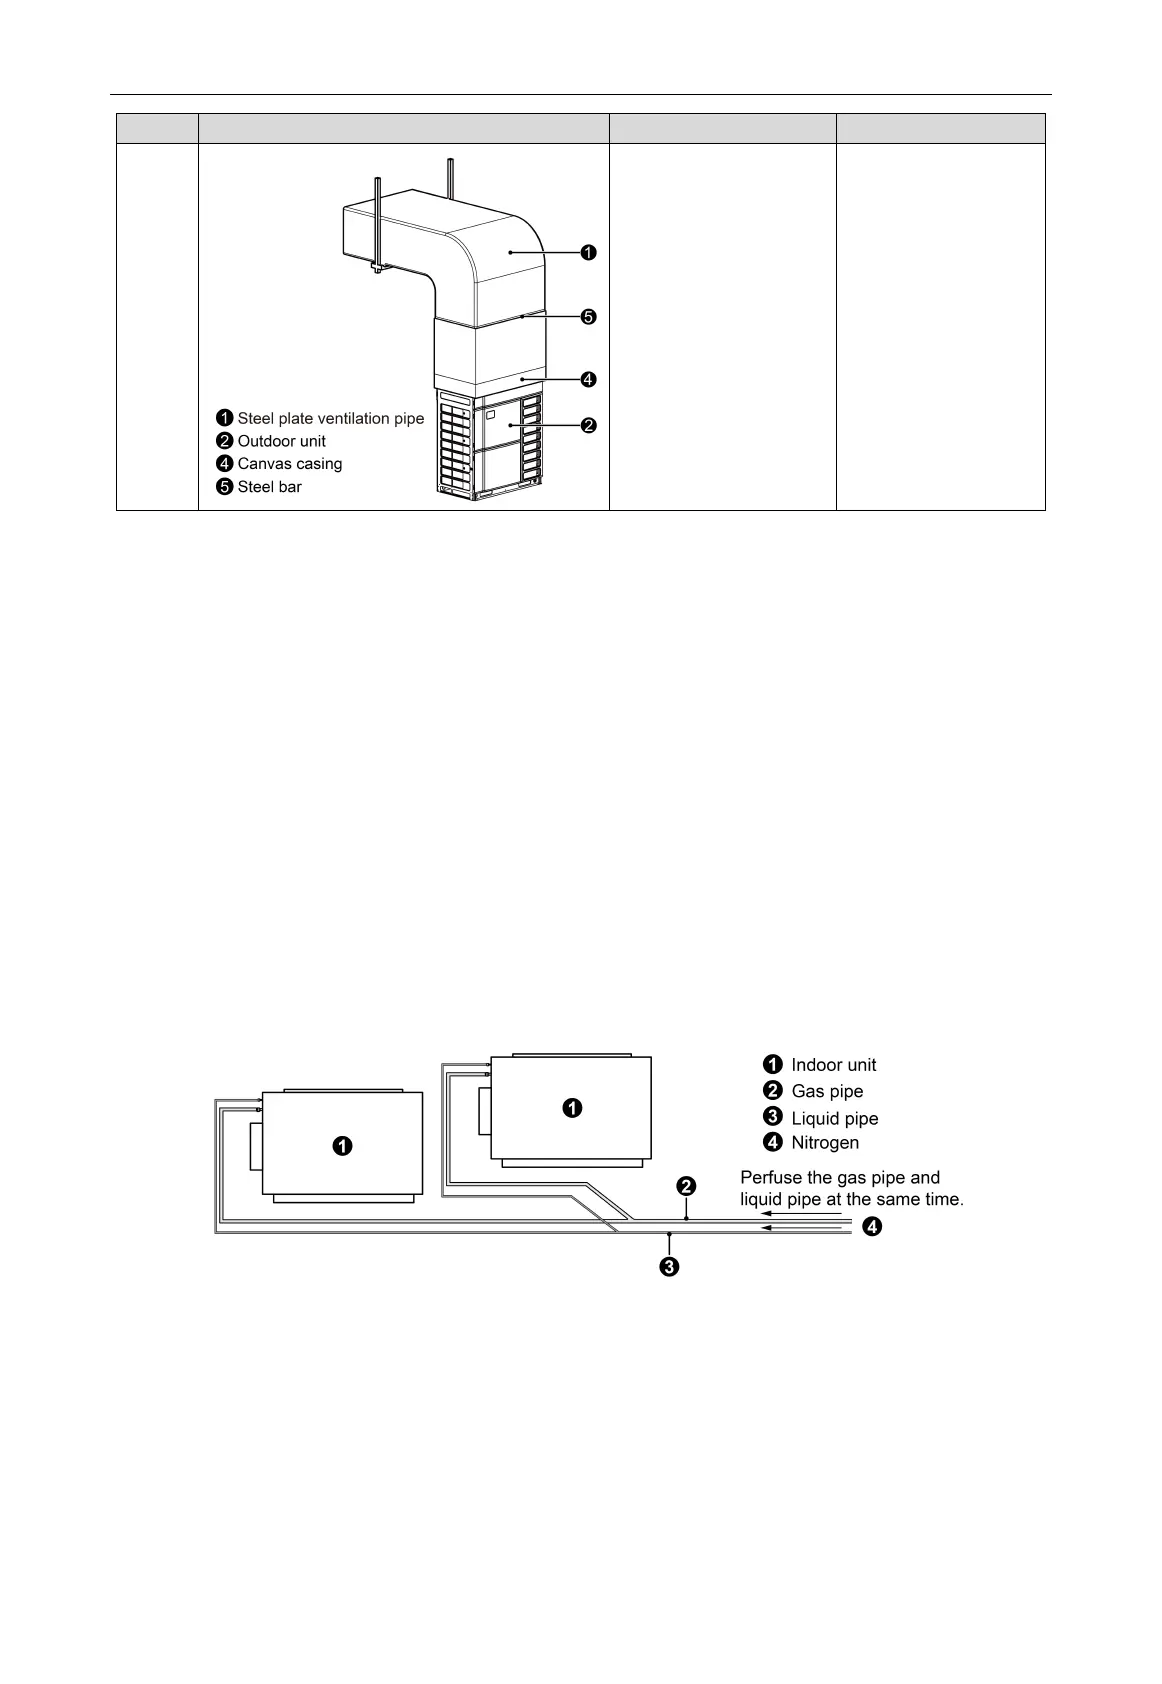
3.6.1 Air Tightness Test
(1) Notices
1) The range of test pressure gauge for R410A system should be above 4.5MPa.
2) Record the pressure gauge readings, ambient temperature and test time.
3) Pressure correction: The temperature changes by 1
℃
, and the pressure changes by 0.01
MPa.
4) The pressure should remain unchanged to be qualified.
5) If it is necessary to maintain pressure for a long time, the pressure should be reduced to
0.5 MPa or less. Long periods of high pressure can cause leakage at the weld site and
there is safety hazard.
6) Before the air tightness test for the refrigerant pipe is completed, it is not allowed to
conduct the insulation and wrapping work for any joints between the welding point and the
bell mouth of indoor unit. Please increase pressure from the outdoor side pipes at the
same time. It is forbidden to increase pressure from one side pipe:
Fig.3.6.1
Note:
All welding points can’t be heat-insulated and wrapped until the air tightness test is
completed.
(2) Operation procedures for the air tightness test
When leaving the factory, gas pipe, liquid pipe and cut-off valve of outdoor unit have been closed.
Please confirm it during installation.
Before the test, a small amount of lubricant oil required by the corresponding system should be
smeared at the nut and the end of the pipe. Two wrenches should be used when fixing the nut.
 Loading...