57
Specications are subject to change without prior notication December 2019
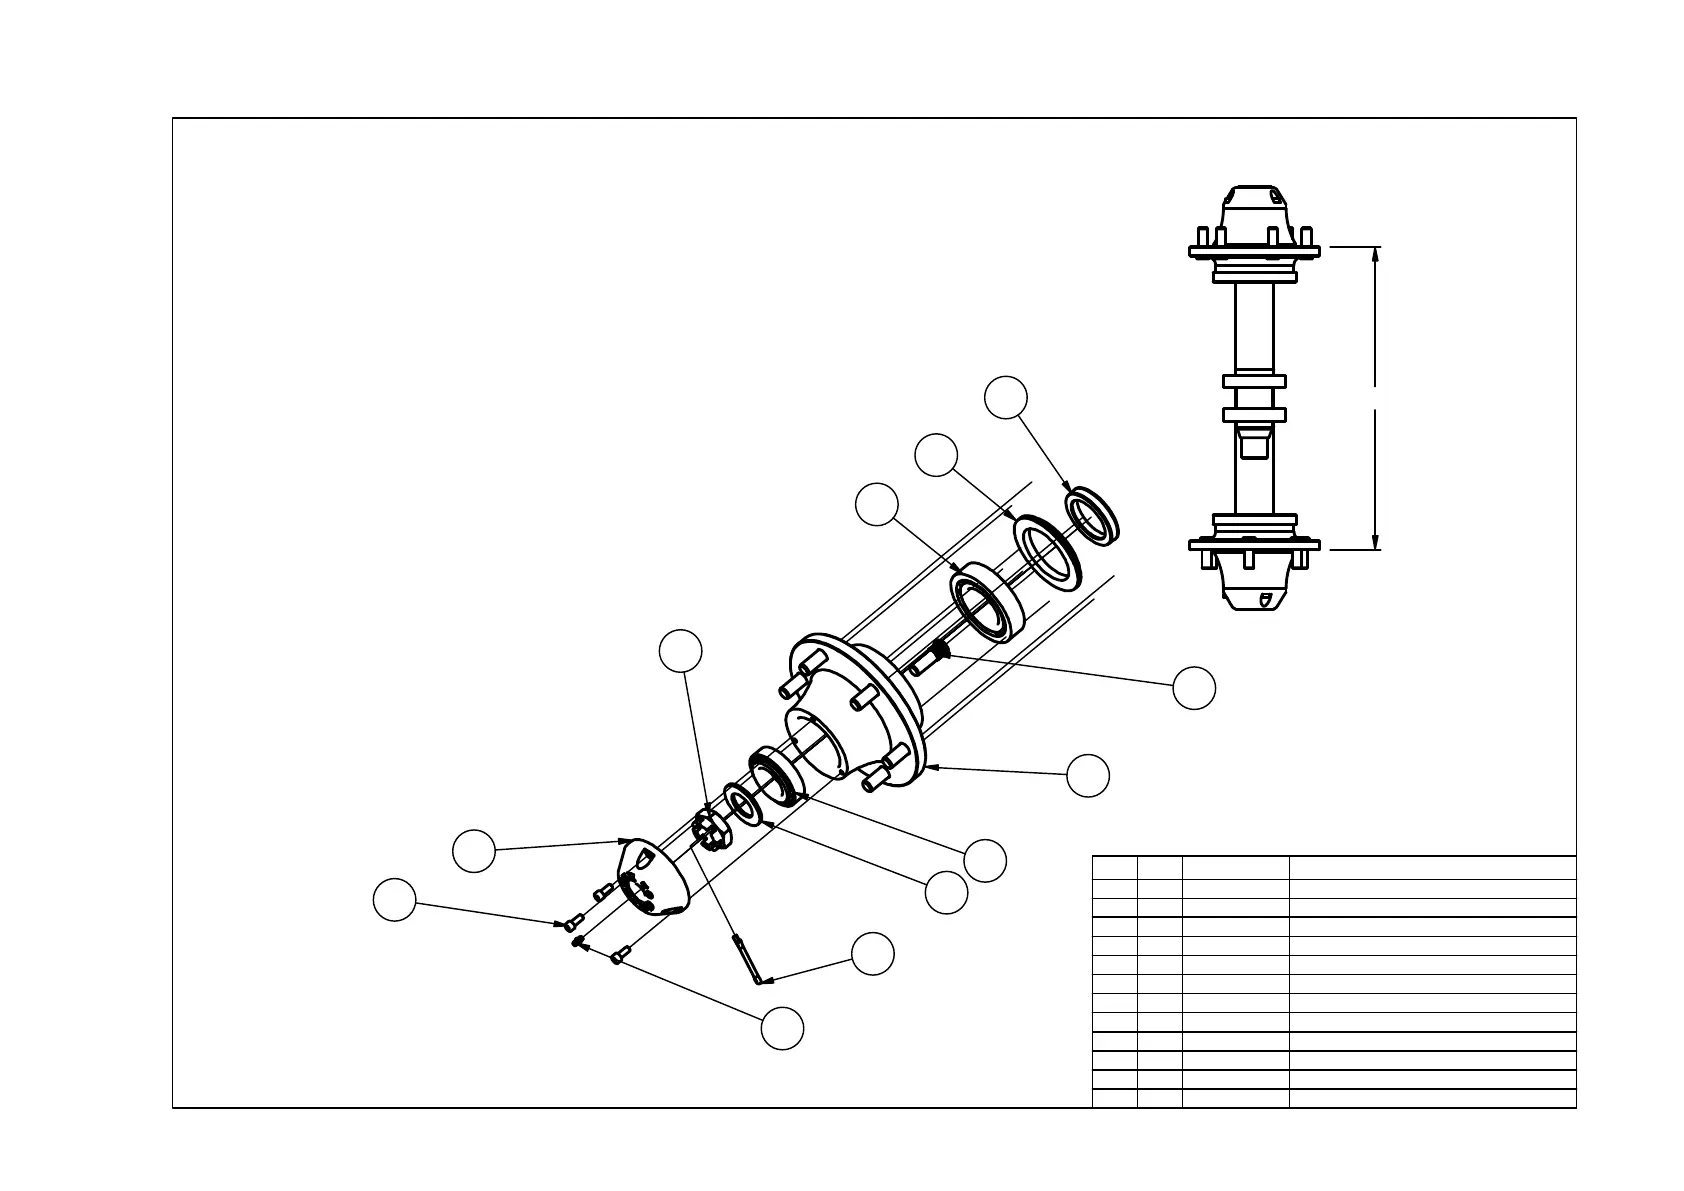
DESCRIPTIONPART NOQTYPOS
BEARING - H70 INNER (32213)BBMAA00021
BEARING FOR H70 OUTER (32210)BCMAA00022
H70 TRIPPLE LIP SEALBNRBA01023
WHEEL STUD 18 X 55 (PC10.9-12.9)FDBJA001124
1 1/2"UNF CASTELLATED NUT FFCUA0002
5
8 X 20 SOCKET HEAD CAP SCREWFJBEA02066
Split Pin 6 X 80FKCFA080
27
WASHER 41 X 70 X 4FMAUKP0028
H70 ROCKER W/ASSY PIVOT RIPPERGNBXN00119
SEAL SPACER
MFRNA015210
H70 HUBWJMAA000211
H70 CAPWKMBA000212
H70 HUB ASSEMBLY
L:\Inventor\Parts\WM-\WMMDA450.IDW
9
3
1
4
10
2
8
5
7
11
6
11
WMMDA450
To assemble and adjust the setting of this
hub:
NOTE: CLEAN THREAD BEFORE ASSEMBLING, IF
YOU ARE ASSEMBLING A NEW AXLE USING 1-
2
"
UNF DIE NUT, CLEAN ALL OTHER COMPONENTS.
Step 1: Clean and prime the seal #3 and seal ring
#9 Fit seal to seal ring using Loctite 480, allow to
dry before proceeding.
Step 2: Fit bearing cups #1 and #2 into the
hub, place bearing cone #1 into the hub.
Step 3: Fit the se
al and seal ring to axle, ensure
this does not rotate on axle, use loctite 680 if
required.
Step 4: Fit the hub to the axle, then fit the
bearing cone #1, washer #8, and nut #5.
Step 5: Tighten the nut while turning the hub.
When there is a tight bind on the bearing, the
parts are seated correctly, approx 150ft/lbs.
Step 6: Back the nut off 1/6 to 1/4 of a turn or
sufficiently to allow .005mm to .02mm end
play.
Note: Failure to back off adjusting nut could cause
bearing to run hot and fail.
Step 7: Insert the split pin #7 as shown, trim the
straight leg, bend the other over the axle end.
Step 8: Fit the cap #11 using loctite 515 flange
sealant on the faces, and tighten the 3 M8 #6 cap
screws 16nm(12ft/lbs).
Step 9: Grease with a grease gun using CASTROL
BTX
or similar until grease is visible through rear sea
l.
592